How to Install and Configure Dnsmasq for a Custom DNS Server on Linux
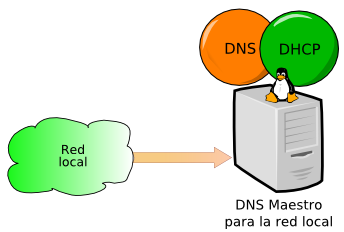
DNSmasq is a lightweight and convenient tool for configuring DNS and DHCP, suitable for small networks. It provides DNS functionality with optional DHCP capabilities. Setting up a public DNS server yourself offers greater flexibility, and if deployed locally, it can significantly improve resolution speeds.
Installing DNSmasq
You can download the source code to compile and install it, but most Linux software repositories already provide DNSmasq. Use the following commands:
# Installation on CentOS
yum -y install dnsmasq

# Installation on Ubuntu
apt-get -y install dnsmasq
Configuring DNSmasq
The DNSmasq configuration file is located at /etc/dnsmasq.conf. You need to modify several parameters:
resolv-file=/etc/resolv.dnsmasq.conf: This parameter indicates that dnsmasq will look for upstream DNS servers in the specified file.strict-order: Uncomment this to strictly follow the order in theresolv-filefrom top to bottom for DNS resolution until the first successful resolution is found.no-hosts: Comment this out (it is commented out by default). By default, dnsmasq will first look for the local hosts file, then the cached domain names, and finally the upstream DNS server.listen-address=127.0.0.1: Change127.0.0.1to your own server IP.
Let's summarize the configuration changes:
# Create a new file /etc/resolv.dnsmasq.conf for upstream DNS configuration (the actual public DNS)
vi /etc/resolv.dnsmasq.conf
# Content as follows:
nameserver 119.29.29.29
nameserver 1.2.4.8
# Modify /etc/dnsmasq.conf
# Upstream DNS path
resolv-file=/etc/resolv.dnsmasq.conf
# Uncomment strict-order
strict-order
# Listen address, change to your server's public IP
listen-address=127.0.0.1
Usage
DNSmasq can be configured to use different DNS servers for different domains by modifying the /etc/dnsmasq.conf file. If no specific DNS is set for a domain, it will retrieve records from the upstream DNS.
# Specify that taobao.com uses 114 DNS for resolution
server=/taobao.com/114.114.114.114
# Specify that google.com uses 8.8.8.8 for resolution
server=/google.com/8.8.8.8
You can also resolve specific domains, effectively acting as a local hosts file. This feature can be used to block ads. DNSmasq also supports wildcard resolution. You can use the format *.xiaoz.me.
# Point ad domains to 127.0.0.1 to block ads
address=/ad.youku.com/127.0.0.1
address=/ad.iqiyi.com/127.0.0.1
# Wildcard resolution for xiaoz.me
address=/*.xiaoz.me/192.168.20.138
Starting and Testing
# Start
/etc/init.d/dnsmasq start
# Stop
/etc/init.d/dnsmasq stop
# Restart
/etc/init.d/dnsmasq restart
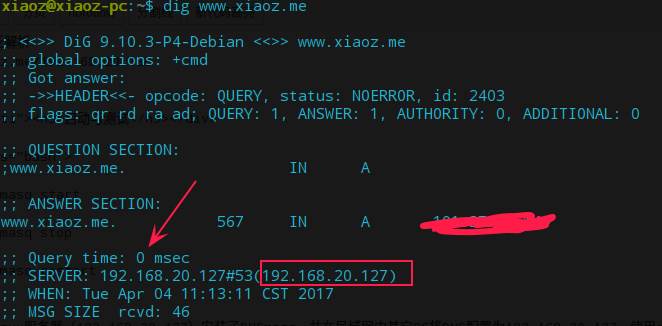
For example, I installed DNSmasq on a local Linux server (192.168.20.127) and configured other PCs on the LAN to use 192.168.20.127 as their DNS. Using the dig command for testing, the first query takes longer, while the second query is almost within 10ms, as shown in the screenshot below.
Summary
If you deploy DNSmasq on an intranet, it not only improves resolution speed but also effectively prevents DNS hijacking and enables ad blocking. If deployed on the public internet, you can map specific domains to hosts to avoid DNS pollution and achieve better connectivity.
If you find that DNSmasq starts normally but cannot resolve domains, please check if the firewall allows TCP/UDP port 53.
References: