How to Properly Configure Qiniu Cloud Mirror Acceleration to Avoid Website Ranking Drops
The free 10GB traffic and storage space offered by Qiniu Cloud Storage are quite attractive, as they not only reduce pressure on your own server but also improve website speed. This has attracted a large number of users. However, some users have reported that using Qiniu Cloud might lead to a drop in website rankings.
However, as long as you properly handle Qiniu's mirror acceleration, this situation can be completely avoided. Based on methods found online, I have summarized the key steps below to show you how to implement them.
1. robots.txt File
The official method is to upload a robots.txt file to the bucket (storage space) to prevent search engine spiders from crawling. Qiniu uses this template by default, and generally, no further modification is required.
2. Bind Your Own Second-Level Domain
By default, Qiniu provides a second-level domain for use. However, some users have encountered situations where 360 Security Software mistakenly flagged it as a dangerous website. This is likely because the majority of users rely on Qiniu's second-level domains, causing them to become overly common. I recommend binding your own second-level domain to your Qiniu space (this requires filing; if you haven't filed, you can borrow a filed second-level domain from a friend).
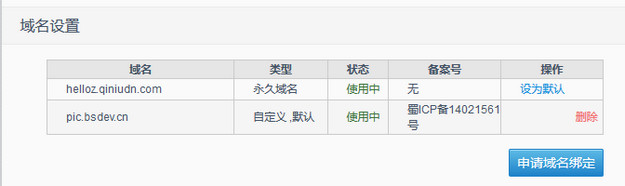 Figure 2-1: Binding Domain
3. Block via User Agent
This is a crucial step, provided by V7V3. It involves blocking Qiniu's mirror crawler from fetching web page files by filtering based on the User Agent. This is a reasonable solution. Add the following code to your website's root index.php file or to the functions.php file in your theme directory:
if( strpos($_SERVER['HTTP_USER_AGENT'],'qiniu-imgstg-spider') !== false) {
header('HTTP/1.1 503 Service Temporarily Unavailable');
echo 'Anti-Qiniu Mirror';
exit;
}
4. Supplementary Notes
If you are using the WP Super Cache plugin in your WordPress site, you must add Qiniu's User Agent to the list of blocked user agents. Go to Settings > WP Super Cache > Advanced, find the Rejected User Agents section, and add qiniu-imgstg-spider, as shown in the screenshot below.
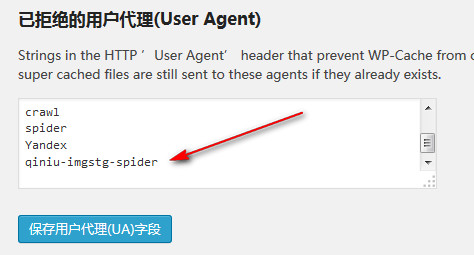 Figure 4-1: User Agent Settings
Final Thoughts:
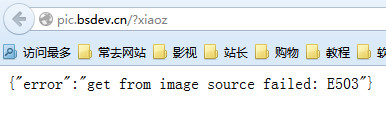
After completing Step 3, clear the Qiniu cache. When you visit the domain again, it should return a 503 status code, indicating success. For example, visit the domain bound by me to Qiniu: pic.bsdev.cn.
Steps 3 and 4 are sourced from: How to Reasonably Handle Website Mirroring Issues Caused by Qiniu CDN Mirror Acceleration