Install Collabora Online on Linux to Enable Office Editing in NextCloud
NextCloud can support online editing of Office documents through plugins, but this requires the Collabora Online service. Here is the deployment process.
![]()
Deploy Collabora Online Service
Collabora Online offers multiple platforms and installation methods. This article uses Linux Docker for a one-click deployment.
Install Docker on CentOS
# Install docker
yum -y install docker
# Start docker
service docker start
# Enable docker to start on boot
systemctl enable docker
Deploy Collabora Online with Docker
# Pull Collabora Online image
docker pull collabora/code
# Run Collabora Online
docker run -t -d -p 127.0.0.1:9980:9980 -e "domain=<your-dot-escaped-domain>" \
        -e "username=admin" -e "password=S3cRet" --restart always --cap-add MKNOD collabora/code
Note that <your-dot-escaped-domain> refers to the WOPI host, which is the domain used by your NextCloud. Multiple domains can be separated by |. You must use double backslashes in the command line because the shell escapes the first one, while the domain parameter uses regular expressions.
For example, if your NextCloud domain is https://cloud.ttt.sh/, the command should be:
docker run -t -d -p 127.0.0.1:9980:9980 -e "domain=cloud\.ttt\.sh" \
        -e "username=admin" -e "password=S3cRet" --restart always --cap-add MKNOD collabora/code
username: The usernamepassword: The password
Adjust the username and password as needed. If there are no errors, the installation is successful. Run netstat -apn|grep '9980' to verify. If you see the following screenshot, Collabora Online is running normally.

Nginx Reverse Proxy for Collabora Online
Although Collabora Online is installed, it can only be accessed via the internal network. To provide public access, use Nginx as a reverse proxy. Below is the Nginx reverse proxy configuration for reference:
server
    {
    listen 443 ssl http2;
    #listen [::]:443 ssl http2;
    # certs sent to the client in SERVER HELLO are concatenated in ssl_certificate
    ssl_certificate /data/ssl/ttt.sh.crt;
    ssl_certificate_key /data/ssl/ttt.sh.key;
    ssl_session_timeout 1d;
    ssl_session_cache shared:SSL:50m;
    ssl_session_tickets off;

    # intermediate configuration. tweak to your needs.
    ssl_protocols TLSv1 TLSv1.1 TLSv1.2;
    ssl_ciphers 'ECDHE-ECDSA-CHACHA20-POLY1305:ECDHE-RSA-CHACHA20-POLY1305:ECDHE-ECDSA-AES128-GCM-SHA256:ECDHE-RSA-AES128-GCM-SHA256:ECDHE-ECDSA-AES256-GCM-SHA384:ECDHE-RSA-AES256-GCM-SHA384:DHE-RSA-AES128-GCM-SHA256:DHE-RSA-AES256-GCM-SHA384:ECDHE-ECDSA-AES128-SHA256:ECDHE-RSA-AES128-SHA256:ECDHE-ECDSA-AES128-SHA:ECDHE-RSA-AES256-SHA384:ECDHE-RSA-AES128-SHA:ECDHE-ECDSA-AES256-SHA384:ECDHE-ECDSA-AES256-SHA:ECDHE-RSA-AES256-SHA:DHE-RSA-AES128-SHA256:DHE-RSA-AES128-SHA:DHE-RSA-AES256-SHA256:DHE-RSA-AES256-SHA:ECDHE-ECDSA-DES-CBC3-SHA:ECDHE-RSA-DES-CBC3-SHA:EDH-RSA-DES-CBC3-SHA:AES128-GCM-SHA256:AES256-GCM-SHA384:AES128-SHA256:AES256-SHA256:AES128-SHA:AES256-SHA:DES-CBC3-SHA:!DSS';
    ssl_prefer_server_ciphers on;
    # OCSP Stapling ---
    # fetch OCSP records from URL in ssl_certificate and cache them
    ssl_stapling on;
    ssl_stapling_verify on;

    server_name     office.ttt.sh;
	# static files
    location ^~ /loleaflet {
        proxy_pass https://localhost:9980;
        proxy_set_header Host $http_host;
    }

    # WOPI discovery URL
    location ^~ /hosting/discovery {
        proxy_pass https://localhost:9980;
        proxy_set_header Host $http_host;
    }

    # main websocket
    location ~ ^/lool/(.*)/ws$ {
        proxy_pass https://localhost:9980;
        proxy_set_header Upgrade $http_upgrade;
        proxy_set_header Connection "Upgrade";
        proxy_set_header Host $http_host;
        proxy_read_timeout 36000s;
    }

    # download, presentation and image upload
    location ~ ^/lool {
        proxy_pass https://localhost:9980;
        proxy_set_header Host $http_host;
    }

    # Admin Console websocket
    location ^~ /lool/adminws {
        proxy_pass https://localhost:9980;
        proxy_set_header Upgrade $http_upgrade;
        proxy_set_header Connection "Upgrade";
        proxy_set_header Host $http_host;
        proxy_read_timeout 36000s;
    }

}
server
{
    listen 80;
    server_name office.ttt.sh;
    rewrite ^(.*) https://office.ttt.sh$1 permanent;
}
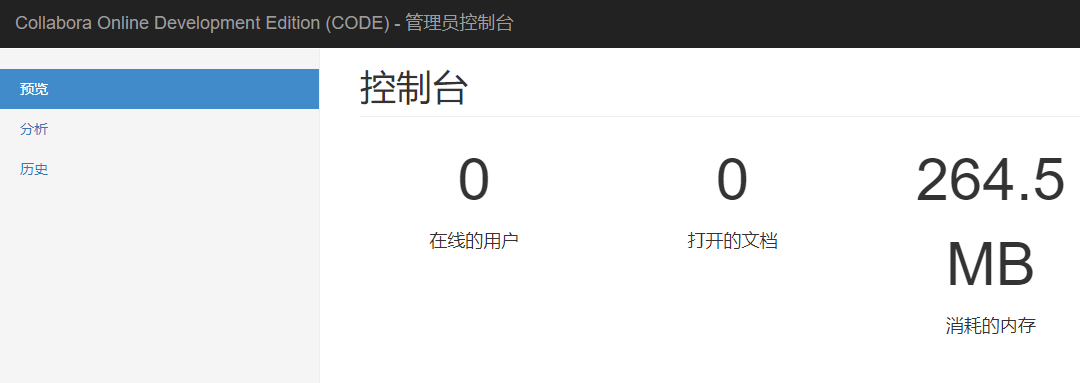
Then, visit https://<CODE-domain>/loleaflet/dist/admin/admin.html to access the Collabora Online console. The Collabora Online service is now deployed.
NextCloud Configuration
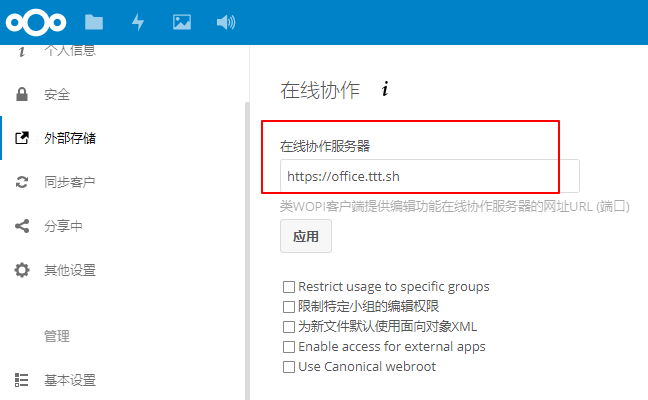
In the NextCloud backend, go to Apps and enable the Collabora Online plugin. Then, go to Settings > Online Collaboration and fill in the Collabora Online domain, as shown in the screenshot below.
Finally, open an Office document in NextCloud to start editing online, as shown in the screenshot below.
Summary
Collabora Online not only enables online document editing for NextCloud but also allows Seafile to support Office preview. It is worth noting that Collabora Online consumes significant memory, especially when multiple users edit documents simultaneously. Therefore, it is recommended to deploy Collabora Online on a server with at least 4GB of RAM.
Some content in this article is referenced from: Collabora Online Development Edition (CODE)