How to Use Custom SSL Certificates with mailcow (Part 2)
This is the second tutorial in the mailcow self-hosted email series. Friends interested in setting up a private mail server can refer to my previous article, Deploying mailcow with Docker to Create a Self-Hosted Email Service. For network transmission security, it is necessary to enable TLS/SSL encryption for the mail server, which requires an SSL certificate.

mailcow Automatic SSL Certificate Application
After deployment, mailcow will automatically apply for an SSL certificate using ACME. However, this requires the default web port 80 (required for Let's Encrypt validation). If a non-default port is used, the application will fail. Additionally, other factors, such as network issues, may also cause the application to fail.
Since I did not use the default port 80, I could not use mailcow's automatic SSL certificate application. Instead, I applied for an SSL certificate manually and deployed it to mailcow, which is more reliable.
Applying for an SSL Certificate
As mentioned in the previous article, if your hostname is set to mail.domain.com, you must use this domain name (specifically the subdomain, not the top-level domain) when applying for the SSL certificate. This article does not detail the SSL certificate application process. Both Tencent Cloud and Alibaba Cloud offer free DV SSL certificates. You can refer to the following guides:
- Free Application for Alibaba Cloud DV SSL Certificate
- Tencent Cloud Free GeoTrust DV SSL Certificate Application
Using Your Own SSL Certificate
I used a free SSL certificate from Tencent Cloud. After application, download the certificate in Nginx format and save it locally. There should be four files, but we only need the files ending with .crt and .key.
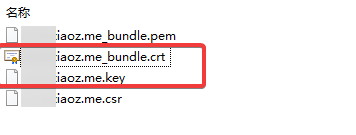
Rename the file with the .crt suffix to cert.pem and the file with the .key suffix to key.pem. Then upload them to the data/assets/ssl directory in the mailcow directory to replace the existing files.
Note: Before replacing, you can back up the original files. Do not use symbolic links.
Next, modify the mailcown.conf configuration file. Change:
SKIP_LETS_ENCRYPT=n
to:
SKIP_LETS_ENCRYPT=y
Finally, restart the three affected containers:
docker restart $(docker ps -qaf name=postfix-mailcow)
docker restart $(docker ps -qaf name=nginx-mailcow)
docker restart $(docker ps -qaf name=dovecot-mailcow)
Verification
Run the following commands to check and verify if the SSL certificate is valid:
# Verify SMTP TLS port
echo "Q" | openssl s_client -starttls smtp -crlf -connect mail.domain.com:587
# Verify IMAP port
echo "Q" | openssl s_client -starttls imap -showcerts -connect mail.domain.com:143
# Verify HTTPS
echo "Q" | openssl s_client -connect mail.domain.com:443
Note: Please replace mail.domain.com with your own domain name.
This article references content from the official documentation: https://mailcow.github.io/mailcow-dockerized-docs/post_installation/firststeps-ssl/