How to Deploy Poste.io Self-Hosted Mail Server with Docker
Building your own email service eliminates sending limits and reduces bulk mailing costs, though deployment can be complex and emails often end up in spam folders. However, many service providers have developed products that support one-click deployment, significantly lowering the difficulty of setup and usage. This article recommends an open-source mail service called Poste.io.

About Poste.io
Poste.io is an open-source mail service software that allows for easy setup of SMTP + IMAP + POP3 + anti-spam + anti-virus + Web management + Web email. It supports the following features:
- Native implementation of SPF, DKIM, DMARC, and SRS with a simple wizard
- Anti-virus engine (ClamAV) for detecting trojans, viruses, and malware
- Built-in spam filter (RSPAMD)
- Webmail client (Roundcube) over HTTPS
- Email redirection, auto-replies, and other filtering via Sieve scripts (email owners can write scripts for each operation)
- Quotas for limiting mailbox space or email counts
- Web management with different permissions for system administrators, domain administrators, and email owners
- Built-in auto-discovery for Microsoft products and Thunderbird
- Diagnostics to help correctly set up domains and mail servers
- SMTP - Ports 25, 465 (TLS), 587
- POP3 - Ports 110, 995 (TLS)
- IMAP - Ports 143, 993 (TLS)
- SSL/TLS everywhere! No personal data, emails, or login information is transmitted unencrypted over the internet.
- By default, all passwords are stored as salted SHA512 hashes (5000 rounds), making them difficult for attackers to crack.
- The entire mail server container is isolated from other applications by Docker.
Prerequisites
- A VPS with a dedicated IP
- Support for port 25 and email sending
- Recommended memory of at least 2GB
- A clean IP that is not blacklisted or marked as a spam IP
- Docker installed in advance
For Docker installation, refer to the article "Linux Install Docker and Common Docker Commands". If you are using CentOS 7, you can also use xiaoz's one-click Docker installation script:
# One-click Docker installation for CentOS
wget https://raw.githubusercontent.com/helloxz/shell/master/install_docker.sh && bash install_docker.sh
Deploy Poste.io with Docker
Deploying Poste.io via Docker will hardly affect existing services on your server. Copy and execute the following command:
docker run -d \
    -p 880:80 -p 8443:443 -p 25:25 -p 110:110 -p 143:143 -p 465:465 -p 587:587 -p 993:993 -p 995:995 -p 4190:4190 \
    -e TZ=Asia/Shanghai \
    -v /data/mail-data:/data \
    --name "mailserver" \
    -h "mail.your-domain.com" \
    --restart=always \
    -t analogic/poste.io
Parameter meanings:
880/8443: Web access ports. To avoid conflicts with existing local web services (like Nginx), ports880/8443are used for web access.TZ=Asia/Shanghai: Sets the container to the Shanghai time zone./data/mail-data: Local data directory; modify according to your server's directory.mail.xxx.com: Change to your own domain.--restart=always: Automatically restarts the container if it crashes.
If port 25 is occupied during deployment, check if it is caused by Postfix using netstat -apn|grep 25. On CentOS 7, you can uninstall Postfix:
# Uninstall Postfix
yum -y remove postfix
After deployment, visit https://IP:8443/ and follow the prompts to complete the initialization settings.
DNS Settings
Go to your DNS provider and set up domain resolution as required below; otherwise, the mail service will not function properly. Here, your-domain.com is your domain, and 1.2.3.4 is your mail server IP.
| Hostname | Record Type | Record Value |
|---|---|---|
| mail.your-domain.com | A | 1.2.3.4 |
| smtp.your-domain.com | CNAME | mail.your-domain.com |
| pop.your-domain.com | CNAME | mail.your-domain.com |
| imap.your-domain.com | CNAME | mail.your-domain.com |
| your-domain.com | MX | mail.your-domain.com |
| your-domain.com | TXT | v=spf1 mx ~all |
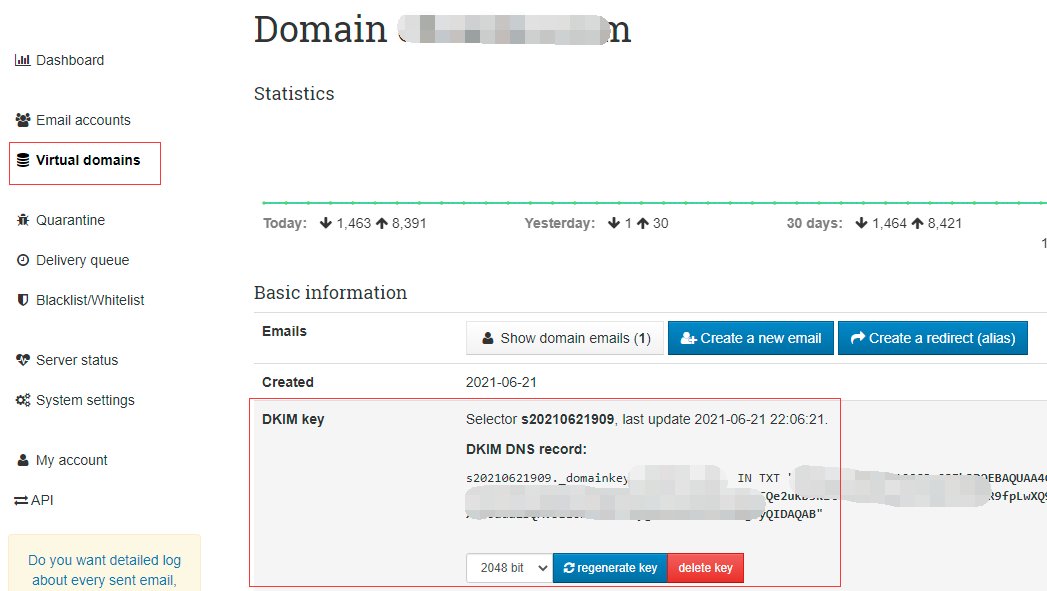
Set up DKIM Verification
In the Poste.io backend, go to Virtual domains, click the corresponding domain, select DKIM key, create a key, and set up the TXT record resolution as required.
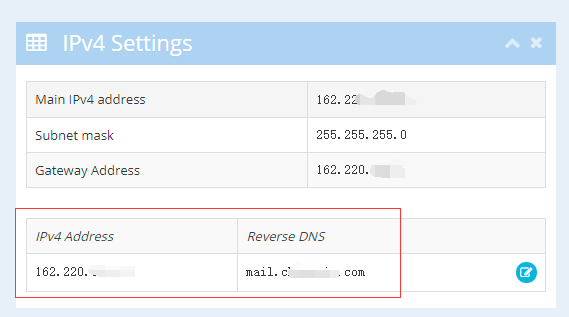
Set up PTR Reverse Resolution
PTR records are a type of mail exchange record in the email system; another type is the A record (in IPv4) or AAAA record (in IPv6). PTR records are often used for reverse address resolution. — Baidu Baike
Domain resolution to an IP is called forward resolution, while IP pointing to a domain is called reverse resolution. Reverse resolution must be performed at the hosting provider's end; consult your hosting provider for specifics.
For example, UltraVPS allows you to add PTR reverse resolution directly in the backend panel, pointing the IP to your mail server, such as mail.your-domain.com.
Adding SPF, DKIM, and PTR resolution increases email credibility and reduces the likelihood of emails landing in spam folders. This is an essential step.
Set up TLS/SSL
If your mail domain is mail.your-domain.com, you need to apply for an SSL certificate for this domain. You can refer to "Apply for ZeroSSL Wildcard Certificate using acme.sh, a Let's Encrypt Alternative" or apply for an SSL certificate from another provider.
After obtaining the SSL certificate, open the Poste.io backend, go to System settings > TLS Certificate, and upload the certificate file as shown in the screenshot.

SSL providers often merge intermediate certificates into the certificate file (e.g., Tencent Cloud). Therefore, the intermediate certificate option can be consistent with the certificate file. Click Save, and then restart the container for changes to take effect: docker restart mailserver.
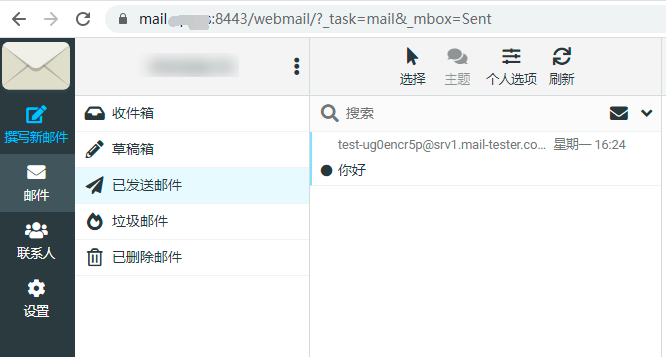
Login and Management
After enabling SSL, you can access via domain: https://mail.your-domain.com:8443/. By default, it logs into the webmail, where you can send and receive emails.
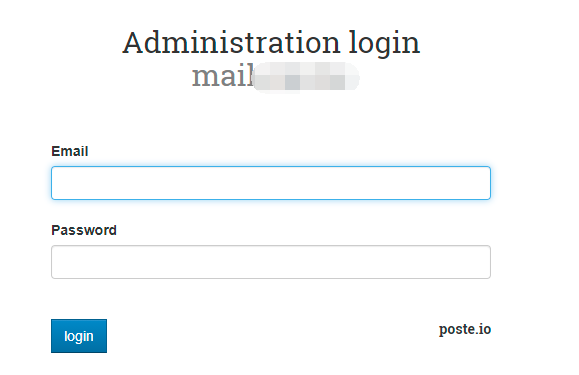
If you need to log into the system management, change the address to https://mail.your-domain.com:8443/admin/login.
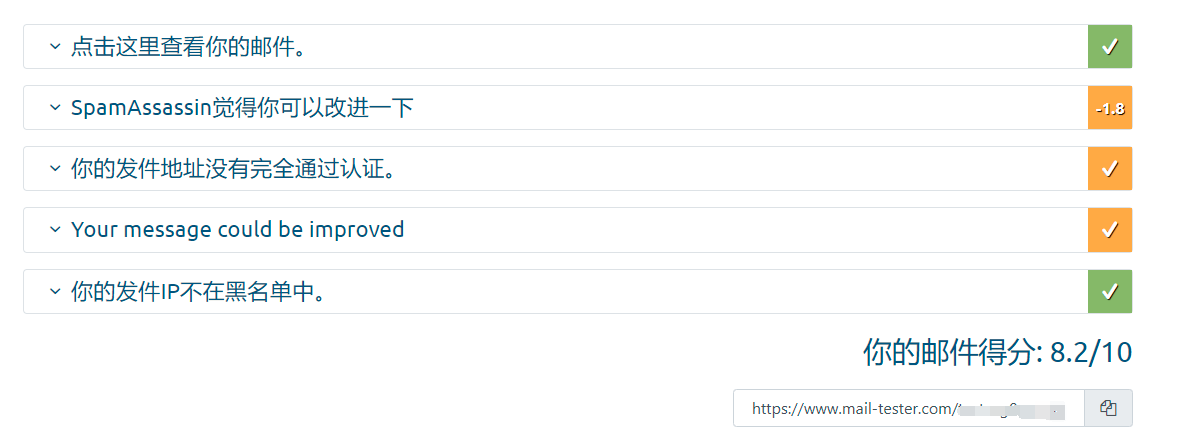
Email Score Test
You can use the tool https://www.mail-tester.com/ to test your email score. It detects issues with your email and provides optimization suggestions. Note that the score is not absolutely accurate and results are for reference only.
Personal Suggestions
Before setting up a self-hosted mail service, be aware of the following precautions, based on personal experience:
- Use a domain suffix with high credibility, such as
.com,.net, or.org. Avoid obscure niche suffixes. - Use domain names with English letters. Avoid pure numeric domain names.
- The longer the domain registration time, the better. The minimum recommended registration time is greater than 7 days.
- Use a clean IP. You can check via https://poste.io/dnsbl.
- The IP must support PTR reverse resolution; consult your hosting provider.
Conclusion
Poste.io is relatively simple compared to other self-hosted mail services, but the steps are still numerous. Currently, I have tested deploying Poste.io for others, sending 10,000 emails in a day without issues. However, if you send spam emails in large quantities for a long time, you will likely get blacklisted. Therefore, it is recommended to proceed with caution.
Poste.io Official Website: https://poste.io/