How to Configure CloudXNS Intelligent DNS for Namecheap Domains
Namecheap is a foreign domain registrar offering affordable domain registration and transfer prices, making it popular among users. If your domain is registered on Namecheap, it defaults to using Namecheap's free DNS resolution service. However, if your target audience is primarily in China, you may encounter issues such as unstable default DNS and slow resolution speeds. Therefore, it is recommended to use a domestic DNS provider like the powerful CloudXNS intelligent resolution service.
1. Add Domain
If you have not yet registered with CloudXNS, please refer to the article: Free Intelligent DNS Resolution CloudXNS to register first. Then, add your domain registered on Namecheap in the CloudXNS backend. See Figure 1-1 (click to enlarge).
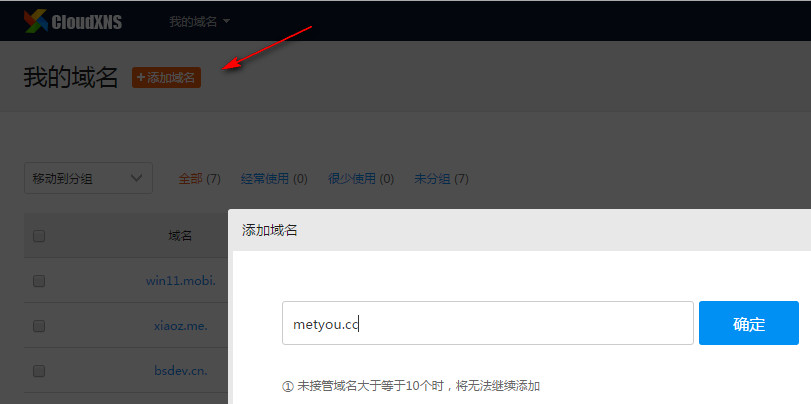 Figure 1-1: Add Domain
After adding the domain, CloudXNS will prompt that the domain is not yet managed. Record the DNS servers provided by CloudXNS for later use: lv3ns1.ffdns.net, lv3ns2.ffdns.net, lv3ns3.ffdns.net, and lv3ns4.ffdns.net. A total of 4 sets of DNS servers are provided. See Figure 1-2 (click to enlarge).
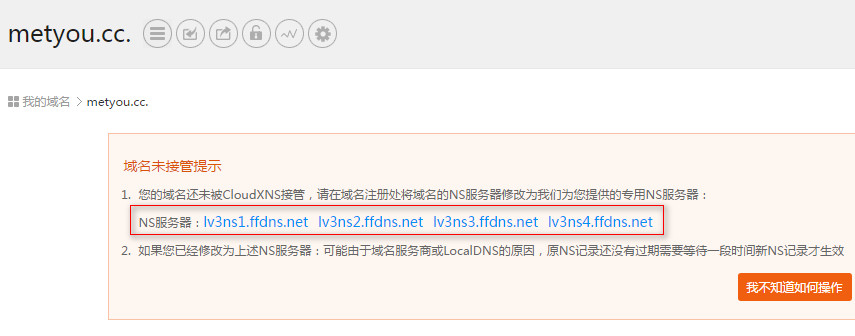 Figure 1-2: Record DNS Servers
2. Modify DNS
After successfully adding the domain, you need to modify the default DNS in the Namecheap backend to the DNS provided by CloudXNS. Go to Domain List -> Products -> Manage to enter the domain control panel. See Figure 2-1 (click to enlarge).
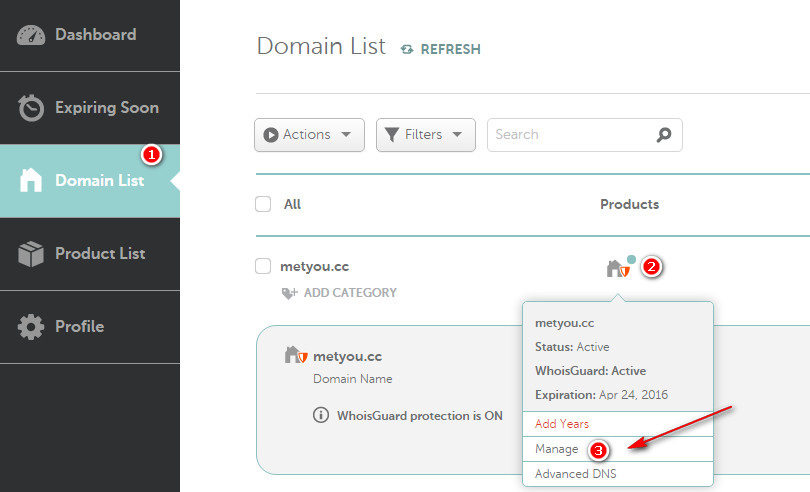 Figure 2-1: Manage Domain
Then, under NAMESERVERS, select Custom, enter the 4 sets of DNS provided by CloudXNS, and finally save. See Figure 2-2 (click to enlarge).
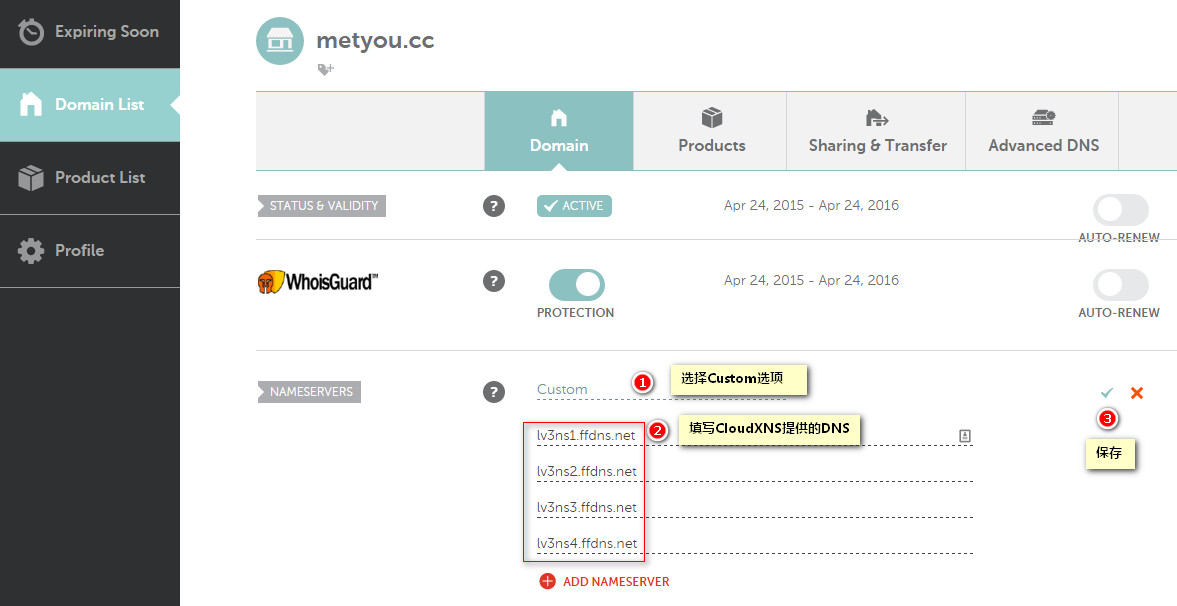 Figure 2-2: Change DNS
3. Wait for Propagation
After modifying the DNS, due to inconsistent DNS cache times across different regions, it typically takes up to 48 hours for the changes to take effect globally, but usually, it takes about 10 minutes. Once effective, you can check in CloudXNS that the domain is in a normal managed state, allowing you to perform domain resolution through CloudXNS. See Figure 3-1.
 Figure 3-1: Successfully Managed
4. Conclusion
If you are using DNS providers like DNSPod or Aliyun Resolution, the method is similar: first add the domain at the DNS provider, then modify the DNS through the Namecheap backend. The above content is for reference. If you have any questions, please leave a message or add the blogger's QQ.