How to Add a Physical Hard Drive and Local Storage in PVE 6.x
pve 6.xadd physical hard drivelvm volume grouplocal storageproxmox virtual environment
Published·Modified·
Recently, I added a 2.5-inch SATA hard drive to my Tianbao Mini PC. After completing the hardware installation, I needed to add it to PVE 6.x for use by virtual machines. Here is a brief guide on the operation steps.

Create LVM Physical Volume and Volume Group
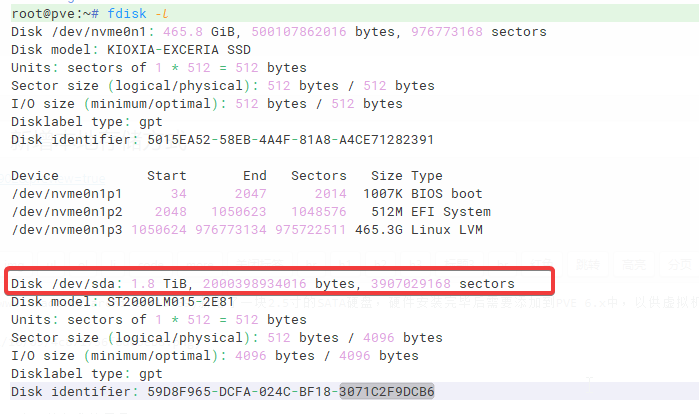
First, use the fdisk -l command to locate your newly added hard drive. In my case, it is /dev/sda.
Next, partition this hard drive by executing the command: fdisk /dev/sda, and enter the following:
# Create a GPT partition table
Command (m for help): g
# Create a new partition
Command (m for help): n
# Press Enter for all other defaults
# When prompted, type 't' to change the partition type
Command (m for help): t
# When prompted, type '31' to convert it to an LVM volume
Partition type (type L to list all types): 31
# Then type 'w' to save
Command (m for help): w
Continue by creating the physical volume:
pvcreate /dev/sda1
Then create the volume group:
# vg2-pve is the volume group name; you can modify it as needed
vgcreate vg2-pve /dev/sda1
Add Storage in PVE 6.x
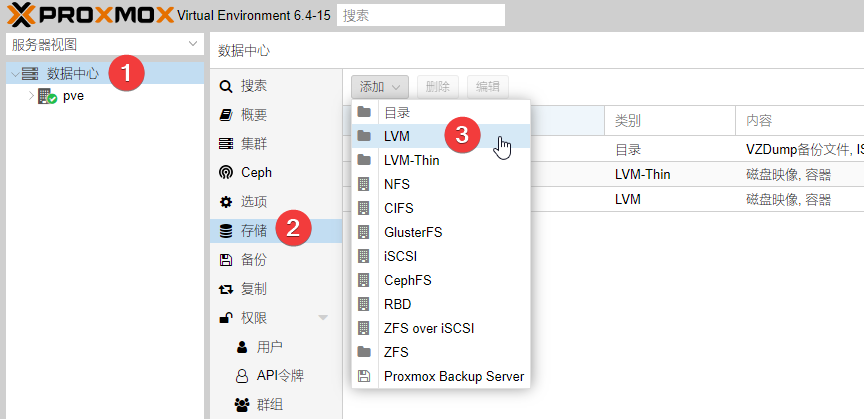
Finally, go to the PVE 6.x backend, navigate to Datacenter > Storage > LVM, and add the new storage. This allows you to select this storage when adding hard drives to virtual machines.
Part of this article references: Notes on Adding Physical Hard Drives to PVE