Automatically Upload Screenshots to ImgURL Using ShareX
ShareX is an open-source screenshot tool that supports a series of operations after capturing a screenshot (such as editing and uploading). Its customization features are very powerful, though it can be slightly difficult to get started with. I previously shared YunUp Cloud + ShareX = Build Your Own Image Hosting Tool. Today, I will share another method: using ShareX to automatically upload screenshots to ImgURL.
Install ShareX
ShareX currently only supports Windows 7, 8.1, and 10; it does not support other systems yet. The official website provides both an installer and a portable version, so you can choose according to your needs.
- Download from the official ShareX website: https://getsharex.com/ (download speed may be slow)
- Backup download from Xiaoz Blog Software Library: ShareX_13.0.1_portable.zip
Install ImgURL
ImgURL is an image hosting program developed by xiaoz. The community version can be found at: https://github.com/helloxz/imgurl. If you need a more powerful professional version, please visit: ImgURL Pro Professional Version Released, Supports Multiple External Storage, 40% Off Promotion. ImgURL is developed using PHP, and both the community and professional versions can be easily installed according to the documentation. Assuming you have prepared ShareX and ImgURL, let's get started.
Configure ShareX Custom Upload
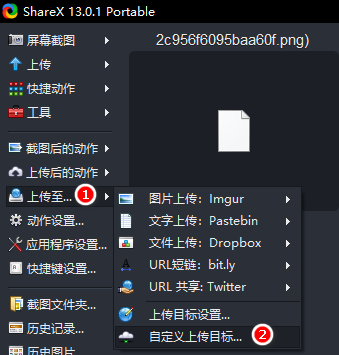
Open ShareX - Upload to - Custom Upload Target, as shown in the figure below.
ImgURL Pro professional version users, please copy the following JSON file (modify appropriately according to your situation):
{
"Version": "13.0.1",
"Name": "ImgURL",
"DestinationType": "ImageUploader",
"RequestMethod": "POST",
"RequestURL": "https://imgurl.org/upload/ftp",
"Body": "MultipartFormData",
"Arguments": {
    "token": "4764d7633392d7e2a9ee0725****"
  },
"FileFormName": "file",
"URL": ""
}
ImgURL Pro supports multiple external storage options. The example above uploads to FTP. Please ensure you have enabled the relevant external storage and modify the upload interface according to your actual situation. The upload addresses for each storage are:
- Local: https://domain.com/upload/localhost
- B2: https://domain.com/upload/b2
- Tencent COS: https://domain.com/upload/cos
- FTP: https://domain.com/upload/ftp
- Qiniu: https://domain.com/upload/qiniu
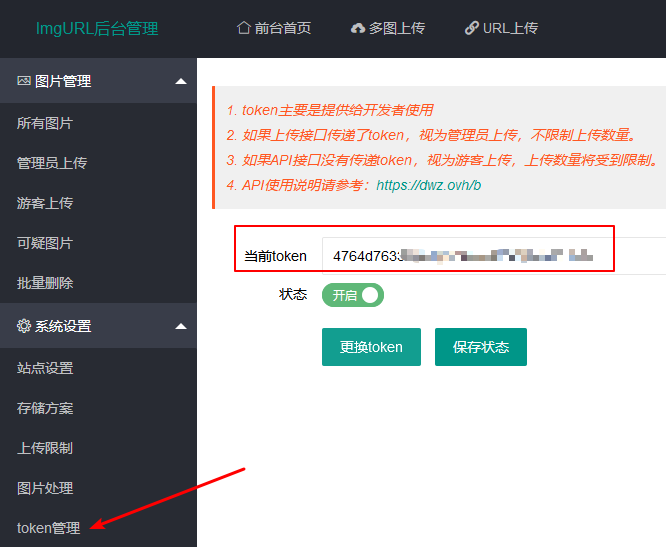
Note that the "token": "4764d7633392d7e2a9ee0725****" refers to administrator upload. The upload token can be viewed in the ImgURL Pro backend under System Settings - Token Management.
Using a token counts as an administrator upload (no upload limit), while not using a token counts as a guest upload (upload limit applies). If you provide guest upload, please remove the following parameter:
"Arguments": {
"token": "4764d7633392d7e2a9ee0725****"
},
Note that the "URL": "" returns a Markdown format link by default. If you want it to automatically return an HTML format link, modify it to:
"URL": "<img src = '$json:url$' />"
You can modify it to any format link following the same pattern; $json:url$ is simply the image link parameter returned by ShareX.
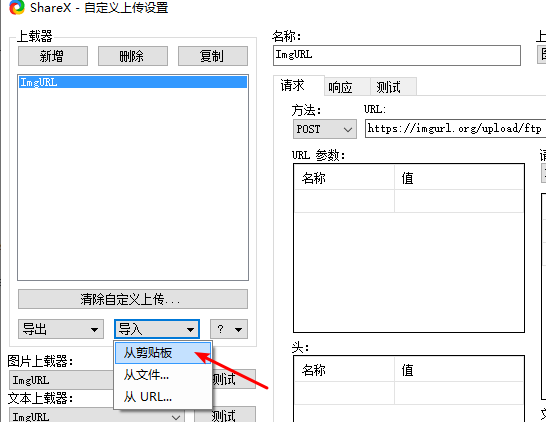
Back in ShareX Custom Upload Settings - Import - From Clipboard - it will automatically import the configuration you just copied into ShareX.
If you are using the ImgURL community version (professional version users can ignore this), please directly copy the following JSON configuration (change youdomain.com to your own domain), and then import it into ShareX using the method above.
{
"Version": "13.0.1",
"Name": "ImgURL",
"DestinationType": "ImageUploader",
"RequestMethod": "POST",
"RequestURL": "https://youdomain.com/api/upload",
"Body": "MultipartFormData",
"FileFormName": "file",
"URL": ""
}
ShareX Shortcut Key Settings
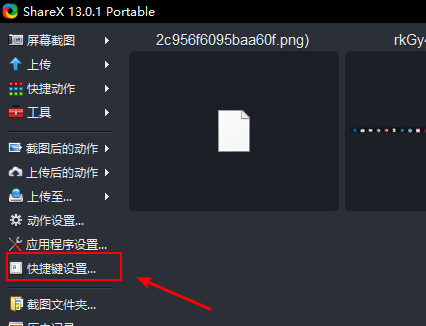
Next, we will add a ShareX shortcut key to complete a series of operations: "screenshot + edit image + upload image + get image URL". Return to the ShareX main interface - Shortcut Key Settings.
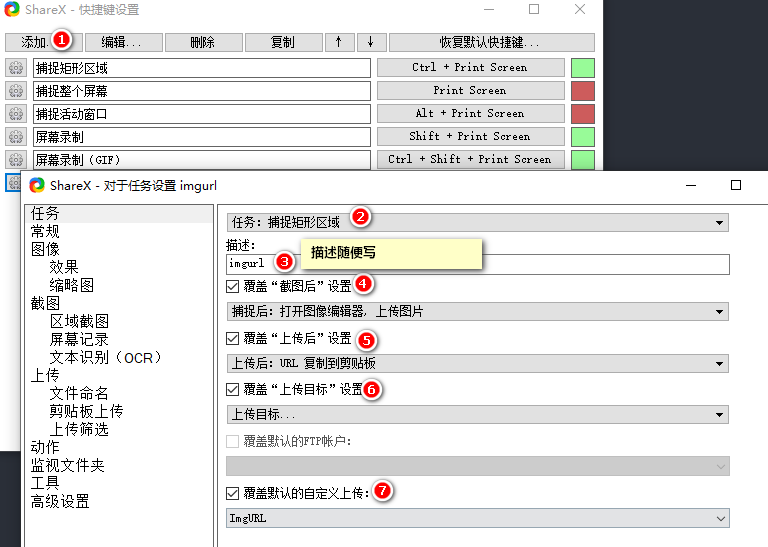
Click the top-left corner to add a shortcut key. Follow the steps in the figure below to select and fill in the options. If you are unclear about the specific options, keep them consistent with the options below.
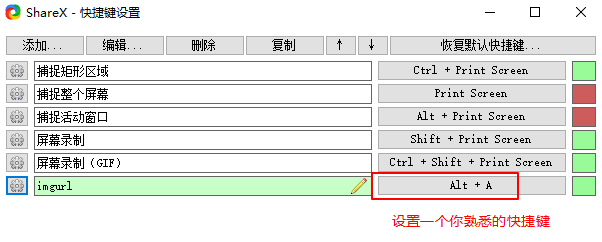
Then set a shortcut key you are familiar with for later screenshot use. Here, xiaoz set it to ALT + A.
Operation Demo
If the above settings are correct, you can now try the screenshot operation. After capturing, ShareX will automatically upload the image to ImgURL and return the image address for your use. (Click the image below to enlarge)
Summary
Through the above operations, we can complete a series of connected operations: screenshot + upload image + get image URL. Mastering ShareX can achieve more automated operations, but ShareX usage is relatively complex. If you encounter issues during setup, please leave a message below for feedback, and xiaoz will do their best to answer.