How to Install Plex on CentOS 7 to Build Your Home Media Library
Plex allows you to store images, audio, and video files in one space and play them anytime, anywhere on PCs, mobile devices, and more, making it ideal for building a home media library.

Install Plex
Plex consists of two parts: the Server side, where your video files are stored, and the Client side. Both the Server and Client support multiple platforms. First, let's install the Server.
Plex Server Download Link: https://www.plex.tv/zh/media-server-downloads/#plex-media-server
This article uses CentOS 7 as an example. The official RPM package is provided, so installation is very simple. Just copy the following commands:
# Download the RPM package
wget https://downloads.plex.tv/plex-media-server/1.13.9.5456-ecd600442/plexmediaserver-1.13.9.5456-ecd600442.x86_64.rpm
# Install Plex Server
rpm -ivh plexmediaserver-1.13.9.5456-ecd600442.x86_64.rpm
# Enable startup on boot
systemctl enable plexmediaserver.service
# Start Plex Server
systemctl start plexmediaserver.service
Plex Server listens on port 32400 by default. You need to allow this port to ensure normal communication. Enter the following commands to open the port:
# Allow port via firewalld
firewall-cmd --zone=public --add-port=32400/tcp --permanent
firewall-cmd --reload
# If using iptables
iptables -I INPUT -p tcp --dport 32400 -j ACCEPT
iptables save
service iptables restart
Connect to Plex
After the Server is installed, it needs to be associated with your Plex account so that clients can use it normally. The first association only supports internal network access. If you have installed Plex Server on a VPS, you can complete this via port forwarding. Here is an example using Xshell.
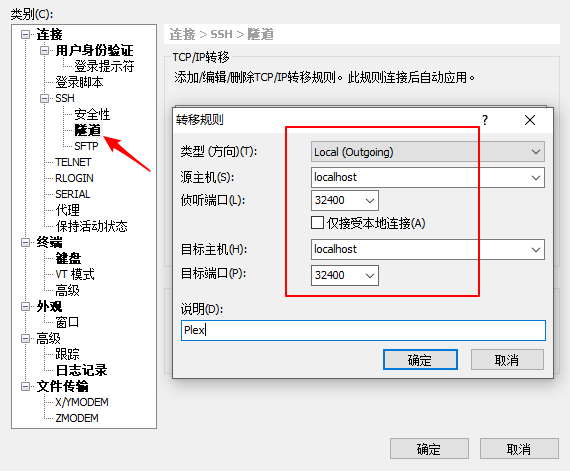
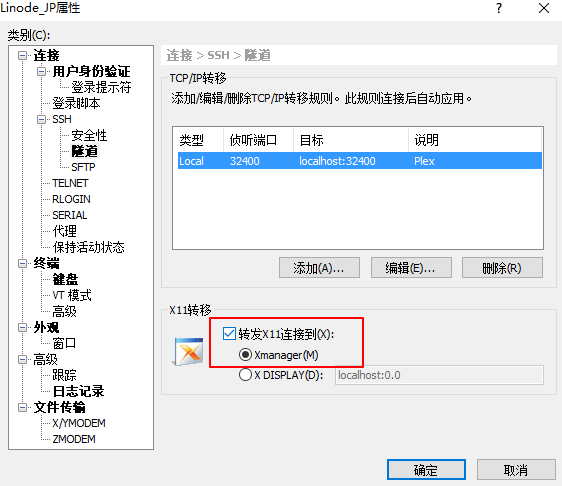
Find your VPS ("chicken"), right-click to open Xshell session properties, go to Properties, switch to the Tunnel tab, and add a tunnel. Fill in the details as shown in the screenshot below.
Check the "X11 Forwarding" option, as shown in the following screenshot.
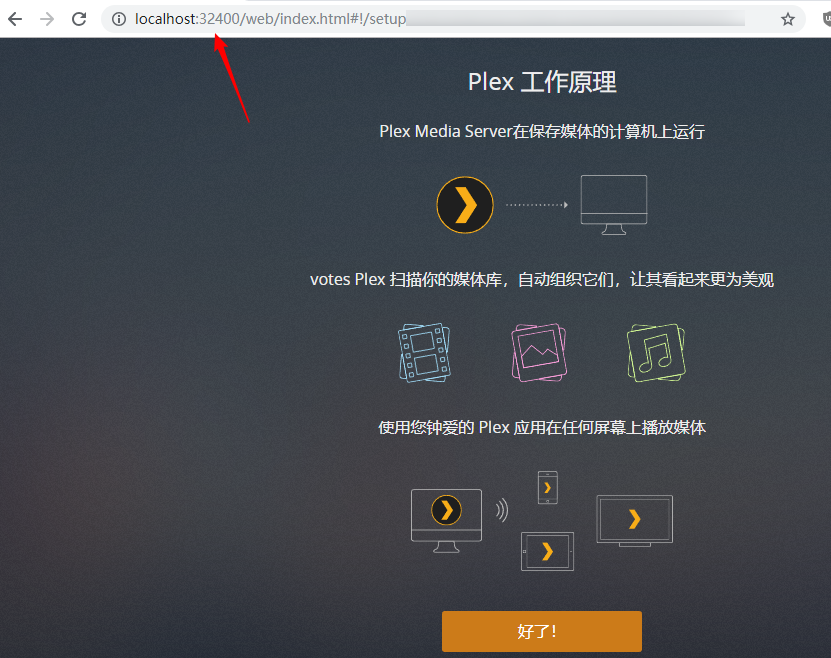
Then visit the address: http://localhost:32400/web/ to associate. If you do not have a Plex account, you need to register one. If everything goes smoothly, follow the prompts to complete the association.
Basic Plex Settings
Plex Client Download Link: https://www.plex.tv/zh/media-server-downloads/#plex-app
If you do not want to install the client, you can also access it directly via the VPS IP + port: http://ip:32400/web/. The Windows client and the web version are almost identical. Plex supports the Chinese language, and the operation is not difficult. I prefer high-quality playback effects, so you can adjust the video quality according to your actual situation. If your VPS network speed is not good enough, you can refer to "CentOS One-Click Kernel Upgrade and Enable Google BBR" to install Google BBR for optimization.

Offline Download
You can refer to my previous article on the CCAA script "CentOS 7 One-Click Install Caddy + Aria2 + AriaNg for Offline Download" to download videos offline to the VPS, and then play them via Plex.
Home Media Solution
No matter how fast your VPS is, it cannot compare to an internal network. I previously bought the "Zhanmei Mini PC", which can now be fully utilized. Use CCAA to download videos offline to the Zhanmei Mini PC, and then play high-definition movies via Plex. The effect is wonderful.
Other Notes
Plex supports iOS and Android clients. If your network speed is good, you can play videos on your phone anytime.
Plex Official Website: https://www.plex.tv/