Complete Guide to Configuring SSL Certificates on Laoxue Host
Laoxue Host, established in 2008, specializes in domain registration and cost-effective overseas virtual hosting services, utilizing the powerful cPanel interface. With the rapid development of the internet and increasing user emphasis on security, adopting HTTPS for websites has become a trend. While most domestic IDC providers do not support SSL certificate configuration, Laoxue Host does.
1. Hosting Purchase
Users who enjoy tinkering might consider VPS, such as HostUS VPS. If you prefer not to deal with too much complexity, using virtual hosting is undoubtedly a better choice. Purchase Laoxue Host at: http://www.laoxuehost.com/. A 25% discount code is available: xiaoz25 (valid for first-time purchases only).
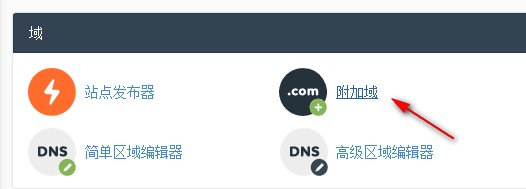
2. Add Domain and Create FTP
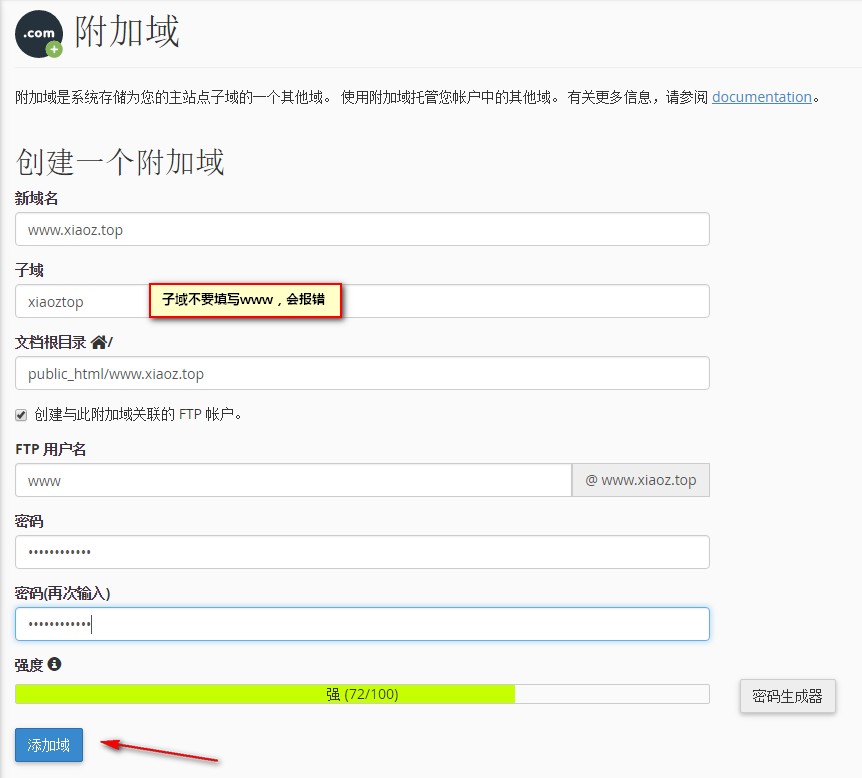
Enter the cPanel hosting panel -> Add Domain -> Enter your domain name, and create an FTP account simultaneously, as you will need it later. See the screenshot below.
Taking www.xiaoz.top as an example, please change it to your own domain in actual configuration. Note that the subdomain defaults to www, which may cause errors, so it was changed to xiaoztop below.
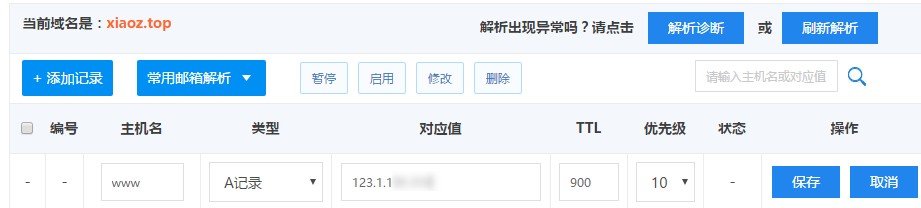
3. Domain Resolution
In the cPanel panel, there is server information on the right side to obtain the server IP address, which is needed for resolution. Then, add the domain resolution at your domain registrar, as shown in the screenshot.

4. Apply for SSL Certificate
Please refer to Free Application for Alibaba Cloud DV SSL Certificate, then download the certificate for Apache from the Alibaba Cloud backend.
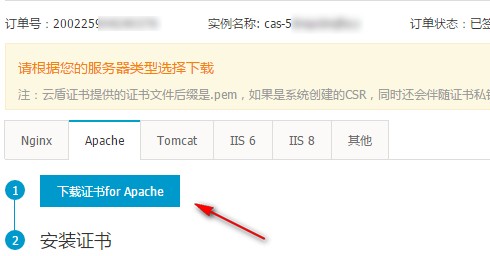
You will see four files in the compressed package. Among them, .key, public.pem, and chain.pem are the ones we need, as shown in the screenshot.

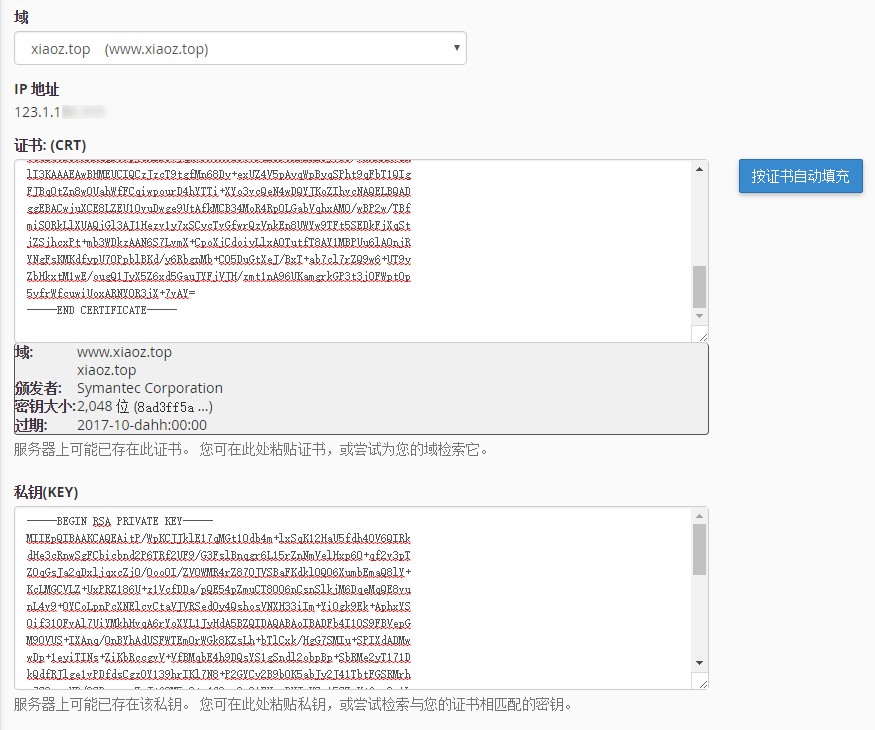
5. Configure SSL Certificate
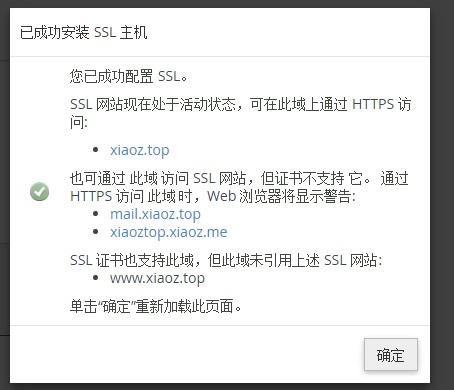
In the cPanel panel -> Security -> SSL/TLS, enter management. Select the domain www.xiaoz.top created earlier. In the Certificate (CRT) field, fill in the content from public.pem. In the Private Key (KEY) field, fill in the content from .key. In the Certificate Authority Bundle (CABUNDLE) field, fill in chain.pem. All three are indispensable. Finally, install the certificate.
6. Access Test
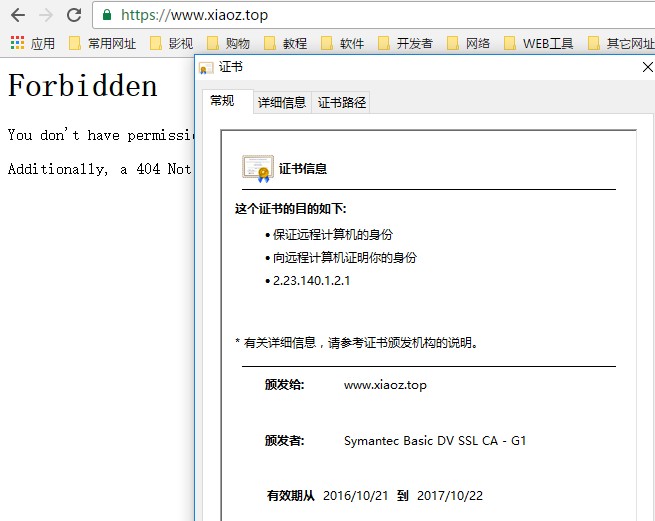
Finally, visit https://www.xiaoz.top/ and you will see a small green lock icon, indicating everything is successful. Thus, the SSL configuration on Laoxue Host is complete.
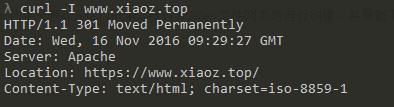
7. 301 Redirection
If you want HTTP (port 80) to automatically redirect to HTTPS (port 443), edit the .htaccess file in your site directory and add the following redirection rules in an appropriate location. If the .htaccess file does not exist, create it locally and upload the following content.
RewriteEngine on
RewriteBase /
RewriteCond %{SERVER_PORT} !^443$
RewriteRule ^.*$ https://%{SERVER_NAME}%{REQUEST_URI} [L,R=301]
8. Summary
Laoxue Host does not require filing, and virtual hosting supports SSL configuration. Users who do not want to tinker can give it a try. If you have already purchased Laoxue Host and bound a domain, please start from Step 4 to apply for the SSL certificate.