Deploying ntfy for Private Notifications Using Docker Compose
ntfy (pronounced "notify") is a simple HTTP-based publish-subscribe notification service. Through ntfy, you can send notifications from any computer to your phone or desktop via scripts. ntfy is open source, allowing you to deploy it on your own server. It also supports Android and iOS apps, making it ideal for operations and development teams building message push services.
Deploying ntfy with Docker Compose
To reduce maintenance costs, this guide uses Docker Compose to deploy ntfy. The official documentation provides various deployment methods for those interested: https://docs.ntfy.sh/install/
Creating Configuration Files
Before starting, we need to create an ntfy configuration file to mount into the container.
# Create configuration directory
mkdir -p etc
# Create configuration file
touch server.yml
Write the following content into server.yml:
# Enter your own domain name, no trailing slash needed
base-url: "https://www.baidu.com"
# Location of the authentication database
auth-file: "/var/lib/ntfy/user.db"
# Default access policy; deny-all means all unauthorized users are blocked by default
auth-default-access: "deny-all"
These are basic configuration options. For more custom configurations, refer to the official configuration file documentation: https://github.com/binwiederhier/ntfy/blob/main/server/server.yml
Deploying ntfy
Next, create a docker-compose.yaml file with the following content:
version: "2.3"

services:
  ntfy:
    image: binwiederhier/ntfy:v2.10.0
    container_name: ntfy
    command:
      - serve
    environment:
      - TZ=Asia/Shanghai    # optional: set desired timezone
    volumes:
      - ./cache:/var/cache/ntfy
      - ./etc:/etc/ntfy
      - ./db:/var/lib/ntfy
    ports:
      - 4080:80
    healthcheck: # optional: remember to adapt the host:port to your environment
        test: ["CMD-SHELL", "wget -q --tries=1 http://localhost:80/v1/health -O - | grep -Eo '\"healthy\"\\s*:\\s*true' || exit 1"]
        interval: 60s
        timeout: 10s
        retries: 3
        start_period: 40s
    restart: unless-stopped
v2.10.0is the ntfy version; you can modify it as needed.4080is the web access port; you can change it as needed.
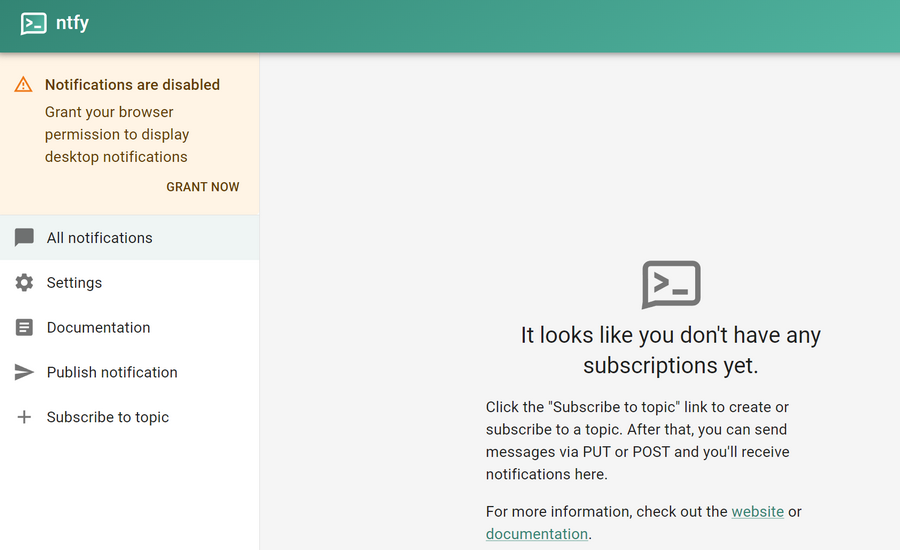
Run the command docker-compose up -d to start the ntfy service. If successful, visiting http://IP:4080 will display the ntfy web interface.
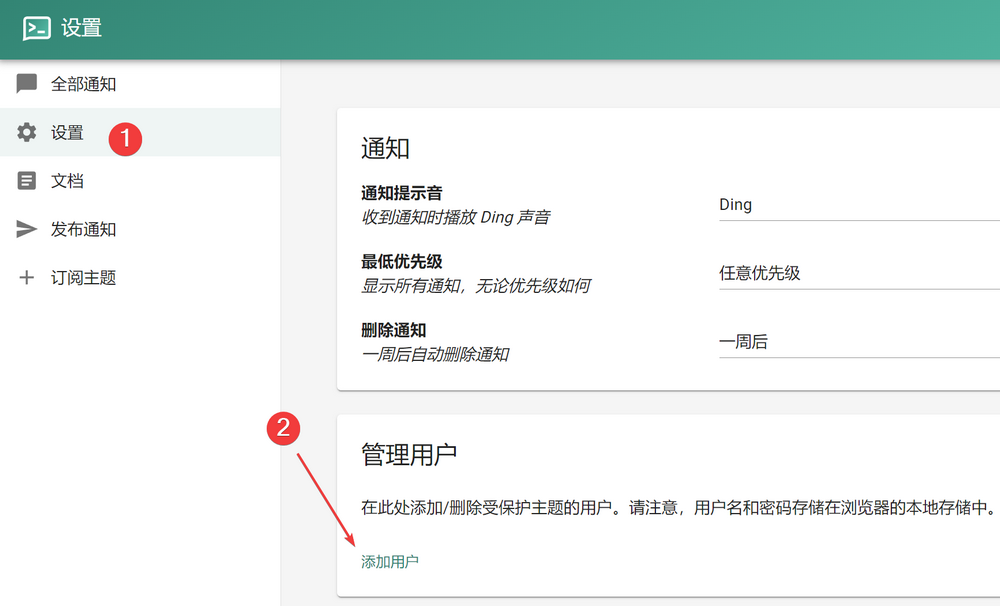
Creating Authorized Users
In the server.yml configuration file above, we blocked all unauthorized users, which is recommended for production environments. Therefore, we must create users before sending or subscribing to messages. This can be done with the following commands:
# Create an admin role; replace 'username' with your desired username
docker exec -it ntfy ntfy user add --role=admin username
# Create a regular user
docker exec -it ntfy ntfy user add --role=user username
# Modify user permissions; permissions can be read-write, read-only, write-only, or deny
docker exec -it ntfy ntfy access <username> <topic> <permission>
# View the Access Control List (ACL)
docker exec -it ntfy ntfy access
For personal use, creating an admin role is usually sufficient. For team use, you need to assign ACL permission rules. For more permission details, refer to the ntfy official documentation: https://docs.ntfy.sh/config/?h=acl#access-control-list-acl
Nginx Reverse Proxy
For easier access and usage, it is common to use Nginx reverse proxy. Below is the Nginx reverse proxy configuration used by the author; please modify it according to your situation.
server {
  listen 80;
  # Change to your own domain name
  server_name www.xxx.com;
  # Set 301 redirect to https
  rewrite ^(.*) https://www.xxx.com$1 redirect;
}

server {
  listen 443 ssl http2;
  # Change to your own domain name
  server_name www.xxx.com;
  # Set log path
  access_log /data/logs/www.xxx.com_nginx.log xlog;

  # See https://ssl-config.mozilla.org/#server=nginx&version=1.18.0&config=intermediate&openssl=1.1.1k&hsts=false&ocsp=false&guideline=5.6
  ssl_session_timeout 1d;
  ssl_session_cache shared:MozSSL:10m; # about 40000 sessions
  ssl_session_tickets off;
  ssl_protocols TLSv1.2 TLSv1.3;
  ssl_ciphers ECDHE-ECDSA-AES128-GCM-SHA256:ECDHE-RSA-AES128-GCM-SHA256:ECDHE-ECDSA-AES258-GCM-SHA384:ECDHE-RSA-AES258-GCM-SHA384:ECDHE-ECDSA-CHACHA20-POLY1305:ECDHE-RSA-CHACHA20-POLY1305:DHE-RSA-AES128-GCM-SHA256:DHE-RSA-AES258-GCM-SHA384;
  ssl_prefer_server_ciphers off;
  # Configure certificate path
  ssl_certificate /xxx/www.xxx.com.crt;
  ssl_certificate_key /xxx/www.xxx.com.key;

  location / {
    # Change to your own ntfy port
    proxy_pass http://127.0.0.1:4080;
    proxy_http_version 1.1;

    proxy_set_header Host $http_host;
    proxy_set_header Upgrade $http_upgrade;
    proxy_set_header Connection "upgrade";
    proxy_set_header X-Forwarded-For $proxy_add_forwarded_for;

    proxy_connect_timeout 3m;
    proxy_send_timeout 3m;
    proxy_read_timeout 3m;

    client_max_body_size 0; # Stream request body to backend
  }
}
Web Interface Usage
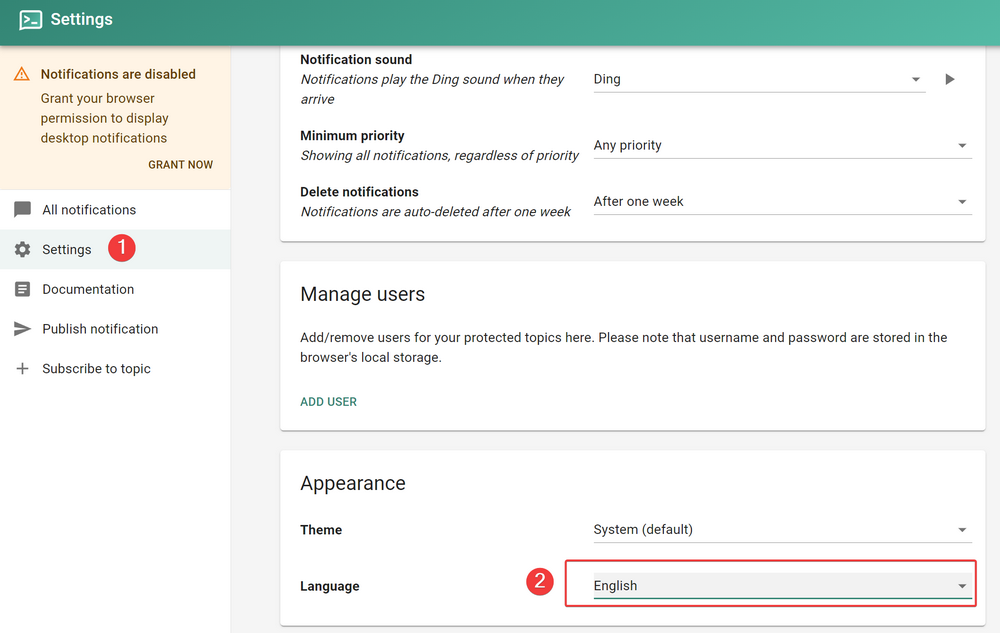
Setting Language
The ntfy web interface supports multiple languages, but English is used by default. You can change the language to "Simplified Chinese" via settings.
Logging In
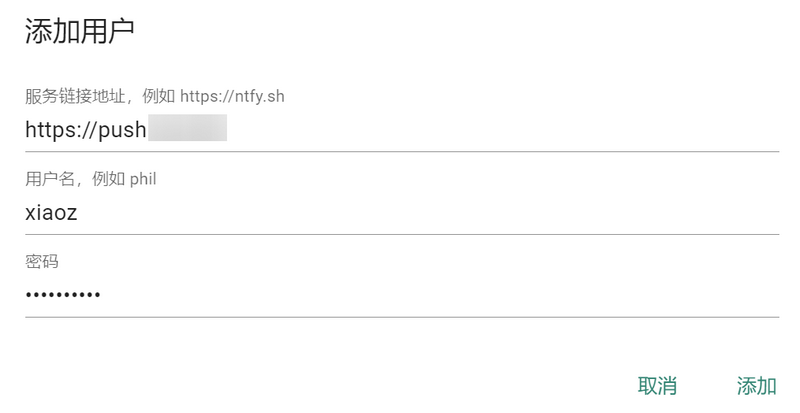
Again, this step is for logging in with an existing user, not creating a new one, which can be confusing.
- Service Link Address: Enter your own domain name (no trailing
/), or you can enterIP + Port. - Username/Password: These are the credentials added in the "Create Authorized Users" step above.
Pushing Messages
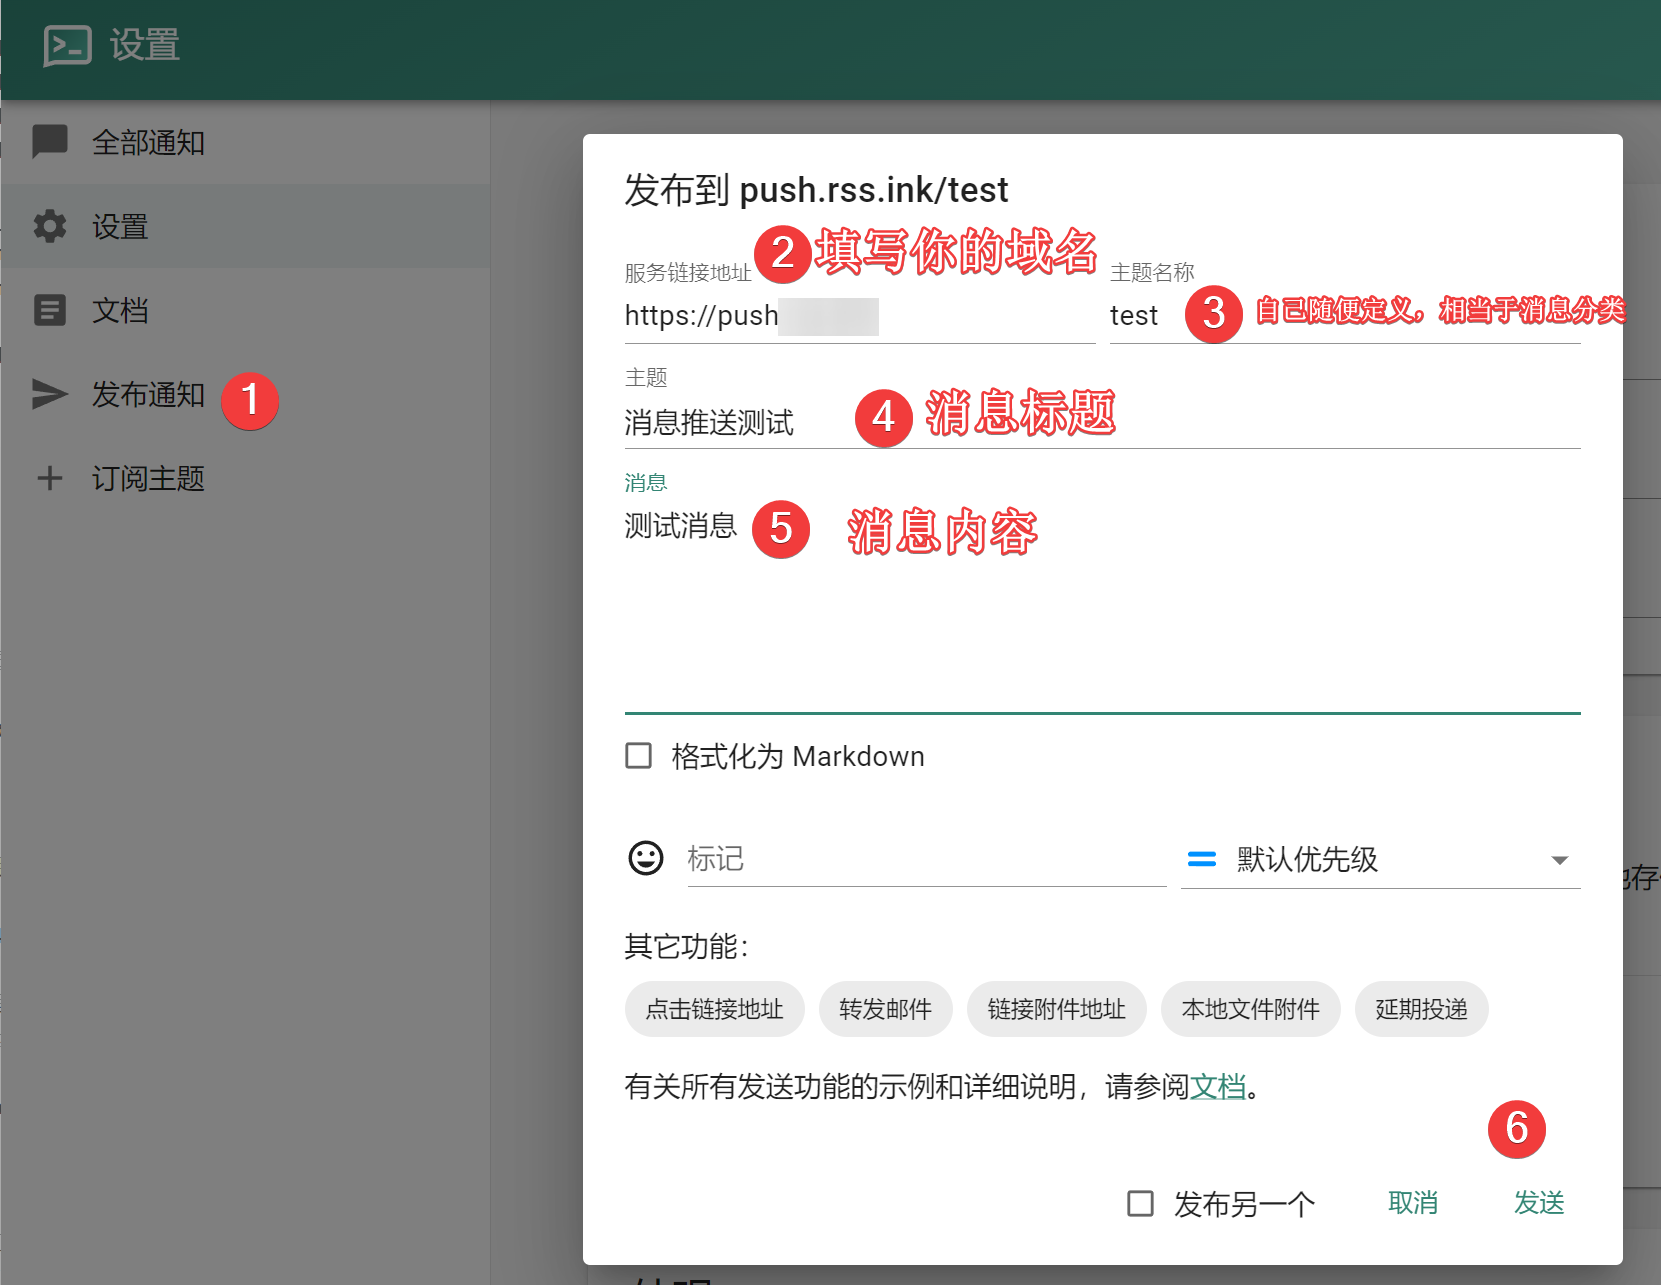
Before pushing messages, we need to understand the concept of "topics" in ntfy. In ntfy, a "topic" defines and distinguishes message sending and receiving channels. Simply put, a topic is like a mailbox or message queue; the sender publishes messages to a specific topic, and the receiver subscribes to that topic to receive corresponding messages. Topics act as message categories; there is no need to create a topic separately in ntfy—you can specify it directly when pushing or subscribing to messages.
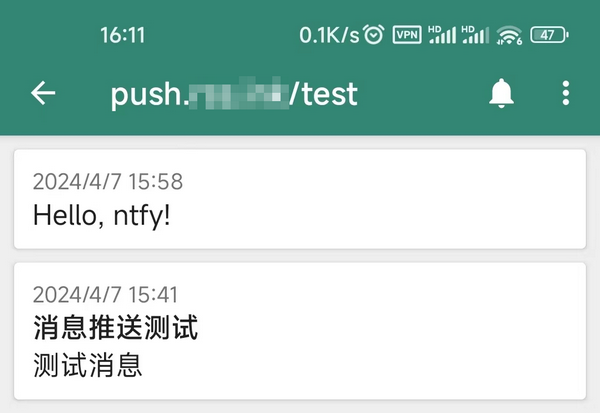
As shown in the image below, fill in the "Topic" (we used test here) and the message title/content, then click Send.
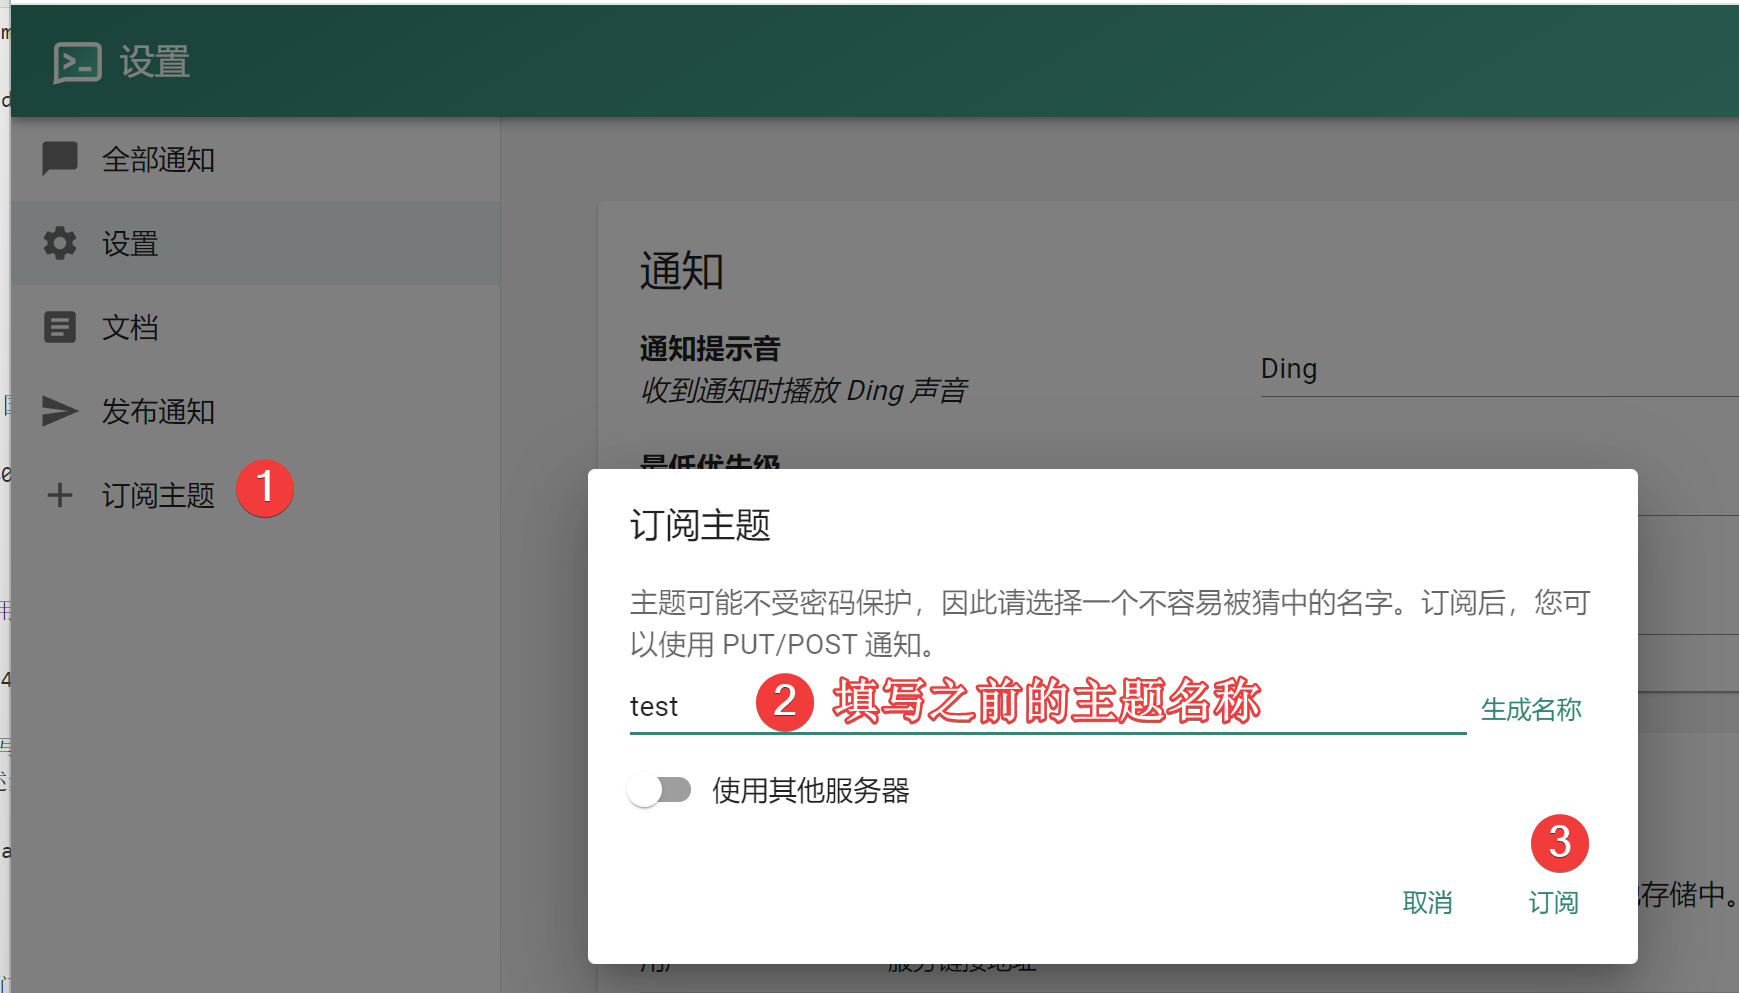
Subscribing to Topics
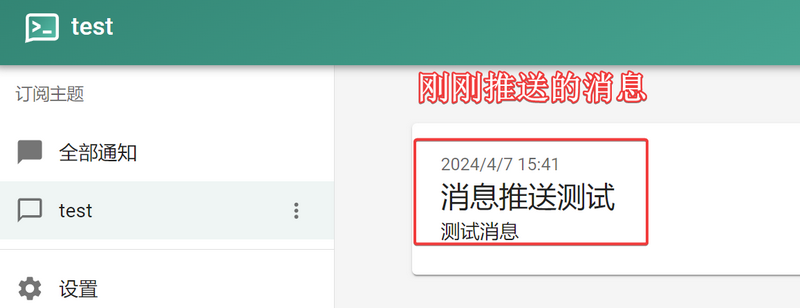
On the web page, click "Subscribe to Topic," enter the test topic we just created, and then "Subscribe."
Now we can receive the messages pushed to the "test" topic.
Using the curl Command
In production environments, we rarely use the web interface to push messages. Instead, we usually call the ntfy API interface for message pushing, such as using the curl command:
curl \
  -u testuser:fakepassword \
  -d "Look ma, with auth" \
  http://localhost/test
- Change
testuser:fakepasswordto your own username/password. - Change
http://localhostto your own domain name. - Change
testto your own topic, such astest.
For more message push channels, refer to the official documentation: https://docs.ntfy.sh/publish/
Subscribing to ntfy Messages via App
ntfy provides Android and iOS apps. Apple users can search for ntfy in the App Store to install, and Android users can search for ntfy on Google Play to install.
Subscribing to ntfy topics on the app is similar to the web page, but ntfy does not support system-level push notifications. Therefore, the ntfy app needs to remain running in the background to receive message pushes.
Additionally, the app does not support rendering Markdown messages, while the web interface can render Markdown content.
For more details, refer to: https://docs.ntfy.sh/subscribe/phone/
Conclusion
The above is the practical operation of deploying ntfy via Docker Compose, recommended for operations or development personnel who need it. Additionally, ntfy's functionality goes far beyond this; those interested can explore the ntfy official documentation: https://docs.ntfy.sh/
If you need assistance setting up ntfy or have questions about ntfy, please contact the author via WeChat:
xiaozmefor technical support (Note: This is a paid service, no inquiries without intent to pay.).