Installing LEDE (KoolShare) as a Side Router on PVE with iKuai
A few months ago, I successfully set up iKuai, referencing Soft Router System iKuai OS Troubleshooting Notes. Although iKuai is stable and easy to use, it felt like something was missing. Thus, the combination of iKuai + LEDE was born. iKuai offers stability, single-line multicast, and traffic control, while LEDE provides scientific internet access and various third-party plugins. This is currently one of the most complete solutions for soft router enthusiasts.
Recently, I have finished installing LEDE and would like to share the installation process and the pitfalls encountered, serving as a reference for those in need.
What is LEDE?
LEDE is a routing system developed by koolshare based on OpenWRT. It supports both hardware routers and X86 (soft router) devices. LEDE comes with an app store and supports rich third-party plugins, making it more suitable for Chinese users.
Before You Start
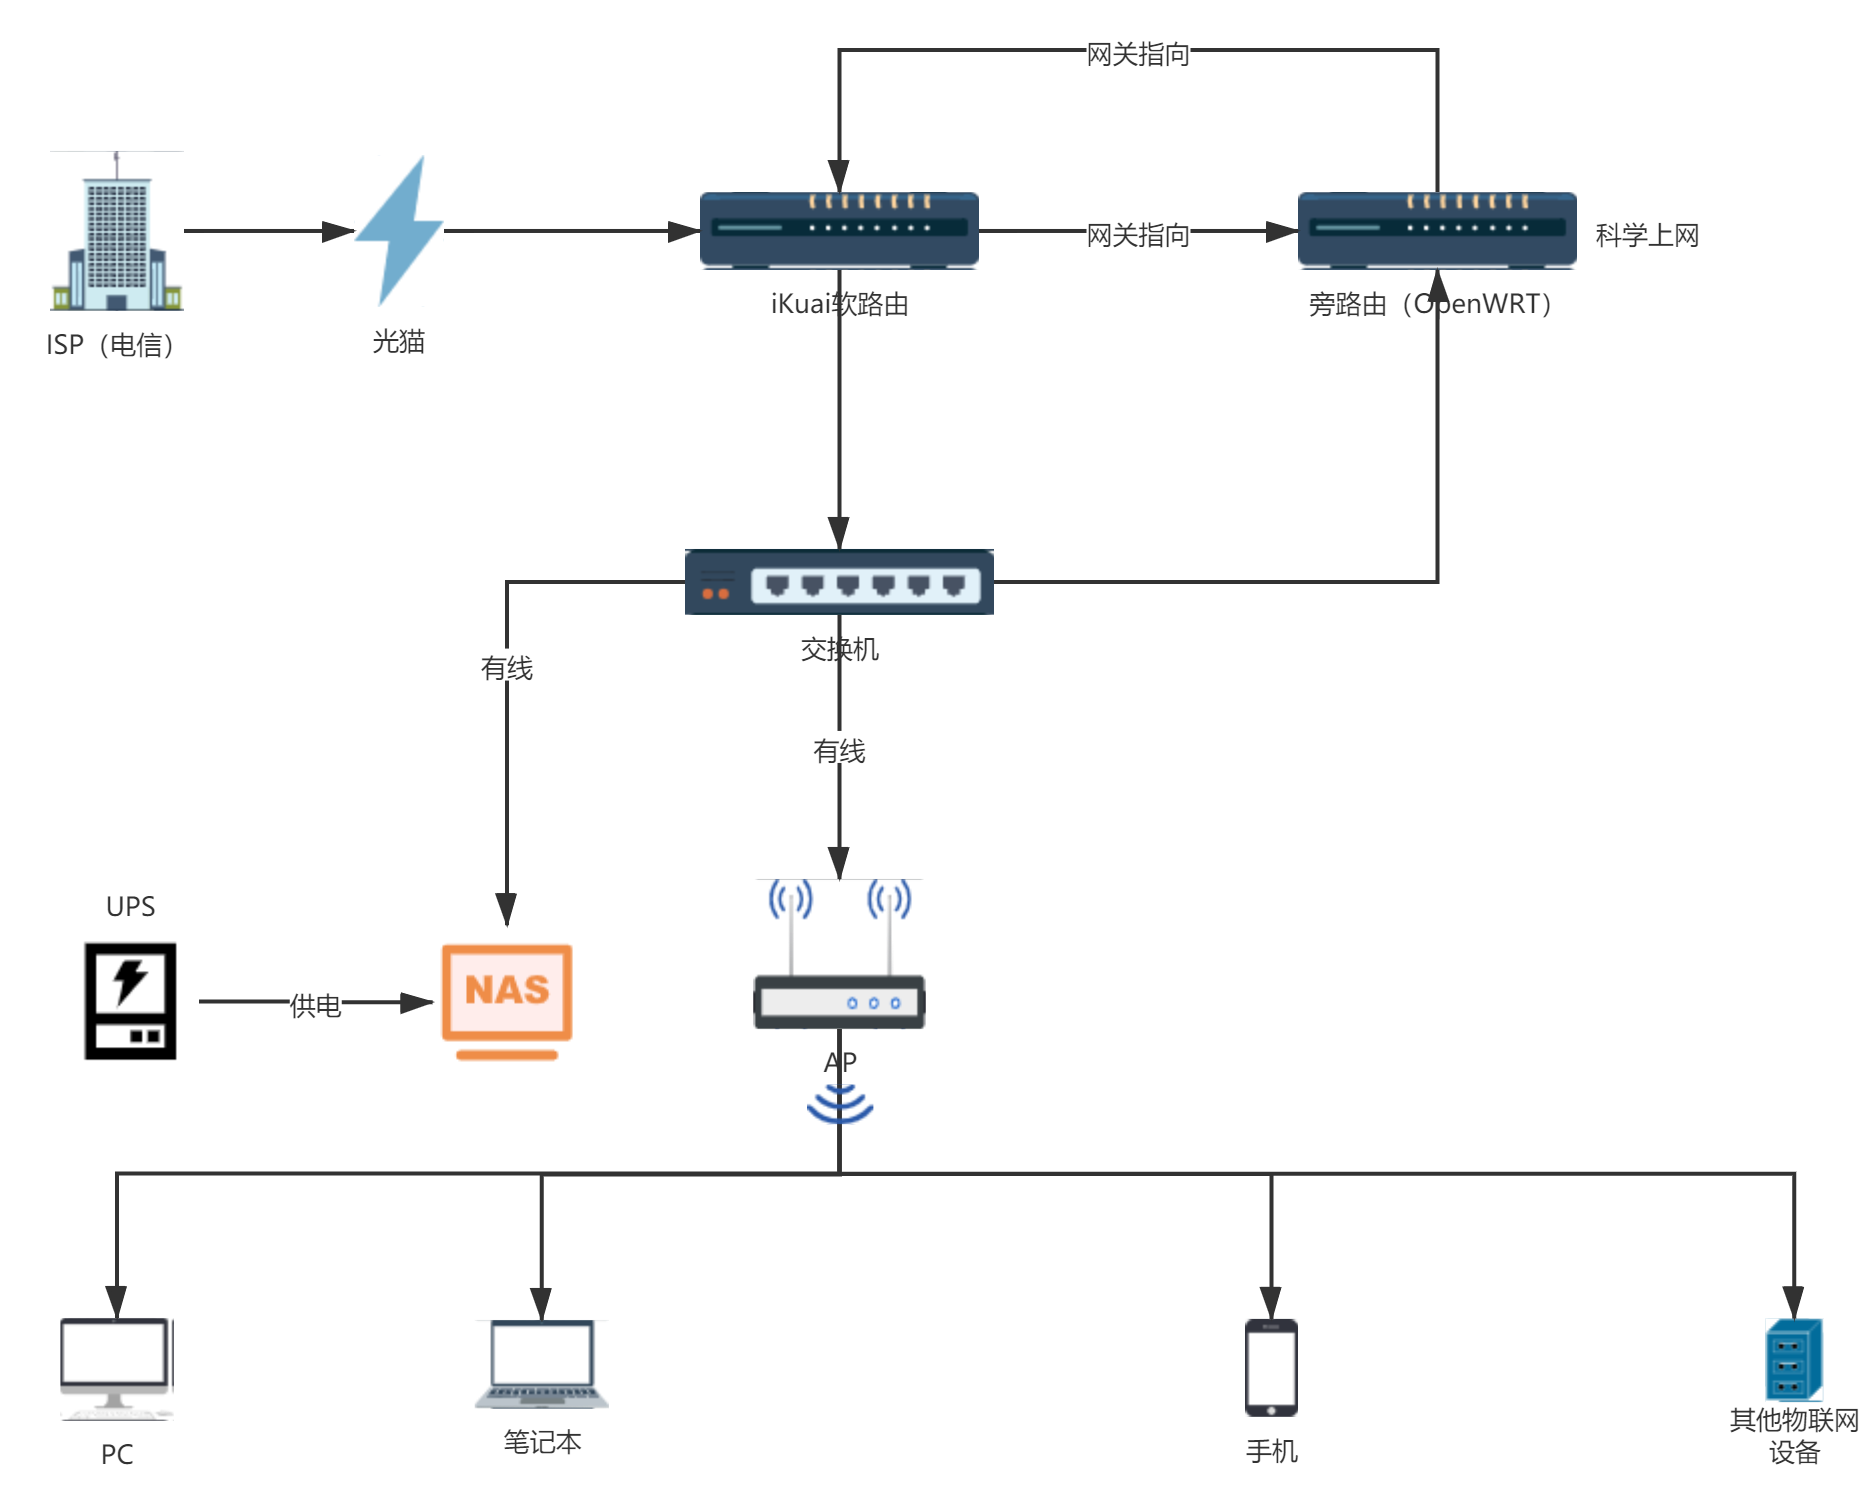
Since hardware devices and network conditions vary for everyone, the following content is for reference only and should be adjusted according to actual situations. Below are xiaoz's hardware details and network topology:
- Zhanmei Mini PC running iKuai soft router
- T-bao Mini PC running PVE virtual machine, with LEDE installed inside the VM (this could also be installed directly in the iKuai VM)
- Redmi RM2100 used as an AP
The network topology is as follows:
Installing LEDE on PVE
xiaoz uses PVE Virtual Machine. LEDE officially only provides .vmdk files, which PVE cannot install directly; they need to be converted.
First, download the firmware from LEDE_X64_fw867. Select the file with the .vmdk suffix. For new devices, it is recommended to choose the version with EFI.
Place the downloaded .vmdk file in any directory on PVE, then execute the command to convert it to qcow2 format:
# Convert vmdk to qcow2
qemu-img convert -f vmdk -O qcow2 source-name.vmdk target-name.qcow2
Create a blank Linux system in PVE and record the disk number. For xiaoz, this is 107.
Then, import the .qcow2 virtual machine image into PVE by executing the command:
# Import virtual machine image to PVE, replace id with the disk number above (107)
qm importdisk id /home/qcow2/openmanage_enterprise.qcow2 local-lvm
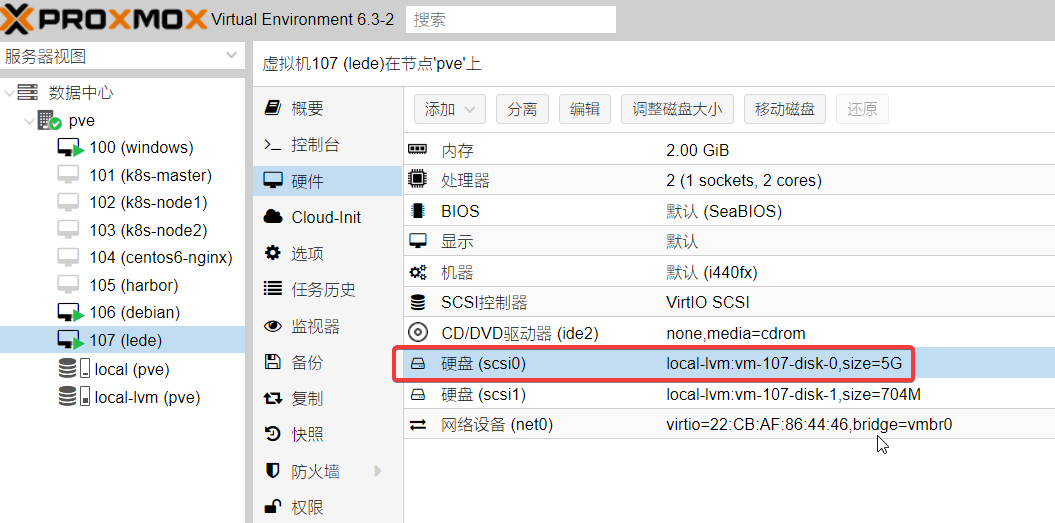
At this point, PVE will have an additional unused disk. Find it in the "Hardware" options and enable it, as shown below.
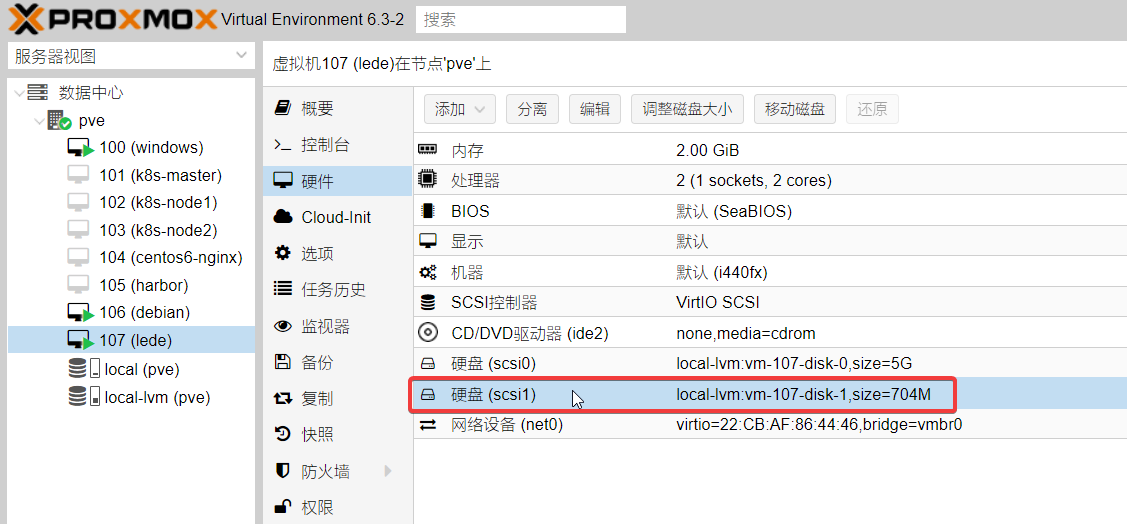
In the PVE options - Boot Order, adjust the newly added disk (scsi1) to the first priority.

Then start the virtual machine and modify the option ipaddr parameter in the network configuration file /etc/config/network to match the IP segment of the iKuai network, then input reboot to restart LEDE.
After restarting, you can open LEDE by entering the IP you just set. The default password is koolshare.
LEDE (Side Router) Configuration
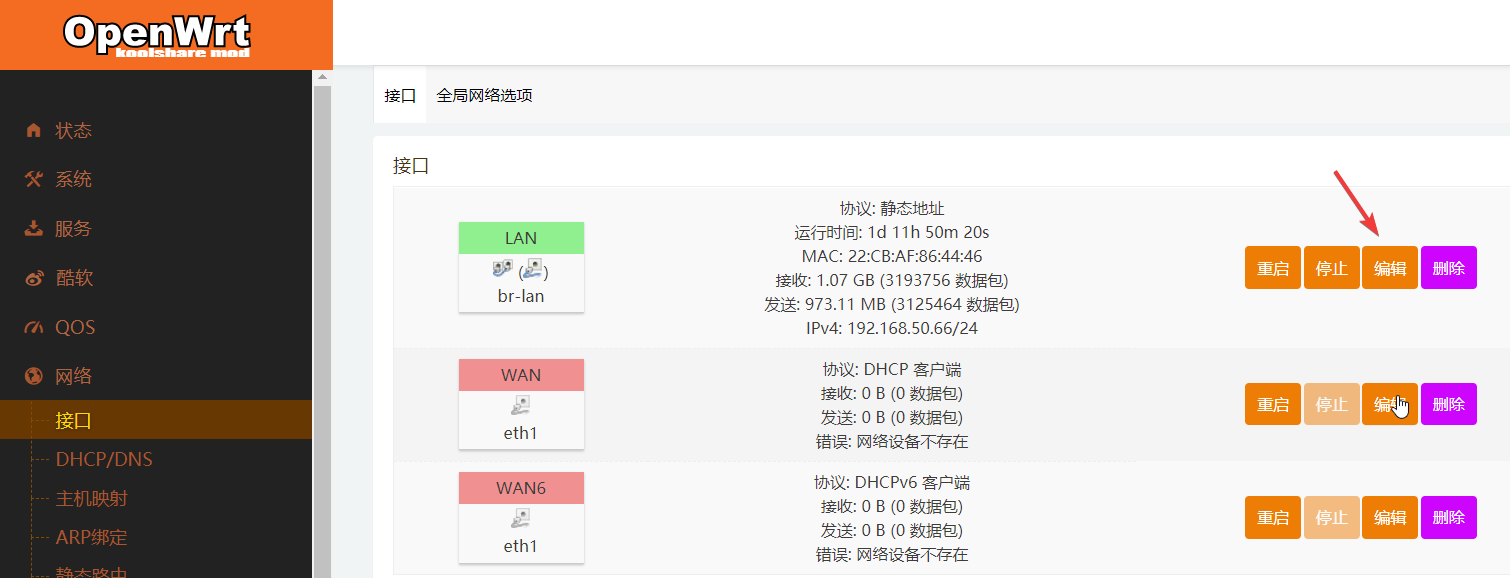
Here we use LEDE as a side router, requiring some configuration. Open Network - Interfaces - Find LAN to edit.
In the General Settings, set the IPv4 Gateway to the iKuai IP address, and disable IPv6 Allocation Length.

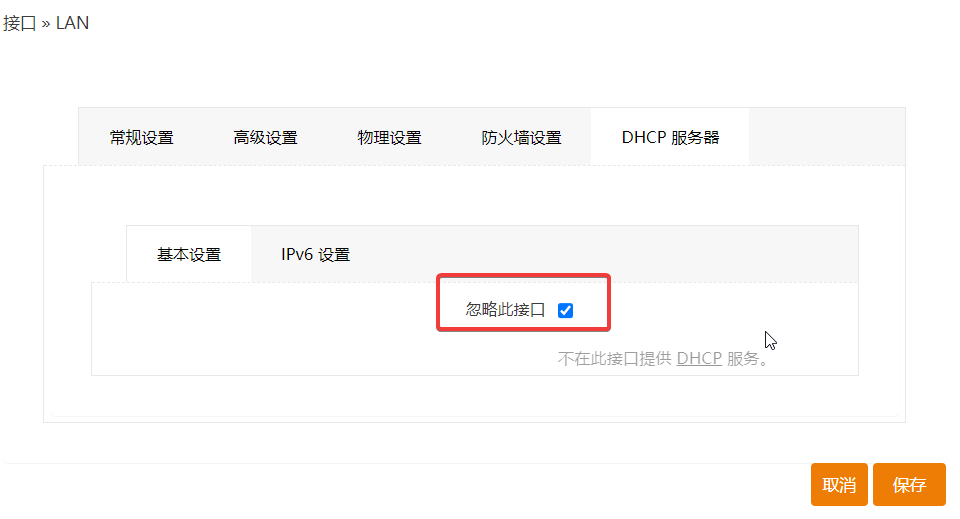
For DHCP Service, select "Ignore this interface" to turn off DHCP.
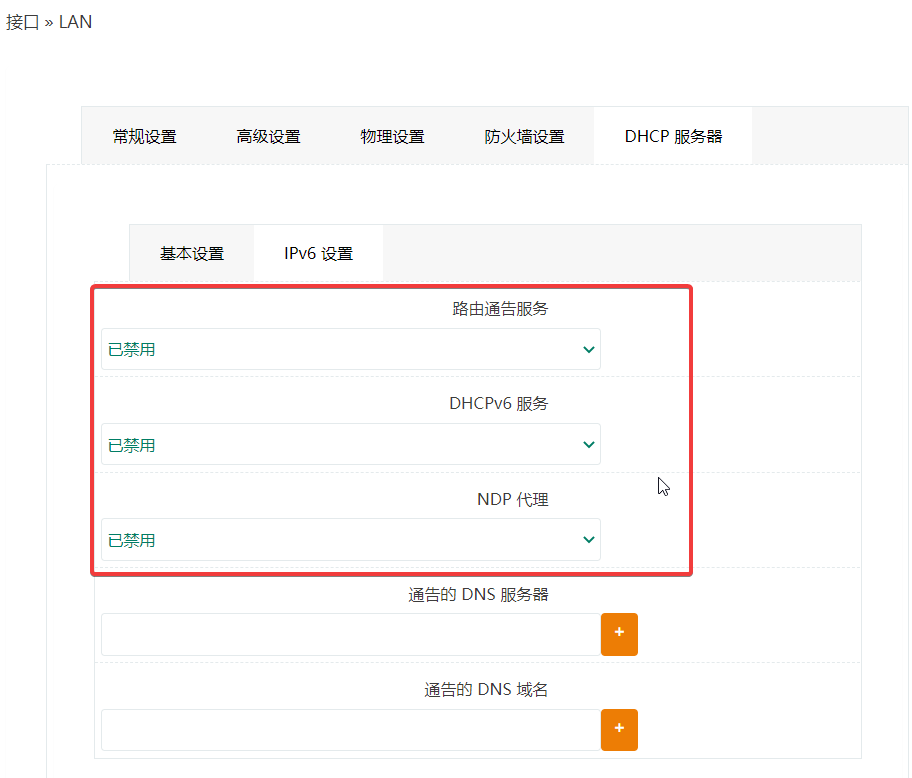
Disable IPv6 Router Advertisement, DHCPV6, and NDP Proxy. It is said that if these are not disabled, some strange problems may occur, though xiaoz has not verified this personally.
At this point, our side router (LEDE) is fully configured.
Enabling Scientific Internet Access
LEDE has removed the scientific internet access plugins, so they cannot be searched in the software center. xiaoz provides a Github project address below for you to research: https://github.com/hq450/fancyss_history_package/tree/master/fancyss_X64
Main Router iKuai Configuration
Open iKuai - Network Settings - DHCP Settings - DHCP Server - Set the Gateway and DNS to the LEDE IP address. This completes the iKuai configuration.
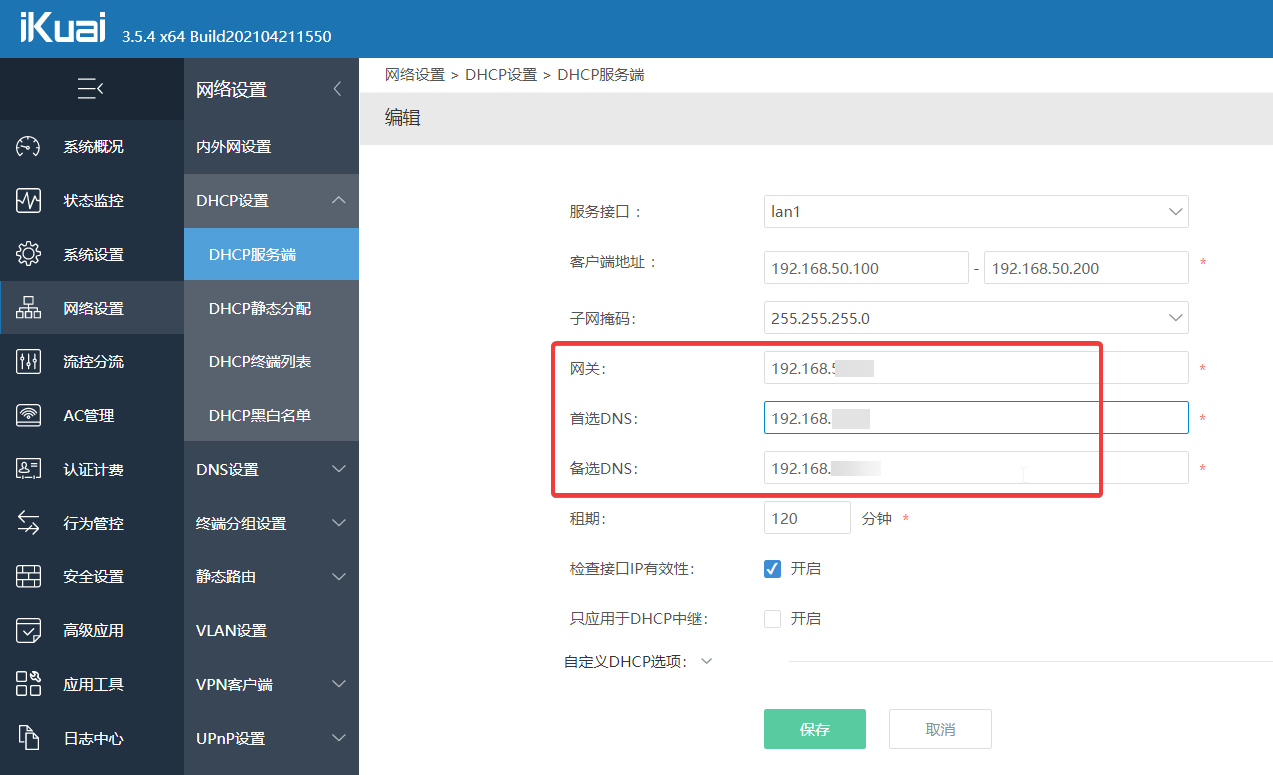
Note: The DNS must also be set to the LEDE IP, otherwise scientific internet access will not work.
Testing
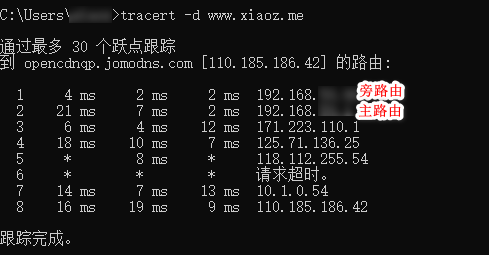
Verify on any device within the LAN (requires setting to DHCP automatic IP acquisition). Disconnect and reconnect the network to let the main router (iKuai) DHCP assign network configuration. Use the tracert command to trace the route. You will see the path goes: Side Router -> Main Router -> Backbone Network.
Summary
.vmdkvirtual machine files need to be converted to.qcow2and imported into PVE for installation.- Side Router (LEDE): Set Gateway to Main Router IP, turn off DHCP, disable IPv6.
- Main Router (iKuai): Set Gateway to Side Router IP, set DNS to Side Router IP.
This article references some content from: Perhaps the Fastest Soft Router and Virtual Machine Installation Tutorial on the Web (iKuai/LEDE/openWRT)