How to Set Up KeePassXC for Automatic Password Autofill in Chrome
In a previous article, Three KeePass Clients Available on Windows, I introduced three different KeePass clients. At that time, I was using the combination of KeePassXC + chromeIPass for automatic password filling. Thanks to the reminder from @Kreen, I learned that KeePassXC officially provides a browser extension called KeePassXC-Browser, which is safer than chromeIPass.

Install KeePassXC
Visit https://keepassxc.org/download/ to download the latest version of the KeePassXC client. Please choose the installer version rather than the portable version, as testing has shown that the portable version has incomplete features.
Install the Browser Extension
Please use a proxy if necessary, then access the Chrome Web Store using Chrome to install the KeePassXC-Browser extension.
Configuration
Open the KeePassXC client, go to Tools > Settings > Browser Integration, enable KeePassXC Browser Integration, and check Google Chrome as shown in the screenshot below. Note that you need to restart the KeePassXC client after completing the settings.

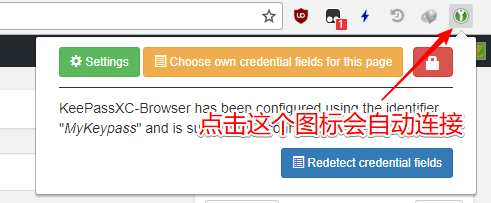
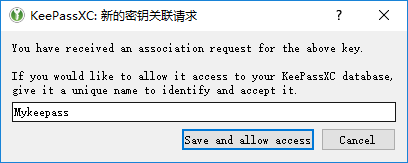
Next, click the KeePassXC-Browser extension icon. It will automatically detect the KeePass database and establish a connection, prompting you to set a connection name as shown in the following screenshots.
Summary
The KeePassXC client supports multiple platforms, and the provided KeePassXC extension also supports browsers like Firefox and Vivaldi. This means you can manage passwords and enable automatic password filling in browsers across different platforms. If you are using the official KeePass client, refer to KeePass Chinese Settings and Chrome Auto-fill for configuration instructions.
Part of the content is referenced from: KeePassXC-Browser Migration