Mount Tencent Cloud COS to Linux Server Using COS-Fuse
COS is Tencent Cloud's object storage service. COS-Fuse allows you to mount COS to the local filesystem in a Linux system, enabling you to conveniently operate objects on COS through the local filesystem and achieve data sharing. This article demonstrates the process using CentOS 7, achieving the same effect as the previously shared article "Mounting Alibaba Cloud OSS to ECS using OSSFS on CentOS 6".
1. Install Dependencies
Please run the following command to install the required dependencies:
sudo yum -y install automake gcc-c++ git libcurl-devel libxml2-devel fuse-devel make openssl-devel
2. Compile and Install
# Download COS-Fuse
wget https://mc.qcloudimg.com/static/archive/144302cd3e6afb2bf2758a8c0c1d9bb9/cosfs-v4.2.1-master.zip
# Extract
.tar -zxvf cosfs-v4.2.1-master.zip
# Rename
mv cosfs-v4.2.1-master cosfs
# Compile and install
cd cosfs
./autogen.sh
./configure
make
sudo make install
3. Configure and Run
In the Tencent Cloud console, go to Cloud Products > Storage & CDN > Object Storage Service (COS) and create a bucket. Record the bucket name and region, as you will need them later.
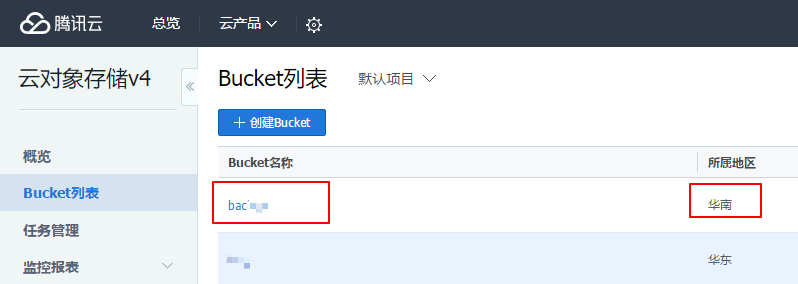 Figure 3-1: Create Bucket
In the Object Storage Service > Key Management section, record your APPID, SecretId, and SecretKey for later use, or directly visit Key Management (login required).
 Figure 3-2: View Keys
Run the following command to save the bucket, SecretId, and SecretKey to the /etc/passwd-cosfs file:
echo my-bucket:my-access-key-id:my-access-key-secret > /etc/passwd-cosfs
chmod 640 /etc/passwd-cosfs
Mount COS
Run the following command to mount COS to the server. The command below contains four parameters, which are explained subsequently:
# Create mount directory
mkdir -p /home/cosfs
# Perform mount
cosfs my-appid:my-bucket my-mount-point -ourl=my-cos-endpoint
my-appid: Corresponds to the APPID (refer to Figure 3-2).my-bucket: The bucket name (refer to Figure 3-1).my-mount-point: The directory to mount, e.g.,/home/cosfs.-ourl: The endpoint URL (e.g.,http://cn-south.myqcloud.com).cn-southcorresponds to the Guangzhou region,cn-northto Tianjin, andcn-eastto Shanghai. Modify this according to your bucket's region.
Below is a demonstration code snippet:
echo my-bucket:faint:123 > /etc/passwd-cosfs
chmod 640 /etc/passwd-cosfs
mkdir -p /home/cosfs
cosfs appid:my-bucket /home/cosfs -ourl=http://cn-south.myqcloud.com
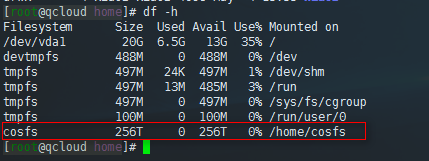
Test
Use df -h to check if the mount was successful. If the output looks like the image below, the mount is successful.
Summary
COS offers free internal network traffic. Mounting COS for backup is a good solution. However, if you plan to store website programs or frequently read/write files, this might not be the best option.
This article references the official documentation: COS-Fuse Tool.