How to Quickly Create a Cloud Server on DigitalOcean
DigitalOcean is a foreign hosting provider that has now ranked as the seventh-largest host, offering high cost-performance. The lowest configuration starts at $5 per month. New users receive an additional 2 months free, meaning you can use the $5 plan for 3 months. All cloud servers use high-performance SSD hard drives. Below is a guide on how to quickly use DigitalOcean to create a cloud server.
1. Enter Hostname and Select Configuration
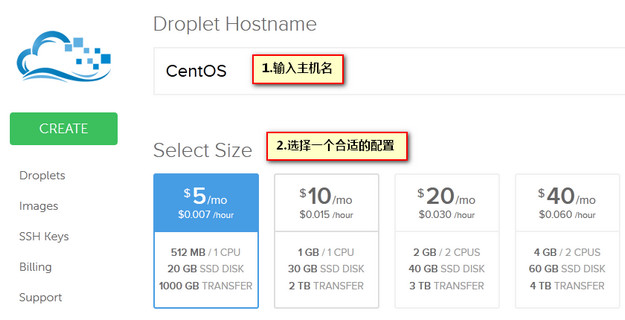 Figure 1-1: Select Host Configuration
2. Select Datacenter
Based on personal usage and user reviews, the San Francisco Datacenter is the most stable and has a direct connection to mainland China. Therefore, it is recommended to select the San Francisco datacenter as shown in the figure. You can skip selecting backup services, as the first backup service incurs an additional 20% fee.
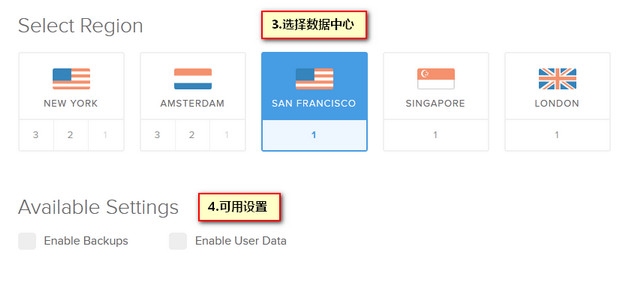 Figure 2-1: Select Datacenter
3. Select Operating System
Choose the operating system you are most familiar with. Since the author previously experimented with CentOS, 32-bit CentOS 6.5 was selected here. Finally, click the Create button.
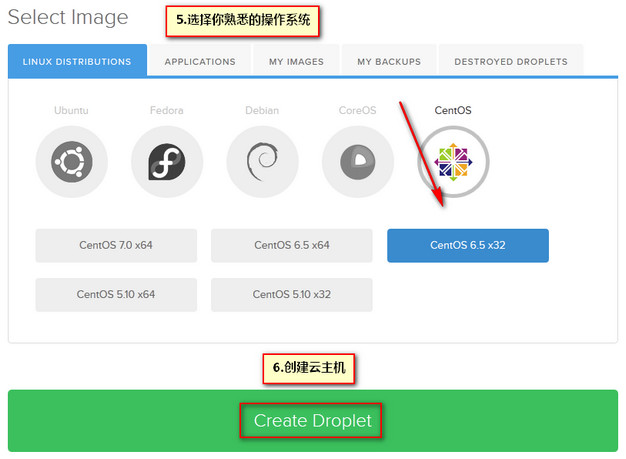 Figure 3-1: Select Operating System
4. Wait for Creation to Complete
After waiting a few dozen seconds, the system will automatically jump to the interface shown below, indicating that the creation was successful. You can now manage the server.
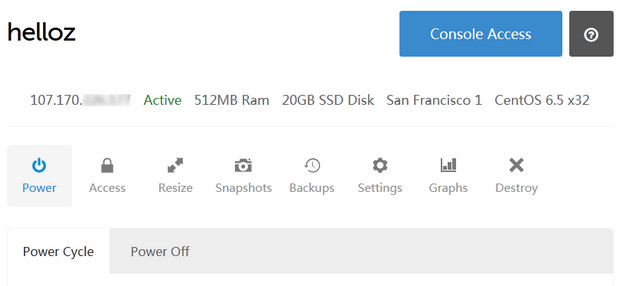 Figure 4-1: Creation Successful
5. Receive Email and Connect via SSH
Upon successful creation, you will receive an email notification containing the host IP, username, and password. Use an SSH tool to connect. The first time you log in, you will be prompted to change the default password. Enter the default password again, then input your new password to complete the change.
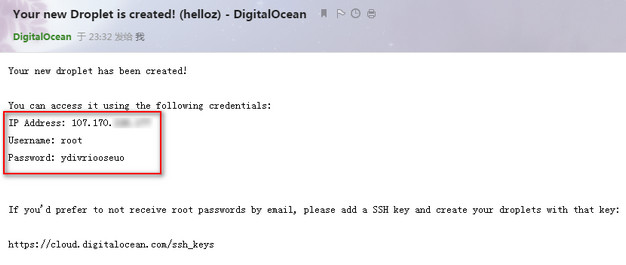 Figure 5-1: Email Notification
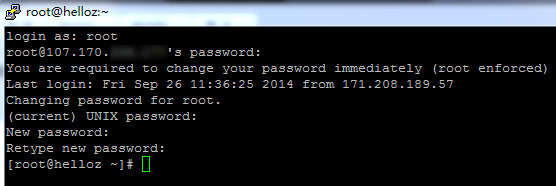 Figure 5-2: Change Password
Click here to register and enter the latest promo code SSDMAY10 to receive $10. This allows you to use the service for three months at a cost of $5. Don't miss out if you enjoy tinkering with servers.