How to Install Nano Lightweight Virtualization Manager on CentOS 7
Nano is a lightweight virtualization management tool developed using Go language based on KVM technology. It offers a complete set of features including a web management portal, host monitoring, image cloning, and failover, ready to use out of the box. Similar to virtualization platforms like noKvm and Proxmox VE, Nano can be executed without third-party software or dependency libraries, making installation very simple.

Server Requirements
- X86 servers supporting virtualization or virtual machines with nested virtualization enabled (Intel VT-x/AMD-v)
- 2 CPU cores, 4GB RAM, 50GB disk space, and a network device
- CentOS 7.7 (1908) Minimal
- Operating system installed and network ready
- Firewalld service started and running normally
- If using Raid/LVM, complete the configuration before installing Nano
Install Nano
Copy the following commands to install:
# Download Nano
wget https://nanos.cloud/files/nano_installer_1.2.0.tar.gz
# Extract
 tar zxfv nano_installer_1.2.0.tar.gz
# Enter directory
cd nano_installer
# Install
./installer
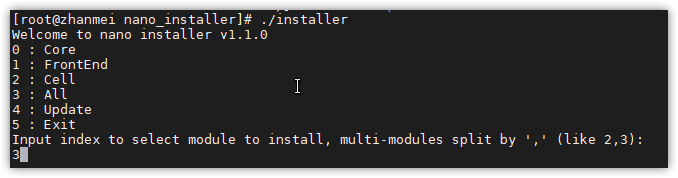
During installation, you will be asked to select modules. Generally, select option 3 (all) for installation. If you are unsure about other options, keep them as defaults. The complete installation usually takes a few minutes.
Run Nano
Nano-related files are located in the /opt/nano/ directory. You need to enter this directory to start the following services:
cd /opt/nano/core
./core start
cd ../cell
./cell start
cd ../frontend
./frontend start
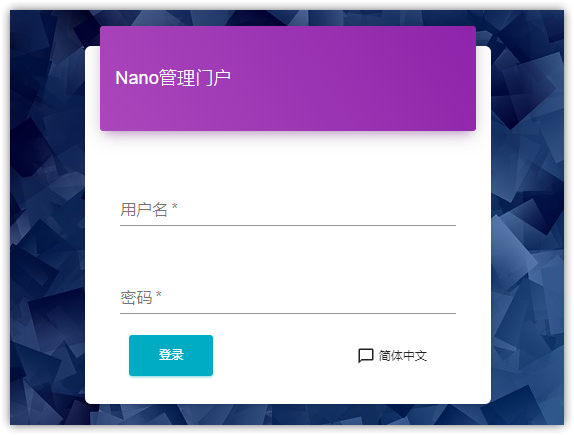
Once the front-end module starts successfully, it will prompt a listening address like "192.168.6.3:5870". Use Chrome or Firefox to open this address for platform management. The first time you open the WEB interface, you will be required to set up an account and password.
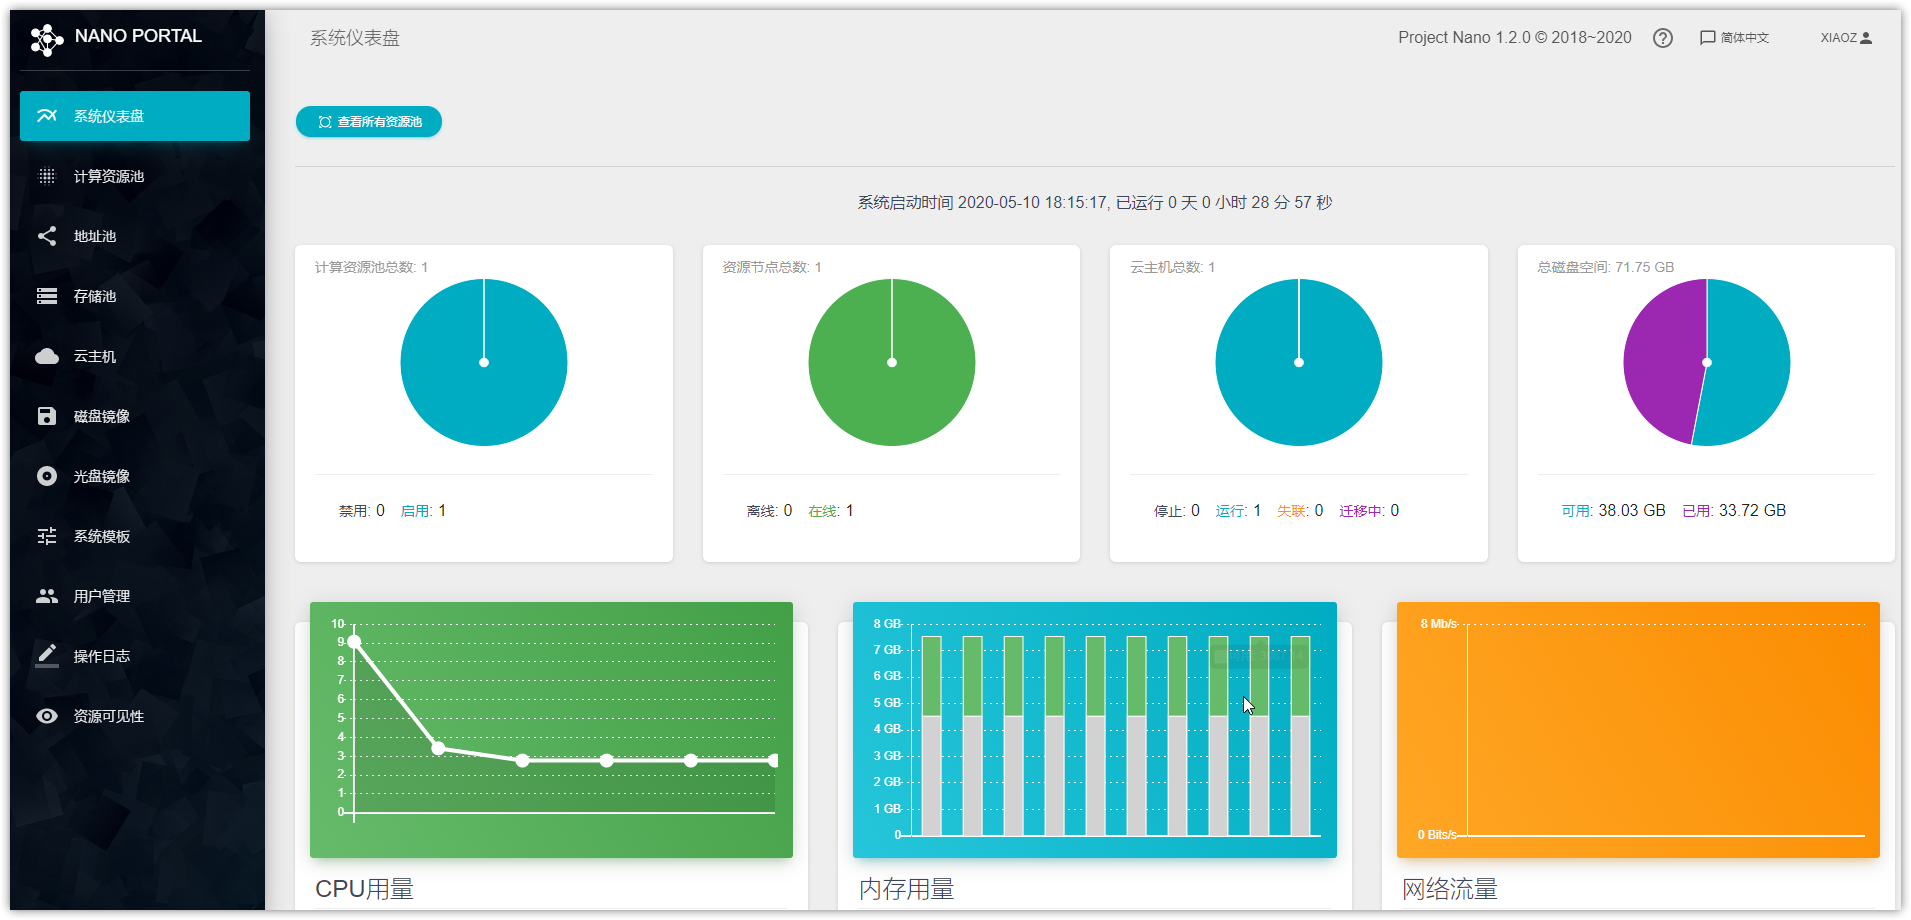
After entering the Nano WEB management interface, you will see the following content. The interface is quite beautiful.
First Time Use
Set Compute Resource Pool
Set resource nodes in the position shown below; otherwise, you cannot create cloud hosts normally.

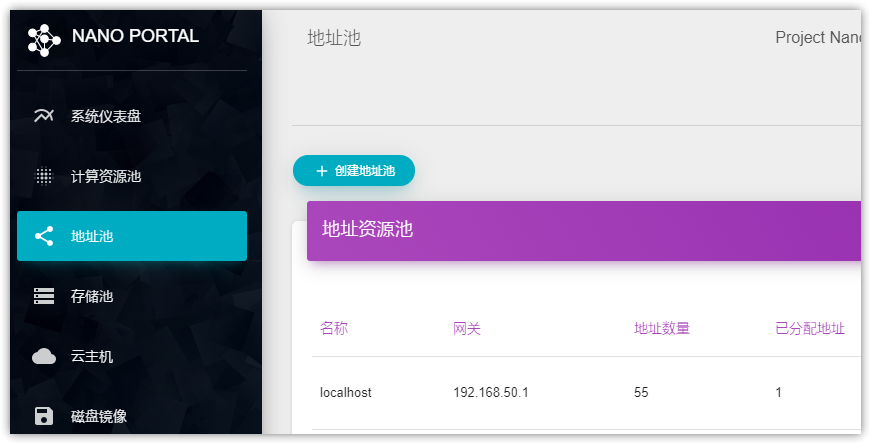
Address Pool
Set the address pool in the image below; otherwise, IP addresses cannot be automatically assigned to virtual machines. Also, ensure these addresses are normally available on the same network and are not filled in arbitrarily.
CD-ROM Images
System images can be downloaded from the official website first and then uploaded through the interface below. When xiaoz used Edge (Chromium) to upload images, it got stuck at 100% for an unknown reason. Later, switching to Chrome worked. The official website recommends using Chrome or Firefox browsers.
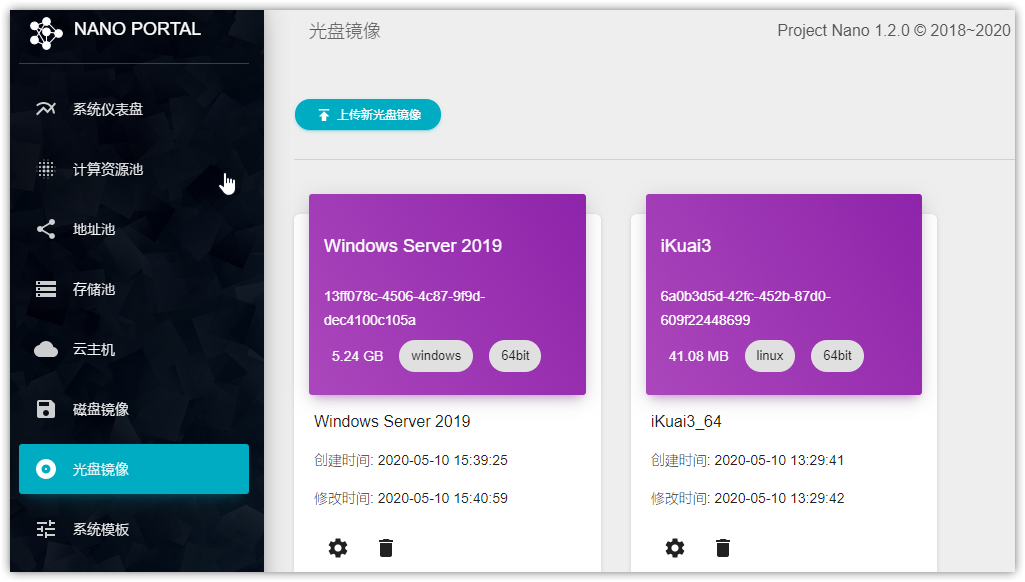
Uploaded CD-ROM images are located in the /opt/nano/core/data/media_images directory. Currently, it does not support downloading directly via wget on the host; images can only be uploaded online, which feels somewhat inconvenient.
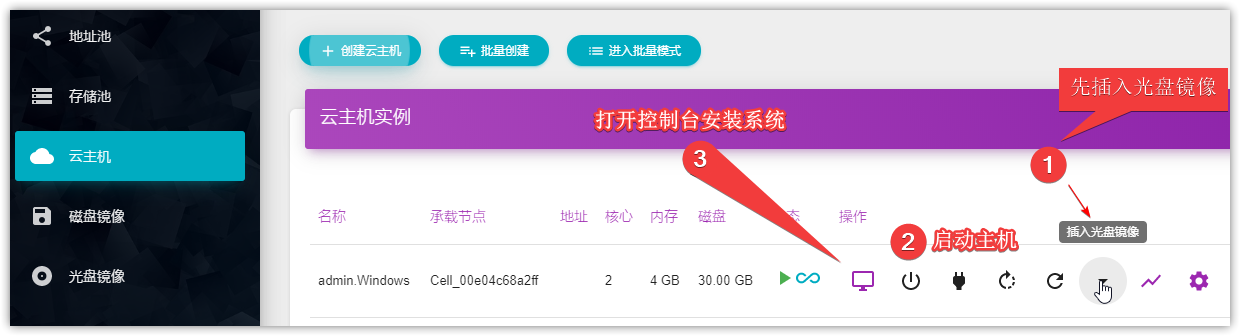
Create Cloud Host
After preparing the above conditions, you can create a cloud host. As shown in the image below, first insert the CD-ROM image, then start the system, and enter the console for installation.
Issues Encountered
After installing Windows Server 2019, xiaoz found that the Ctrl + Alt + Del shortcut key could not be sent from the console. The solution is to use a VNC client for connection.
When clicking resource monitoring, the browser prompts insufficient memory. This issue should occur with Windows virtual machines. The solution is to install virtio drivers and qemu agent. The download address is: https://fedorapeople.org/groups/virt/virtio-win/direct-downloads/archive-virtio/virtio-win-0.1.173-9/virtio-win.iso. Otherwise, Nano will freeze when viewing virtual machine resource monitoring.
Nano Script Management and Boot Startup
Entering the /opt/nano/core directory every time to manage Nano's three services is very inconvenient. We can write scripts to manage Nano. xiaoz has already written one that can be downloaded and used directly:
# Download management script
wget -O /usr/sbin/nano https://raw.githubusercontent.com/helloxz/shell/master/nano.sh
# Add execute permission
chmod +x nano
After adding the script, you can use the following commands to quickly manage Nano:
# Check nano status
nano status
# Stop nano
nano stop
# Start nano
nano start
# Restart nano
nano restart
Continue writing a systemd service to set up boot startup. Create a new nano service file vi /etc/systemd/system/nano.service with the following content:
[Unit]
Description=Nano - https://nanos.cloud/
After=network.target

[Service]
Type=forking
ExecStart=/usr/sbin/nano
ExecRestart=/usr/sbin/nano restart
ExecStop=/usr/sbin/nano stop

[Install]
WantedBy=multi-user.target
After adding the service, input systemctl daemon-reload to refresh the newly added nano service. Then you can use systemctl for management with the following commands:
# Set nano to start on boot
systemctl enable nano
# Start nano
systemctl start nano
# Stop nano
systemctl stop nano
# Restart nano
systemctl restart nano
Note: This service depends on the nano.sh script above, which xiaoz has placed on Github: https://github.com/helloxz/shell/blob/master/nano.sh
Summary
Nano is developed using Golang and can be executed without third-party software or dependency libraries, making installation very simple. Compared to other virtualization management platforms, Nano is easier to install and less prone to errors. xiaoz has only used VMware, ESXI, and Nano so far. ESXI must run with an image, while Nano only requires CentOS 7 for installation. Some netizens have shared that Nano is more user-friendly than PVE, but since I haven't used PVE, I cannot make a comparison.
Nano also has some shortcomings. For example, CD-ROM images must be uploaded online. If you are using a foreign independent server and the image is large, it can be a nightmare, whereas ESXI can directly wget on the host. Additionally, after installing a Windows virtual machine, the WEB console cannot send Ctrl + Alt + Del, so a VNC client had to be used.
Nano uses the MIT license, with no restrictions on personal use, modification, or commercial use. Nano can meet daily tinkering needs, but it feels not yet mature. For commercial or production environments, please consider carefully. (xiaoz is still encountering issues~)
This article partially references:
Finally, thanks to classmate "Li Zi (106****406)" for their enthusiastic help, which helped xiaoz avoid some pitfalls.