Quickly Deploy CertD with Docker for Free Wildcard SSL Certificates
Recently, various cloud service providers have shortened the validity period of free DV SSL certificates from one year to three months. In comparison, Let's Encrypt has long supported free wildcard SSL certificates and multi-domain SSL certificates, also with a three-month validity period. Since both options have the same validity period, choosing the wildcard SSL certificate provided by Let's Encrypt appears to be a more wise and reasonable choice.
For users familiar with acme.sh, this tool can automatically apply for and renew wildcard SSL certificates, greatly simplifying the operation process. Recently, xiaoz discovered a new tool named CertD, which can be regarded as the WEB version of acme.sh, offering a more convenient operation interface. Next, I will demonstrate how to quickly deploy CertD via Docker to apply for free wildcard SSL certificates.
CertD Features
- Fully automatic certificate application (supports domains registered via Alibaba Cloud, Tencent Cloud, Huawei Cloud, Cloudflare, etc.)
- Fully automatic deployment and certificate updates (currently supports deployment to hosts, Alibaba Cloud, Tencent Cloud, etc.)
- Supports wildcard domains/multi-domain certificates, allowing multiple domains to be combined into one certificate
- Email notifications
- Provides private deployment to ensure security
- Free
Deploying CertD with Docker
Next, the author will use the docker compose tool to privately deploy CertD. If you are not familiar with this, please go learn about it first.
Create a docker-compose.yaml file with the following content:
version: '3.3'
services:
  certd:
    # Image                                                  # ↓↓↓↓↓ --- 1. Image version number, recommended to change to a fixed version number [Optional]
    image: registry.cn-shenzhen.aliyuncs.com/handsfree/certd:1.23.1
    container_name: certd # Container name
    restart: unless-stopped # Auto-restart
    volumes:
      #   ↓↓↓↓↓ ------------------------------------------------------- 2. Database and certificate storage path, default stored in the /data/certd/ directory on the host [Optional]
      - ./data:/app/data
      - ./ssl:/data/ssl
    ports: # Port mapping
      #  ↓↓↓↓ ----------------------------------------------------------3. If there is a port conflict, you can modify the first 7001 to another non-conflicting port number [Optional]
      - "7001:7001"
    dns:
      # If you encounter errors like getaddrinfo ENOTFOUND, try modifying or commenting out the dns configuration
      - 223.5.5.5
      - 223.6.6.6
      - 8.8.8.8
      - 8.8.4.4
    environment: # Environment variables
      - TZ=Asia/Shanghai
      - certd_system_resetAdminPassword=false
      - certd_cron_immediateTriggerOnce=false
      - VITE_APP_ICP_NO=
1.23.1: This is the CertD version number; you can also change it tolatest../data: Local mounted directory used to persistently save CertD data; you can modify it to an absolute path../ssl: Directory used to export SSL certificates; this was added by the author.
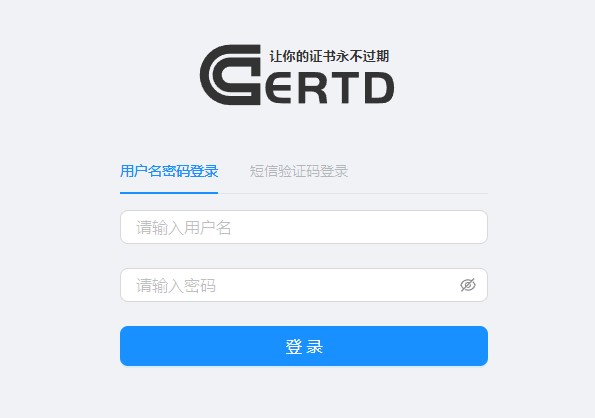
Then use the command docker-compose up -d to start the container, and access it via http://your_server_ip:7001. The default username and password are admin/123456; be sure to change them after logging in.
Basic Usage
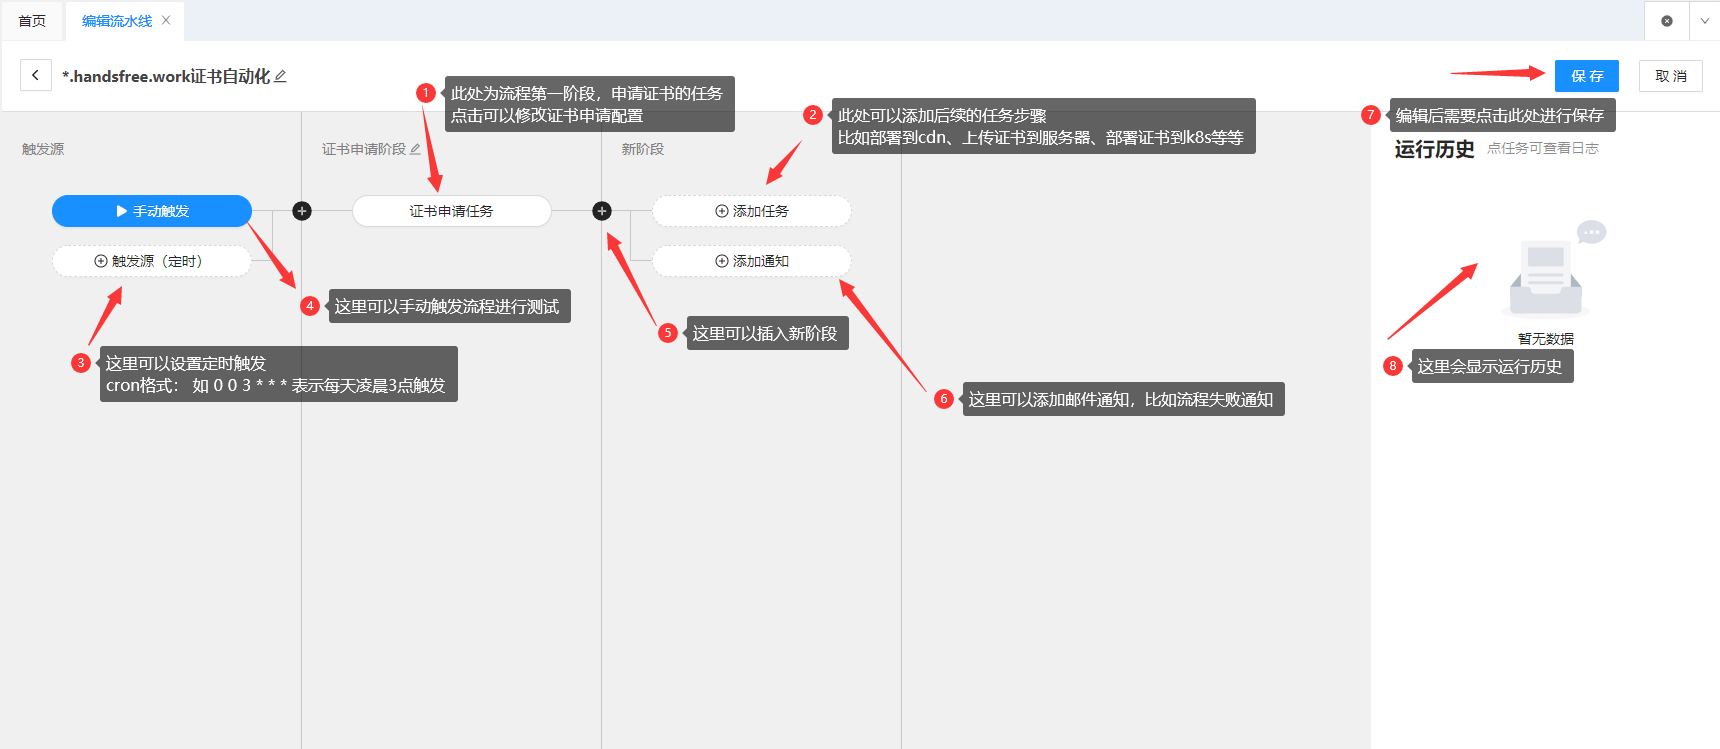
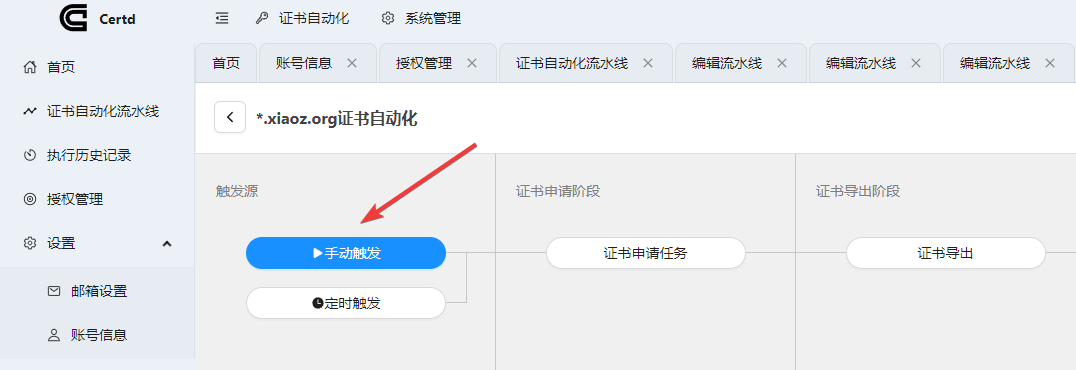
The automation process of CertD is shown in the screenshot below.
First, you need to add DNS authorization in Authorization Management. Currently, it supports mainstream DNS providers such as DNSPOD, Tencent, Alibaba Cloud, Huawei Cloud, and CloudFlare.
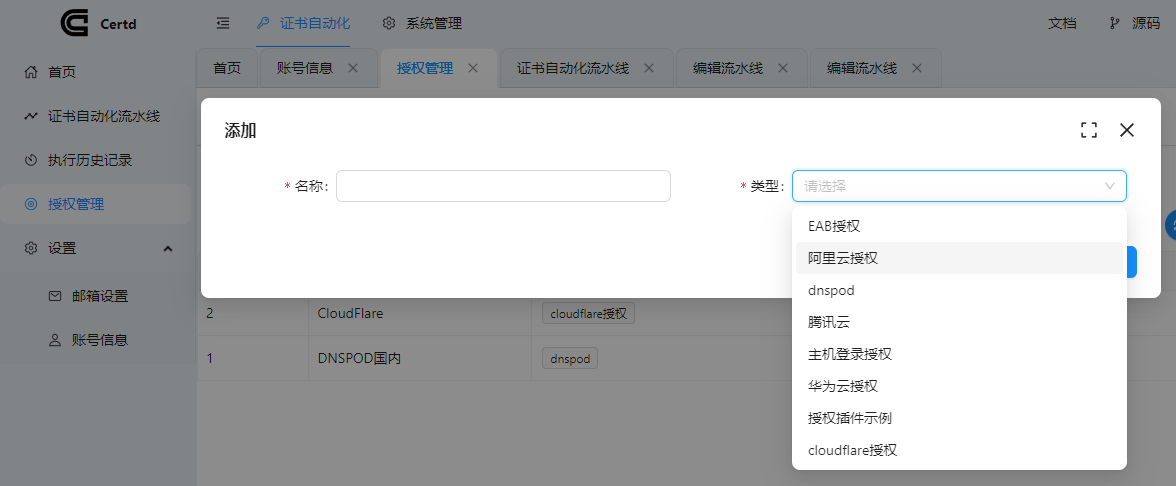
Choose the DNS provider that you use for your domain!
Next, add a Certificate Automation Pipeline and fill in the required information such as domain name and email according to your situation.
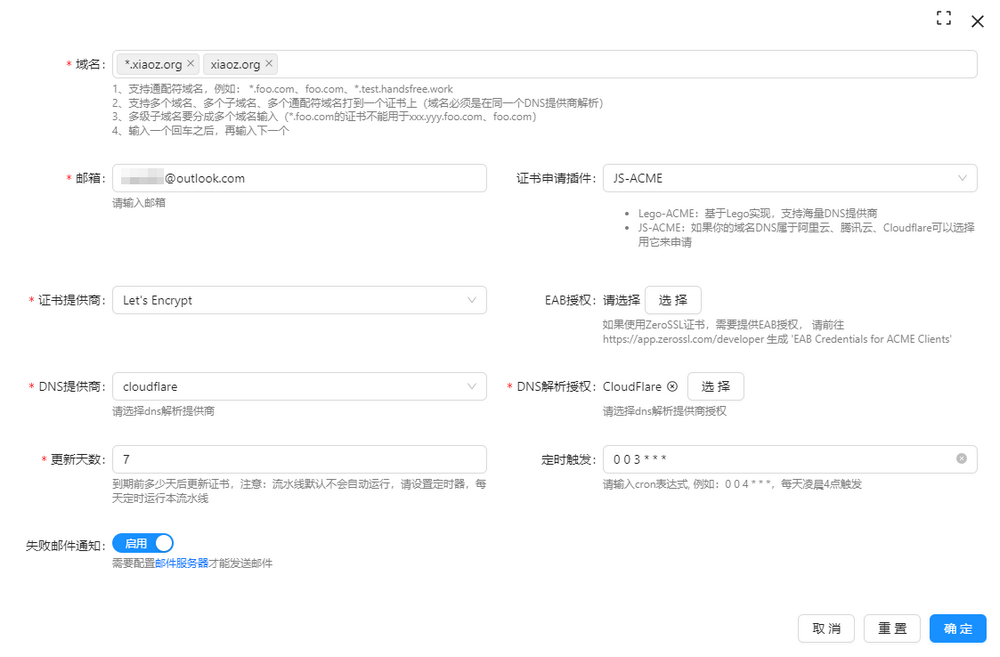
- Domain Name: If you need a wildcard certificate, enter
*.xxx.com. Pressing Enter allows you to add multiple domains. Let's Encrypt supports wildcard and multi-domain certificates, provided these domains use the same DNS provider. - Certificate Provider: Default to Let's Encrypt.
- DNS Provider: Select the service provider you use for your domain.
- Scheduled Trigger: Recommended to fill in for automatic renewal later. For example,
0 0 4 * * *means checking once every day at 4 AM.
After adding, if you need to apply for an SSL certificate immediately, simply click Manual Trigger. If the configuration is correct, the application usually takes a few minutes.
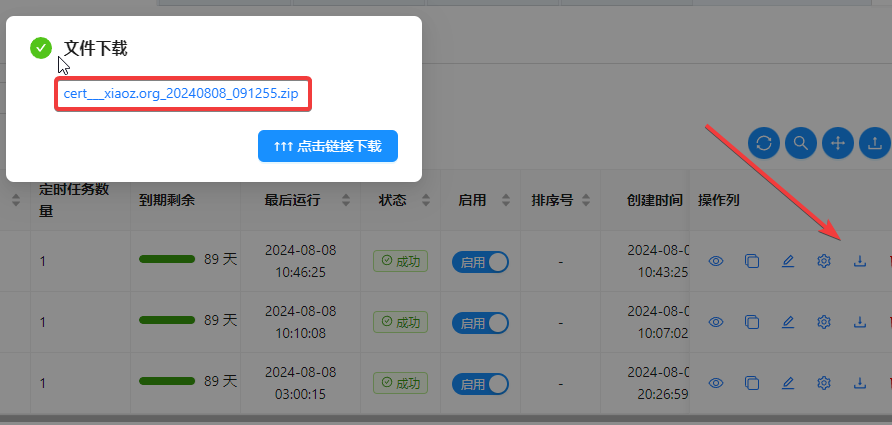
After the application is complete, click the download button to download the SSL certificate to your local machine.
You can also manually add more steps, such as automatically exporting the certificate or uploading it to Alibaba Cloud, Tencent Cloud, etc. The automation level is quite high, though the number of supported vendors is currently limited.

Important Notes
During the application process, xiaoz encountered an application failure. The reason was that before the application, my domain DNS had a host record named _acme-challenge, which conflicted with the hostname required by Let's Encrypt. Therefore, it is best to delete any existing _acme-challenge host records before applying.
Additionally, the author has not pushed the CertD image to Docker Hub, so you must use the Alibaba Cloud image address provided by the author above; otherwise, it cannot be pulled.
Conclusion
CertD is relatively professional and may not be suitable for beginners, but it is well-suited for operations and development personnel. Its automated certificate management process can significantly improve the efficiency of operations and development teams. Currently, the number of service providers supported by CertD is limited, and it is expected to expand to more platforms in the future. At the same time, thanks to the author's hard work.
CertD Open Source Address: https://github.com/certd/certd