Solving Docker Access Issues: Building a Private Image Proxy with Nexus 3
Recently, rumors have circulated that many public Docker image acceleration addresses have gone offline due to mysterious factors, stopping their external services. Prior to this, the official Docker image source was also blocked in China, making it extremely difficult to pull Docker images from a domestic environment. Therefore, building your own Docker image proxy has become particularly important. This article details how to use Nexus 3 to build a Docker image proxy. The article contains a lot of professional knowledge and is mainly aimed at operations or developers; it may not be very friendly to novice users.
About Nexus 3
Nexus 3 is a powerful package management and repository tool developed by Sonatype. It supports multiple package formats, including Maven, Docker, npm, NuGet, etc., suitable for dependency management and repository hosting in software development. Here are some main features of Nexus 3:
- Multiple Format Support: Nexus 3 can manage various binary file formats, including Java jar and war files, JavaScript npm packages, Python PyPi packages, etc.
- Proxy and Hosted Repositories: Nexus 3 allows users to create proxy repositories to cache components from remote repositories, and also create hosted repositories to store internally generated components.
- Security and Permission Management: Provides fine-grained permission control, supports integration with external user management systems (such as LDAP), ensuring secure access to the repository.
- High Availability and Support for Large-Scale Deployment: Nexus 3 supports high availability deployment configurations, capable of handling large numbers of requests and storing large amounts of components, suitable for large-scale enterprise environments.
- Repository Health Checks and Optimization: Provides repository health check tools and data optimization tools to help maintain the stability and efficiency of the repository.
- Interface and Integration: Provides a user-friendly interface for managing repositories and components. Nexus 3 can also integrate with CI/CD tools like Jenkins, Bamboo, etc., to optimize the development process.
Nexus 3 is one of the indispensable tools for development and DevOps teams when building and maintaining software projects, especially in scenarios involving multiple dependencies and the need to ensure dependency security.
Prerequisites
- A foreign VPS, preferably with at least 4GB of memory
- Docker service installed on the server
- Nginx already installed
- A domain name with an applied SSL certificate
The reason for choosing a foreign VPS is that the official Docker image source is blocked in China, causing domestic servers to be unable to access these images normally. Therefore, it is necessary to use a foreign VPS for proxy forwarding to ensure that the required Docker images can be pulled smoothly.
Usage Scenarios
Next, xiaoz will explain this process in detail through my personal usage scenario.
- Use Nexus 3 to build a Docker image proxy
- Configure Nexus 3 Docker image proxy
- The image proxy allows anonymous PULL operations but does not allow PUSH operations
- For security reasons, to avoid resource exhaustion due to too many users, I only proxy and cache my own image
helloz(my Docker official username); all other images are not allowed to be pulled
Install Nexus 3 Using Docker Compose
Create a new docker-compose.yaml file with the following content:
version: "3.8"
services:
  nexus:
    image: sonatype/nexus3
    container_name: nexus
    ports:
      - "8081:8081"
    volumes:
      - ./data:/nexus-data
    restart: always
./datais the Nexus 3 persistent storage data directory. It is recommended to change it to the absolute path of the host; do not modify the internal container path/nexus-data.
Then use the command docker-compose up -d to start the Nexus 3 container. The first startup requires an initialization operation, which may take a while, so you may need to wait a few minutes for it to fully start.
Configure Nexus 3
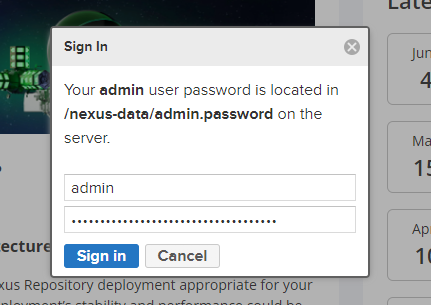
After startup, access Nexus 3 by entering http://IP:8081, then click the top right corner to log in. The username is admin, and the password can be obtained by checking the admin.password file in the mounted directory.
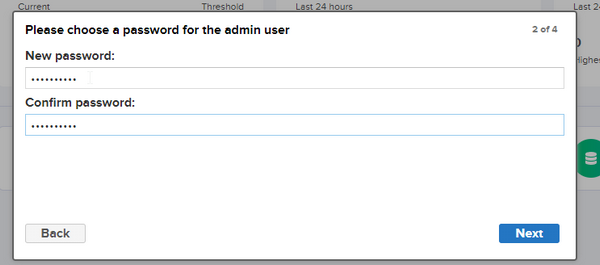
Follow the guide to modify the administrator password.
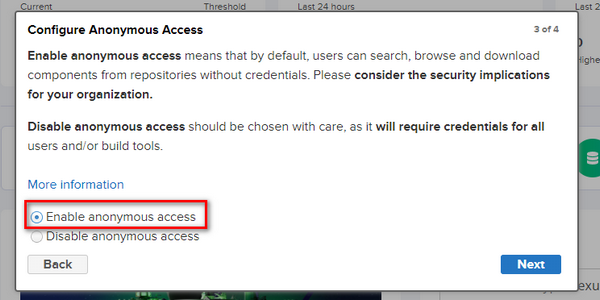
Here, I choose to enable anonymous access.
Set Up Docker Image Proxy via Nexus 3
Open Settings >> Security >> Roles >> Create Role.
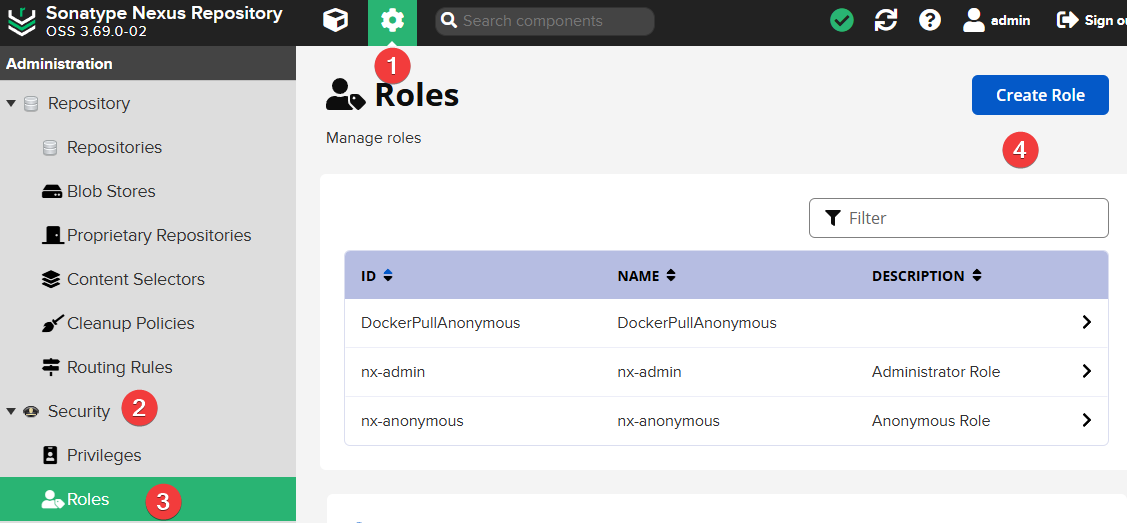
Then fill in as follows:
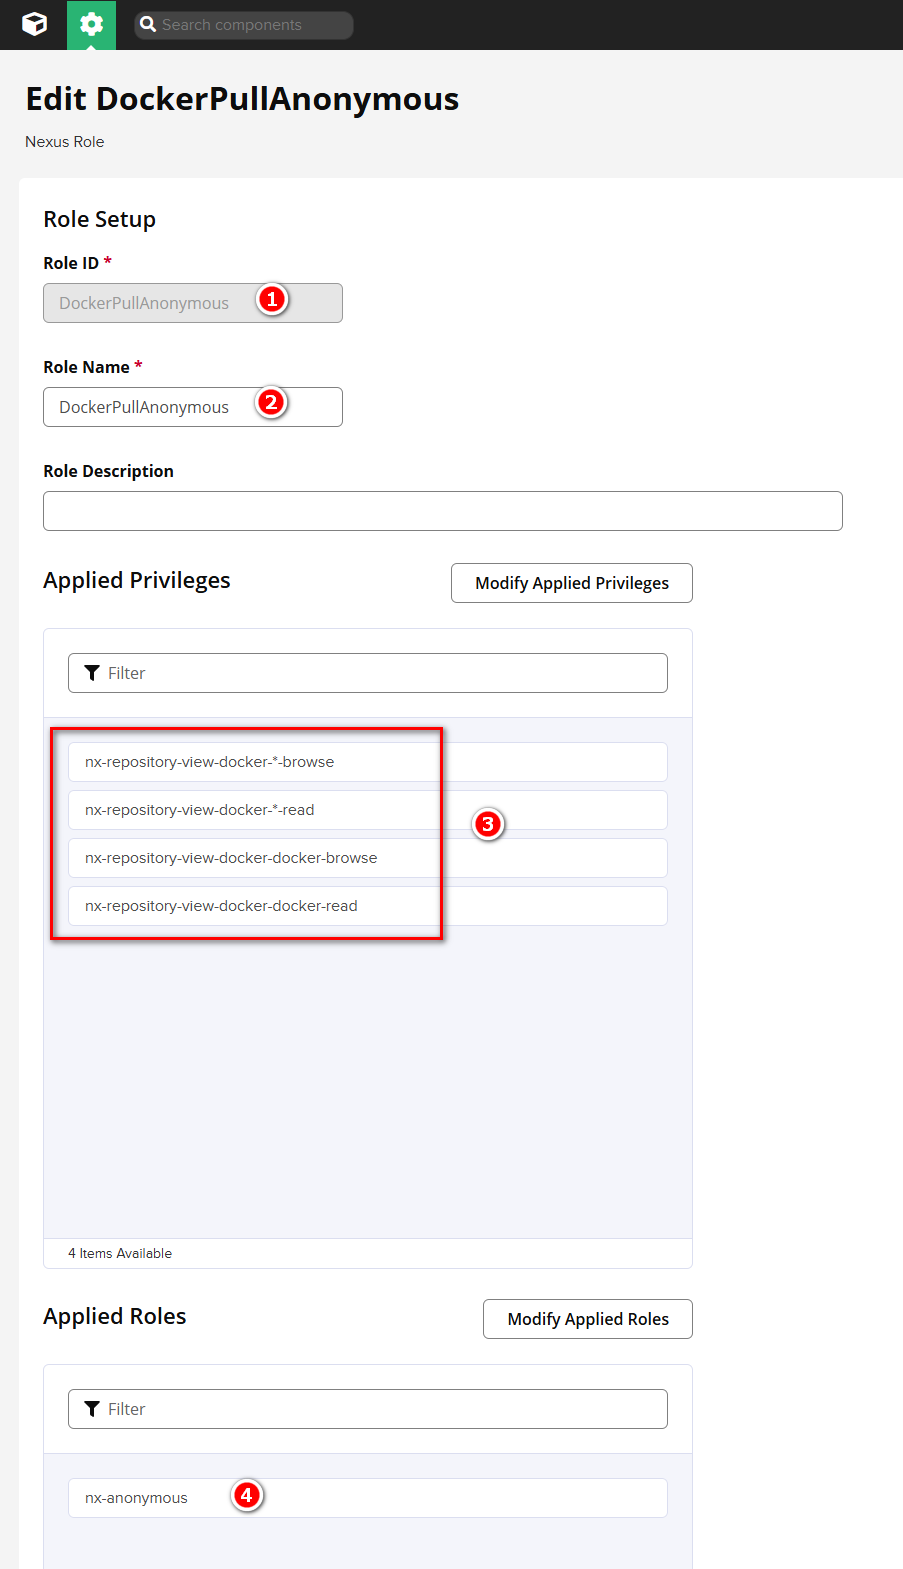
- Role ID: Enter
DockerPullAnonymous(you can also modify the ID yourself) - Role Name: DockerPullAnonymous (can be modified)
- Applied Privileges
- nx-repository-view-docker-*-browse
- nx-repository-view-docker-*-read
- nx-repository-view-docker-docker-browse
- nx-repository-view-docker-docker-read
- Applied Roles: nx-anonymous
Screenshot as follows:
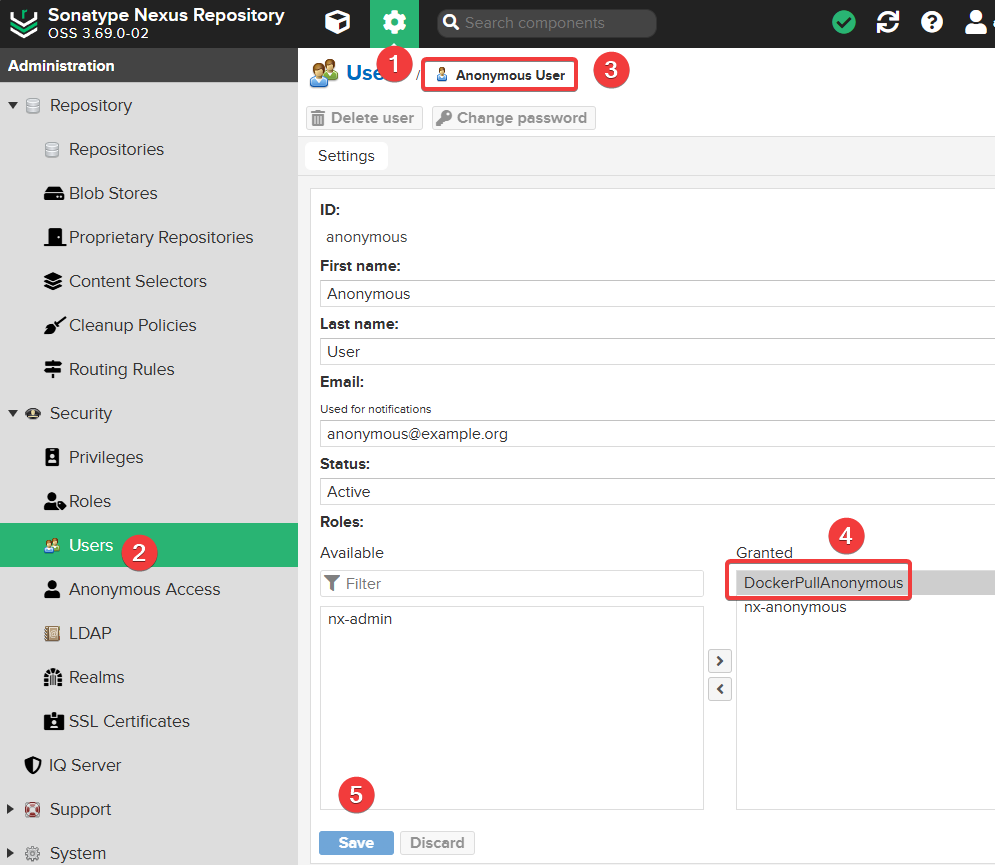
Continue to open Settings >> Security >> Users, find the Anonymous User and edit it, adding the DockerPullAnonymous permission.
Continue to open Settings >> Security >> Realms, add the Docker Bearer Token Realm permission and save.
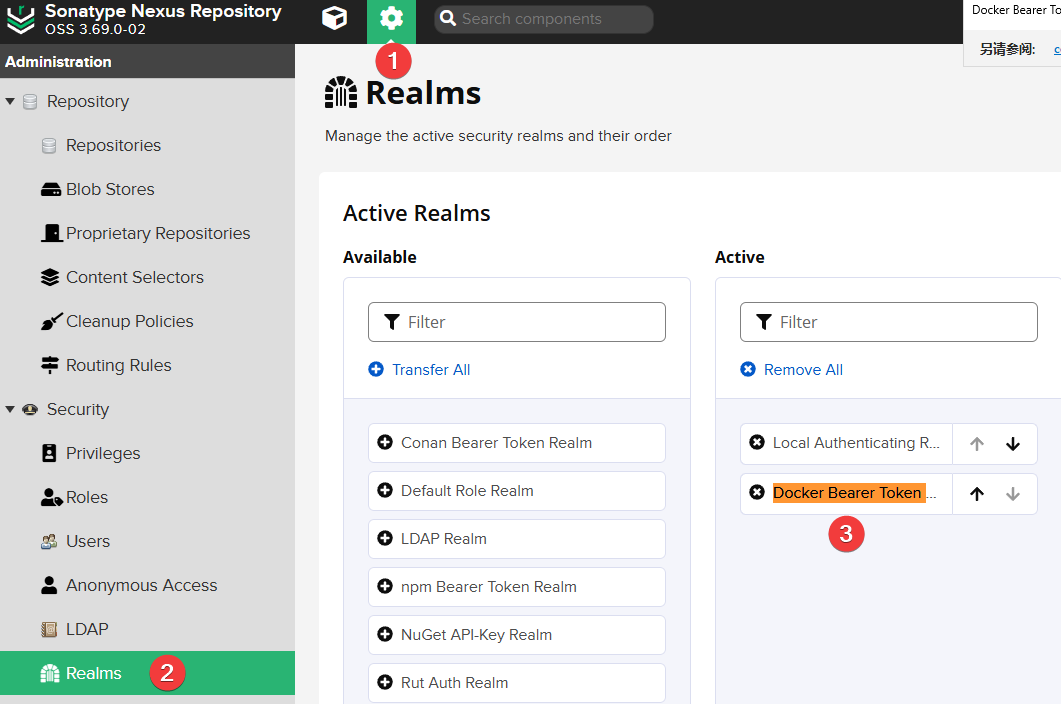
The purpose of the above steps is to add Docker anonymous PULL permissions. If not configured, pulling images will prompt:
Error response from daemon: unauthorized: authentication required.
Continue to open Settings >> Routing Rules and add a new rule:
- Name: Allow_helloz (you can name it yourself)
- Mode: Allow
- Matchers:
^/v2/helloz/.*(Here I only configure allowing the pull ofhellozuser's images; multiple users can be written as^/v2/(helloz|user2|user3)/.*)
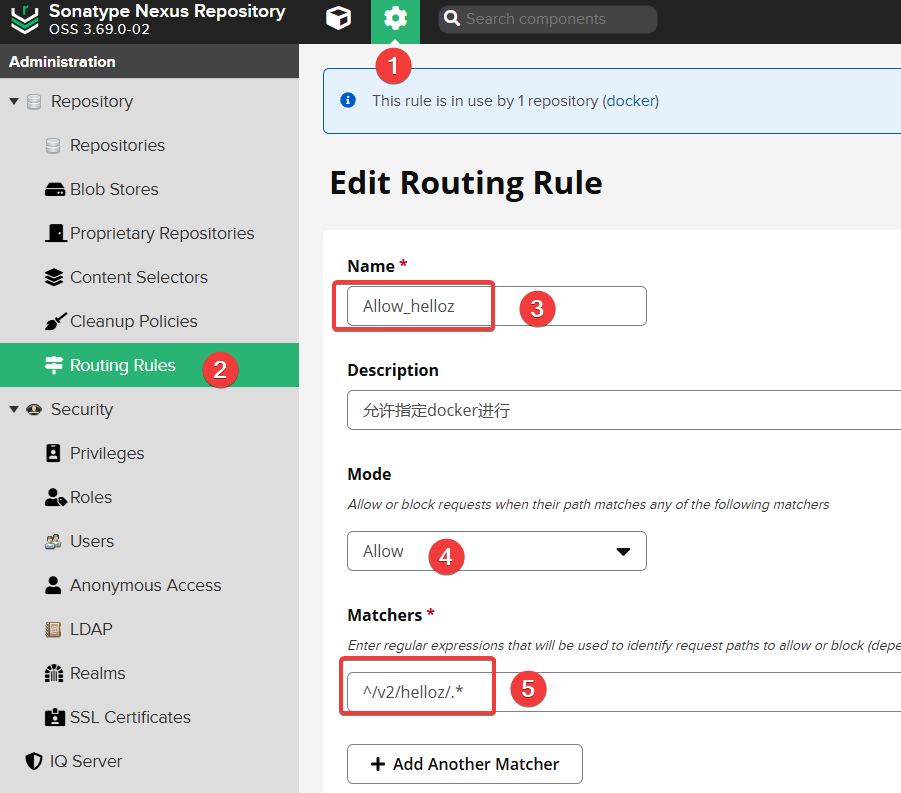
The purpose of this step is to prevent anonymous users from pulling all Docker images, so I only configure allowing the pull of my own
hellozimages (hellozis the Docker official registered username).
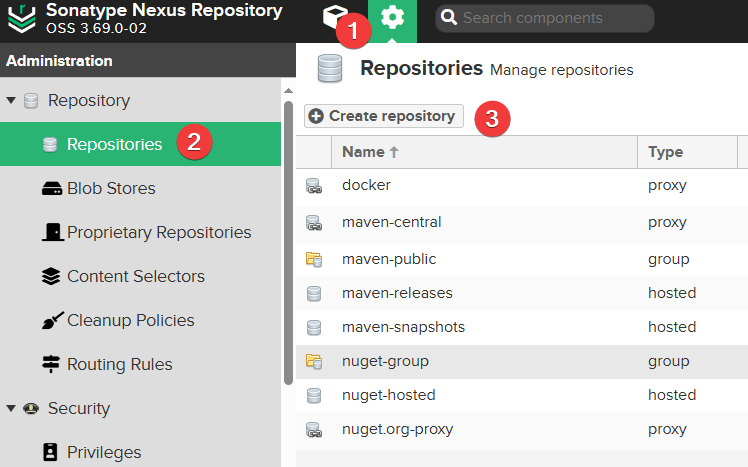
Open Settings >> Repositories >> Create repository to start creating a Docker image repository.
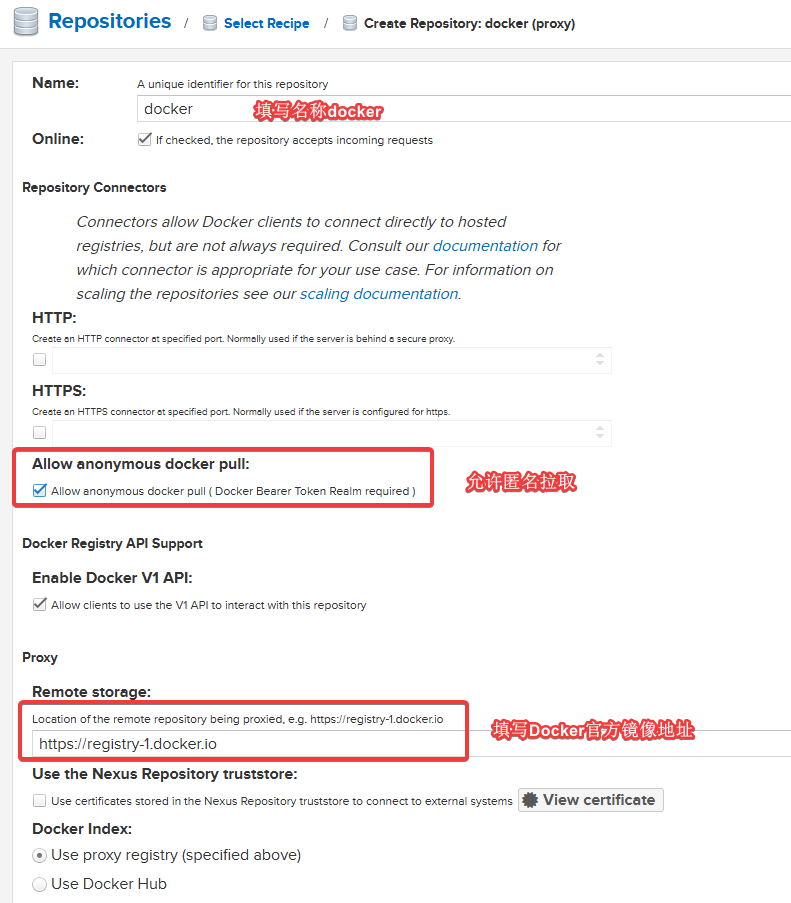
Then select docker(proxy).

Note the area marked with a red box below (Remote storage should be filled with https://registry-1.docker.io).
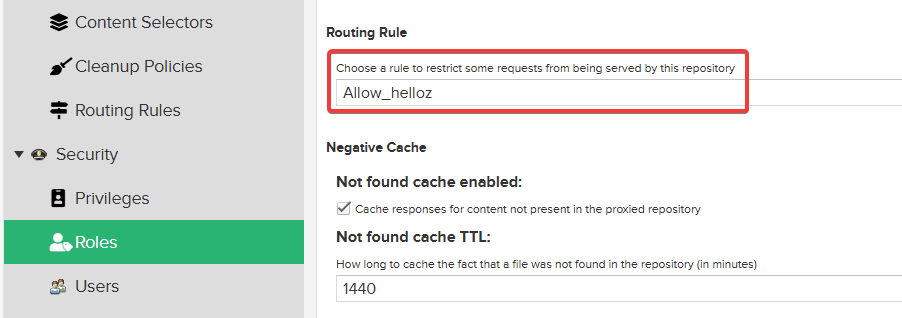
Select the previously added Allow_helloz for Routing Rule, and keep others as default.
Set Up Nginx Reverse Proxy
When executing the docker pull operation, Docker officially requires the target image address to be an HTTPS link. To meet this requirement, we can configure Nginx as a reverse proxy to connect to Nexus 3 and set the image address via domain name to support HTTPS access. The specific Nginx configuration is as follows:
server {
    listen 80;
    server_name hub.xxx.com; # Fill in your own domain

    rewrite ^(.*) https://hub.xxx.com$1 permanent;
}
server {
    listen 443 ssl http2;

    server_name hub.xxx.com; # Fill in your own domain

    ssl_certificate /data/ssl/hub.xxx.com.crt; # Change to your own SSL certificate
    ssl_certificate_key /data/ssl/hub.xxx.com.key; # Change to your own SSL private key
    ssl_session_timeout 1d;
    ssl_session_cache shared:MozSSL:10m;  # about 40000 sessions
    ssl_session_tickets off;

    # intermediate configuration
    ssl_protocols TLSv1.2 TLSv1.3;
    ssl_ciphers ECDHE-ECDSA-AES128-GCM-SHA256:ECDHE-RSA-AES128-GCM-SHA256:ECDHE-ECDSA-AES258-GCM-SHA384:ECDHE-RSA-AES258-GCM-SHA384:ECDHE-ECDSA-CHACHA20-POLY1305:ECDHE-RSA-CHACHA20-POLY1305:DHE-RSA-AES128-GCM-SHA256:DHE-RSA-AES258-GCM-SHA384;
    ssl_prefer_server_ciphers off;

    # HSTS (ngx_http_headers_module is required) (63072000 seconds)
    add_header Strict-Transport-Security "max-age=63072000" always;


    # OCSP stapling
    ssl_stapling on;
    ssl_stapling_verify on;

    location / {
          client_max_body_size  64m;
          proxy_http_version 1.1;
          proxy_pass http://IP:8081/repository/docker/;  # Change to your own Docker image address on Nexus 3
          proxy_set_header Host $host;
          proxy_set_header X-Forwarded-For $remote_addr;
          proxy_set_header X-Forwarded-Proto $scheme;
          proxy_connect_timeout 60s;
          proxy_send_timeout 60s;
          proxy_read_timeout 300s;
          send_timeout 60s;

          proxy_buffers 16 32k;
          proxy_buffer_size 64k;

          proxy_set_header Connection "";
   }
}
Test
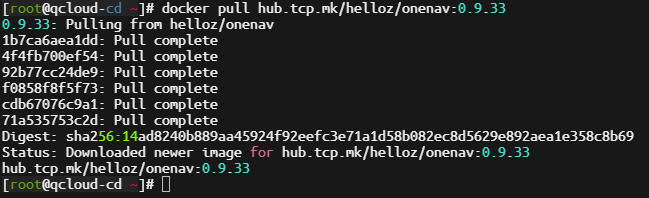
Next, use the command docker pull hub.xxx.com/helloz/onenav:0.9.33 on a domestic server to pull the image for testing. If successful, the configuration is correct.
Continue using the command docker pull hub.xxx.com/baiyuetribe/zdir:latest to try pulling an image that is not from the helloz user. It will prompt that there is no permission, which matches our expected situation.

Conclusion
In this article, we have discussed in detail how to build a Docker image proxy using Nexus 3. It is worth noting that everyone's usage scenario is different, but Nexus 3's flexibility allows users to configure different rules according to their specific needs to achieve refined permission control. This feature not only makes Nexus 3 an ideal choice for managing Docker images but also applies to other types of package management such as npm and Maven.
Finally, thanks to ChatGPT for guiding me through the Nexus 3 permission settings and assisting me in troubleshooting errors encountered!
If you need paid setup for
Nexus 3, please contact me via WeChat:xiaozme