How to Install macOS on Intel NUC8i5BEH: A Step-by-Step Guide
Over a year ago, I purchased a modified Intel NUC8i5BEH from a well-known online seller (with the network card upgraded to Broadcom 2CS) to better support Apple drivers. My original intention was to build a Hackintosh.
Due to various reasons, I went through a process from Hackintosh (macOS) to Deepin and then to Windows 10, leaving my NUC 8 gathering dust for over half a year. Recently, because I needed to package a macOS client for AsBot, I took the NUC8 out again, reinstalled the Hackintosh system, and put it back to work.
According to netizens, the Intel NUC8i5BEH is the most suitable hardware for building a Hackintosh. While hardware compatibility is not a concern, reinstalling the Hackintosh system took me most of a day. This article aims to record my experience and share it with others to avoid similar pitfalls.

Preparation
- Intel NUC8i5BEH host
- One USB drive (32GB or larger), formatted to FAT32
- macOS system image
- EFI files
- balenaEtcher (for burning the system image)
- Windows 10 system (all subsequent operations will be performed under Windows)
Burning the System Image
- macOS Image Address: https://www.aliyundrive.com/s/y6DE6ipV3g7 [Extraction Code: 16rk]
After downloading the image, remove the .pdf suffix and keep the .dmg suffix.
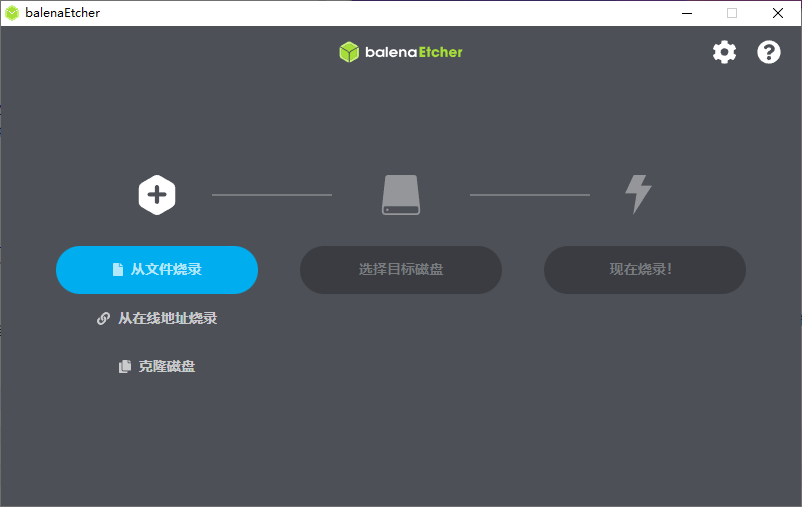
- Download balenaEtcher: balenaEtcher-Portable-1.18.4.exe
balenaEtcher is used to burn the macOS image. Open the software, select "Flash from file," choose the downloaded macOS image (.dmg), select the USB drive in the second step, and proceed with the burning in the third step.
Modifying EFI Files
Next, you need to replace the default EFI with an OpenCore EFI file.
- OpenCore EFI Download Address: https://www.aliyundrive.com/s/hNc9iDWtx25 [Extraction Code: hy77]
This file uses a .exe self-extractor. Double-clicking it will yield an EFI folder, which we will keep for later use.
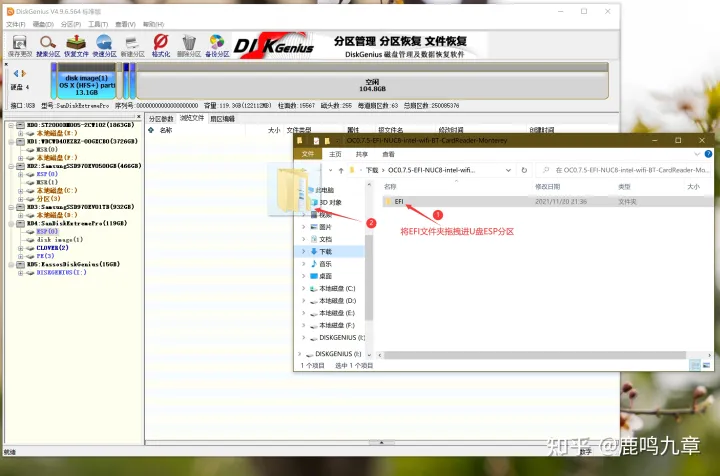
Continue from the previous step: first, unplug the USB drive, then reinsert it into the computer. Open the DiskGenius partitioning software (Download), locate the EFI folder inside the USB drive, and forcibly delete all contents (the screenshot shows the ESP partition, but it could also be the EFI partition).
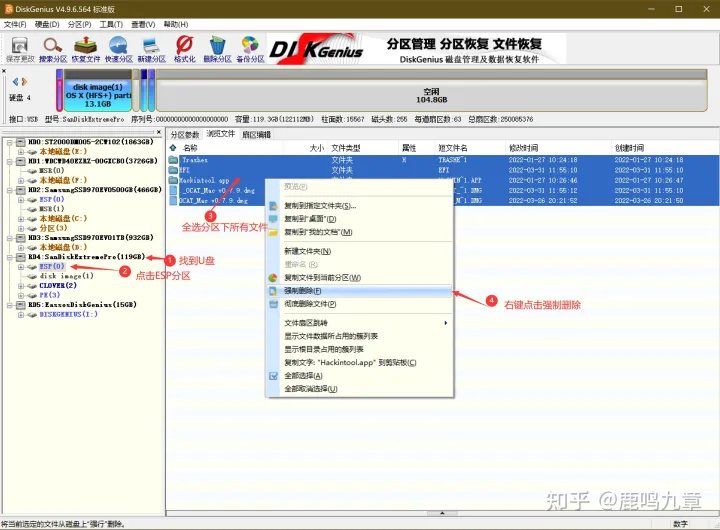
Then, copy the downloaded EFI folder into the EFI partition.
Setting NUC8 BIOS
When the NUC8 boots and displays the Intel logo, press the F2 key to enter the BIOS settings. Configure according to the requirements below, then press F10 to save and shut down.
Detailed settings:
Press F2 to enter BIOS, then reset BIOS to factory default settings.
Boot -> Secure Boot -> "Secure Boot": Uncheck
Security -> Security Features -> "Inter VT for directed I/VO (VT-d)": Uncheck
Boot -> Boot Priority -> Legacy Boot Priority -> "Legacy Boot": Uncheck
Boot -> Boot Configuration -> UEFI Boot -> "Fast Boot": Uncheck
UEFI Boot -> "Boot USB Devices First": Check
UEFI Boot -> "Boot Network Devices Last": Check
Boot Devices -> "Network Boot": Disable
Power -> Secondary Power Settings -> "Wake on LAN from S4/S5": Stay Off
Disk Partitioning
The NUC8 has only one solid-state drive, and the Hackintosh will be installed on this drive without considering a multi-system setup. Here, you need to use a PE tool to partition in advance. The hard drive must retain an EFI partition; this is crucial, otherwise, you won't be able to boot from the hard drive later. Initially, I did not retain the hard drive's EFI partition, which caused a pitfall and wasted several hours.
Installing macOS
Insert the USB drive. When the NUC8 boots, press F10 to select the "XXXX_0" boot option (the OpenCore boot item is usually number 0, the first one).
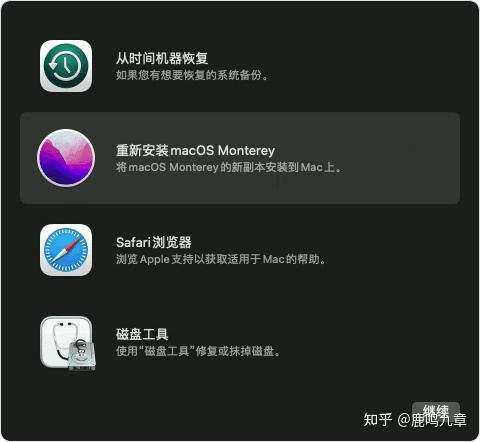
Select "install macOS Monterey." After the Apple logo appears, the system will boot into the installation options interface.

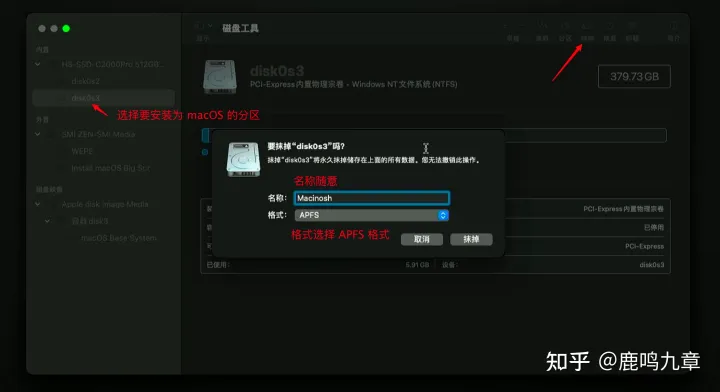
Click on Disk Utility, select the hard drive where you want to install macOS (it is recommended to use the entire drive without any partitions). Click "Erase" in the top right corner, enter a disk name in the pop-up window (the name can be arbitrary but must not contain Chinese characters), and ensure the format is set to APFS. Click "Erase" and confirm. After completion, close Disk Utility and return to the installation options interface. Click "Install macOS Monterey."
Then, select the freshly erased hard drive to install macOS and click Continue. The system will automatically install. During the installation process, the system will restart multiple times; no manual intervention is required. The installation time depends on the read/write performance of the USB drive (so it is recommended to use a USB drive with better read/write performance to create the bootable drive).
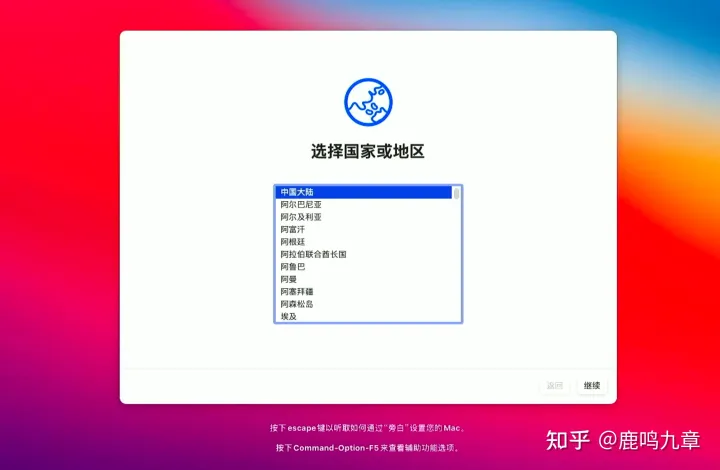
After installation is complete, the welcome and setup interface will appear. Configure as needed, but do not set up iCloud yet.
Establishing Hard Drive EFI Boot
After the new system is successfully installed, the EFI boot is still located on the USB drive, requiring the USB to be plugged in for every boot. Obviously, you cannot keep the USB drive plugged in all the time. Therefore, you need to copy the EFI files from the USB drive to the EFI partition on the hard drive.
- Download OpenCore Configurator software: OCC.zip
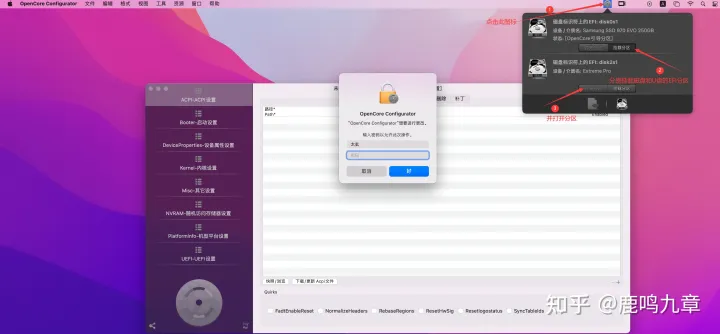
Use the OpenCore Configurator tool to mount and open the EFI partitions of both the hard drive and the USB drive. There are two partitions:
- The hard drive's EFI partition (see the "Disk Partitioning" step above)
- The USB drive's EFI partition
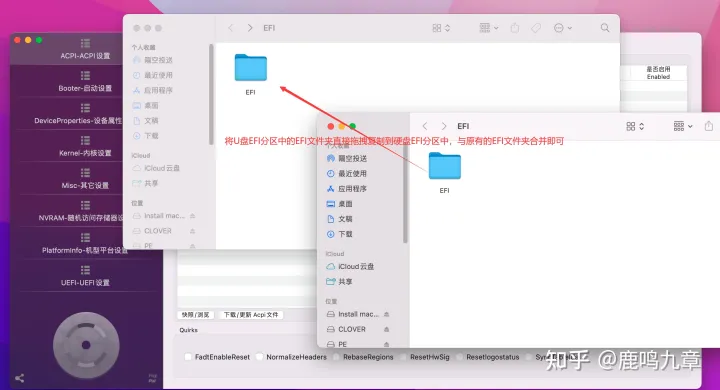
Simply drag the entire EFI folder from the USB drive to the hard drive's EFI partition to merge it with the existing EFI folder in the partition.
Then, unplug the USB drive and restart macOS to test. If it boots normally, the hard drive EFI boot has been successfully established.
Three-Code Injection
After the system installation is complete, you need to inject the three codes (Serial Number, Board Serial Number, and SmUUID) into the Hackintosh to "whiten" it, avoid account bans, and unlock features like iCloud, FaceTime, iMessage, and Sidecar. Although I don't use these features, I decided to inject the three codes to avoid any future concerns.
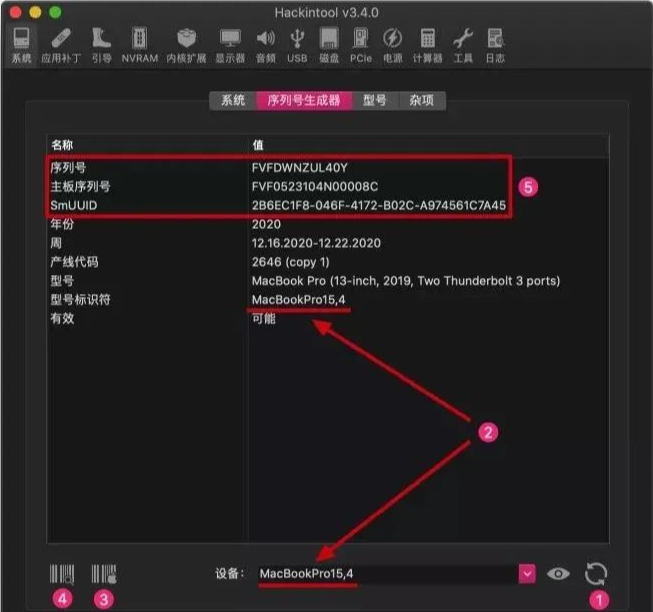
- Download: Hackintool.zip
This tool is used to generate serial numbers and other information. Refer to the screenshot below (record the Serial Number, Board Serial Number, and SmUUID):
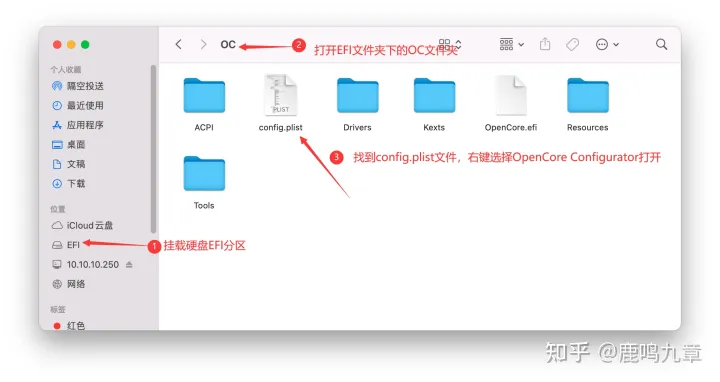
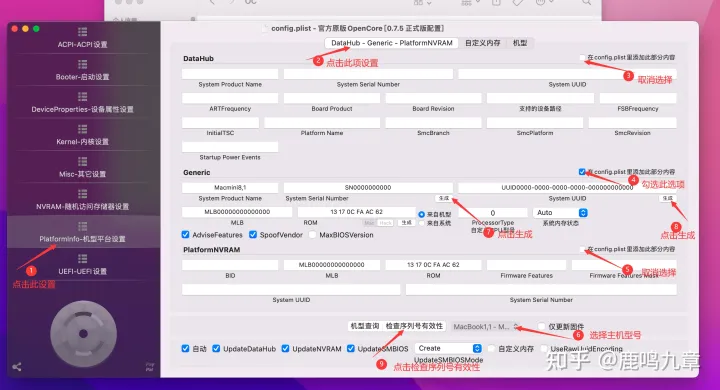
Then, continue by opening the "OpenCore Configurator" software, mounting the hard drive's EFI partition, and locating the configuration file config.plist under the OC folder in EFI. Right-click and choose to open it with OpenCore Configurator. Follow the instructions in the screenshot to generate the serial number, check the validity of the serial number, confirm everything is correct, save the changes, and then restart.
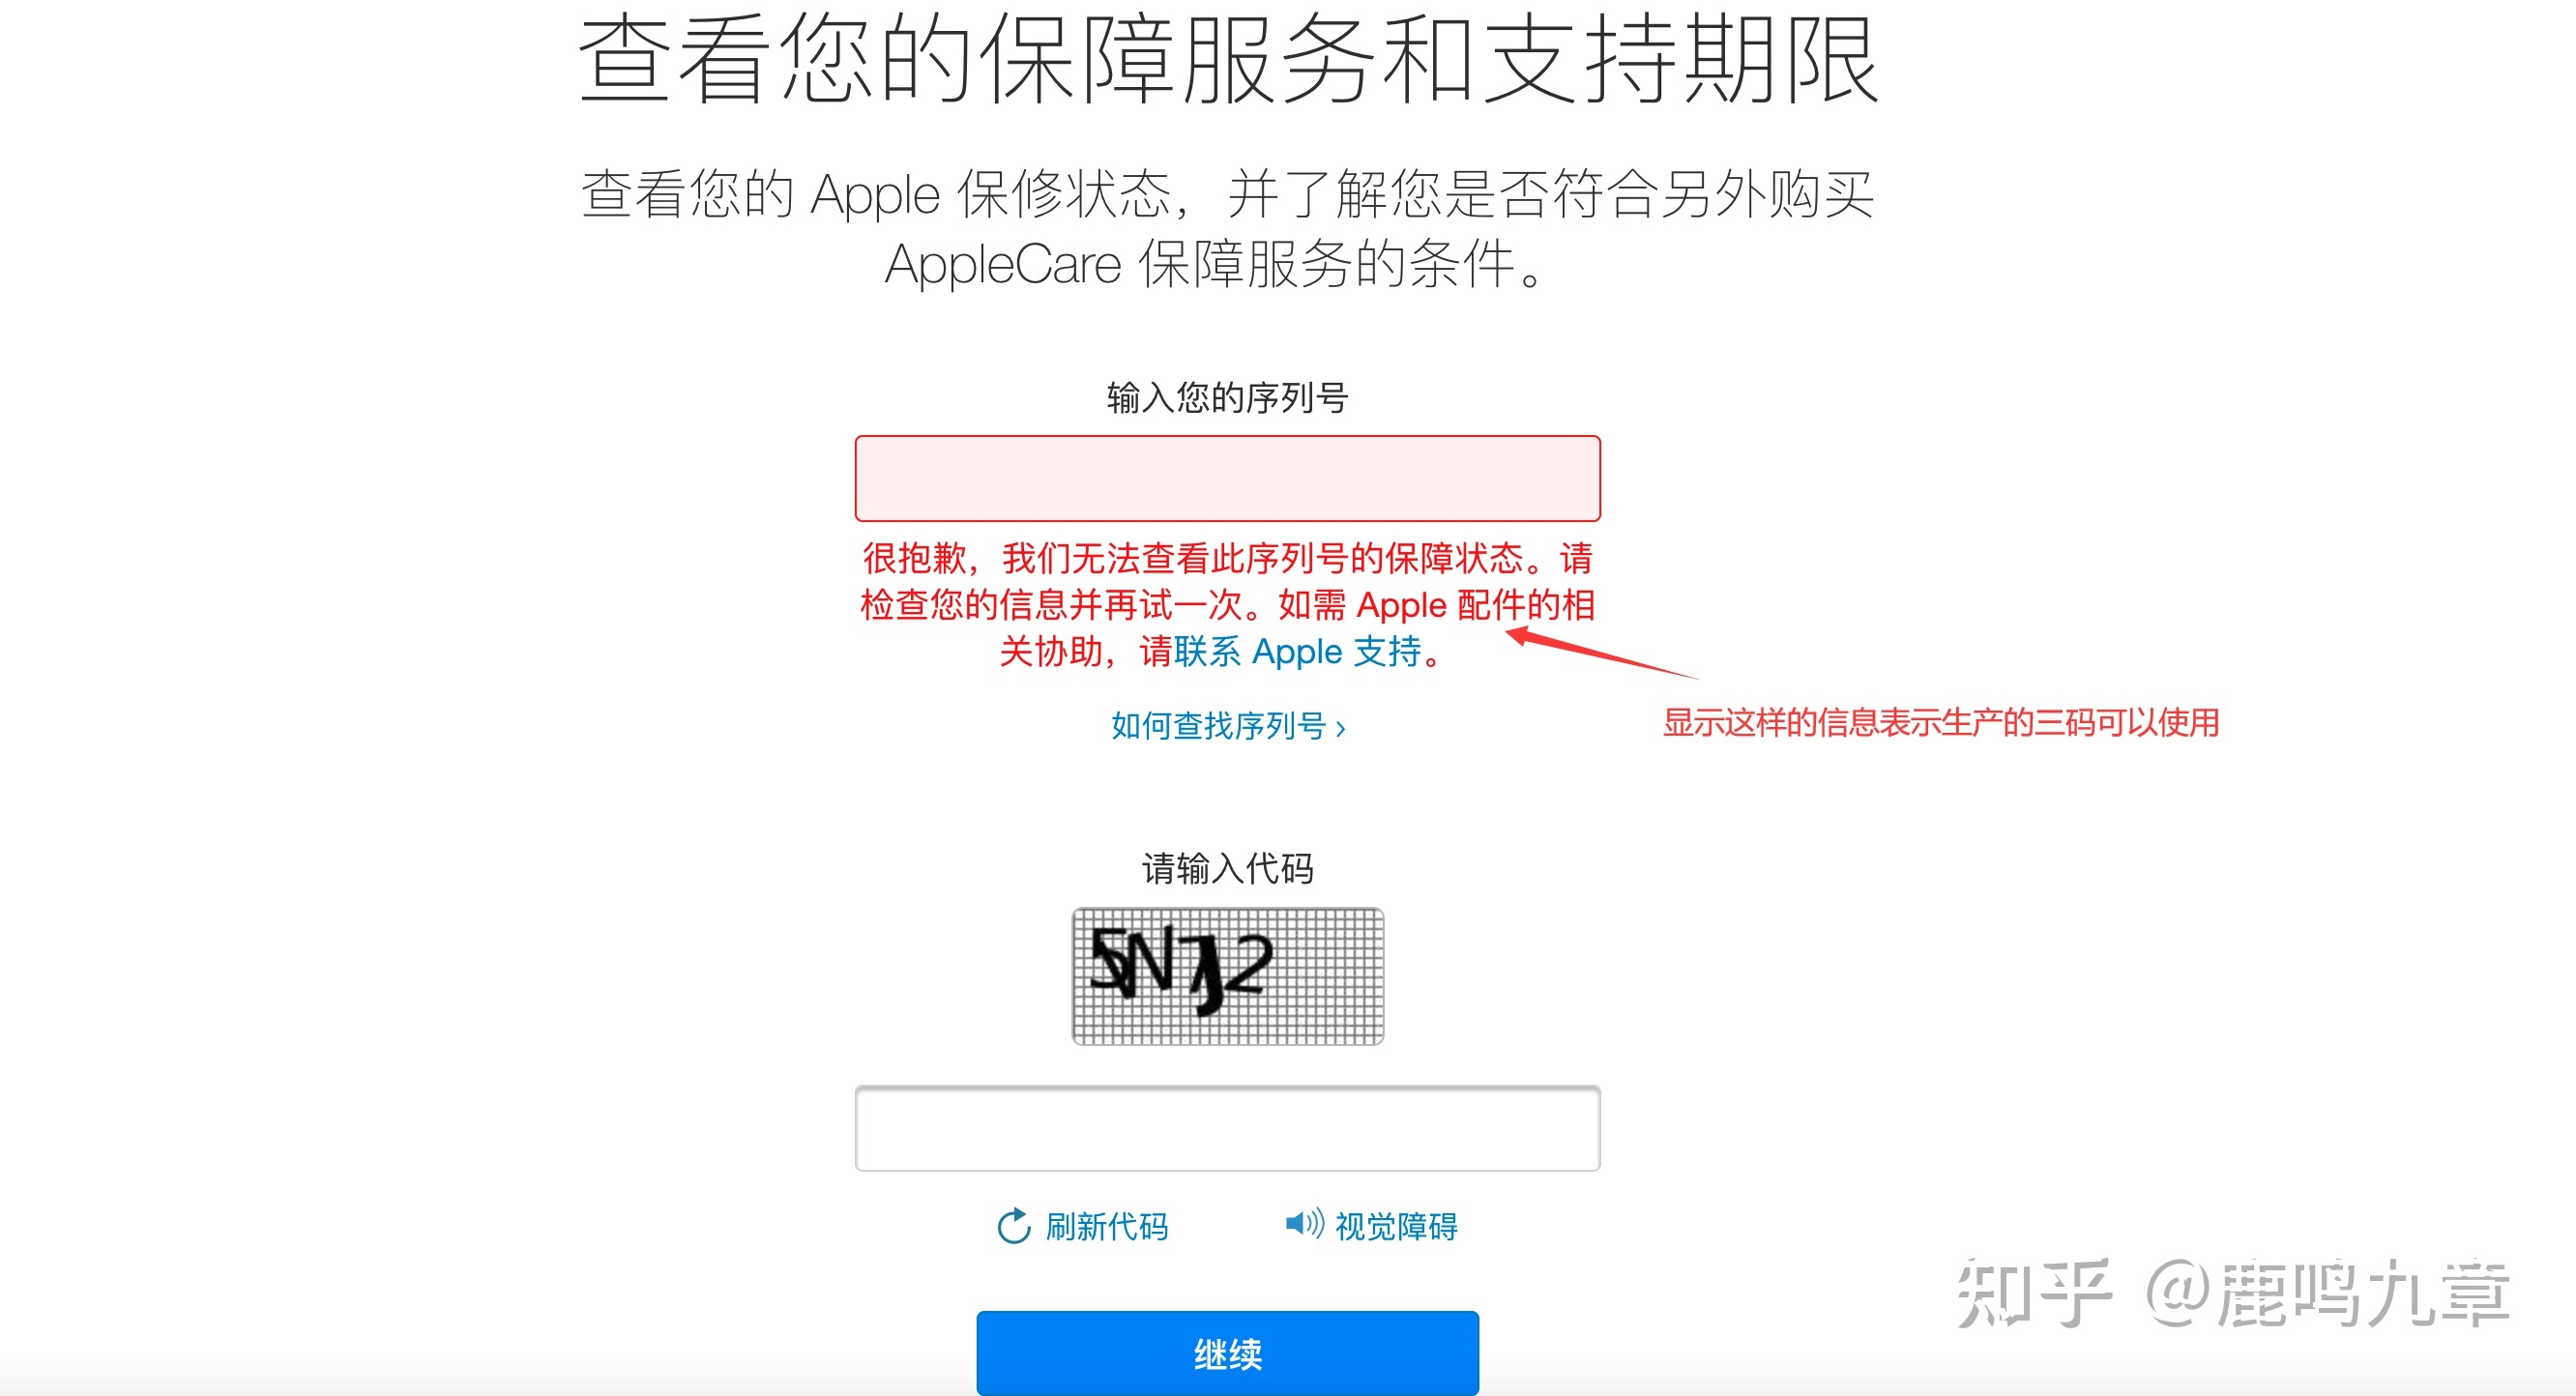
If the serial number shows as invalid, or if you see the screenshot below, it means it is OK.
Final Thoughts
There are many steps and pitfalls involved. Although it may not look particularly complex, the actual process took quite a bit of time.
Some content in this article is referenced from: NUC8 i5beh Hackintosh macOS Monterey 12.3.1 Installation Tutorial