Deploy a Custom Port Forwarding System with Docker, Brook Relay, and Portainer
Previously, I have introduced several common port forwarding programs on my blog, such as rinetd and Nginx Stream. Today, I will introduce another port forwarding program: Brook Relay. Without further ado, let's look at the screenshot.
Note: The following content requires some familiarity with Docker.
What Can Brook Relay Do?
First, let's look at an official introduction:
Brook relay can relay any TCP and UDP server. This is an independent feature; it does not depend on Brook server or Brook wsserver, etc.
Request <--> Relay Server <--> Target Server
However, Brook's capabilities go far beyond this. You know what else it can do. If you are interested, you can check the official documentation yourself: https://txthinking.github.io/brook/#/zh-cn/. Today, the focus is on using Brook Relay for port forwarding.
Why Use Docker + Brook?
Brook is developed in Golang, and the author has already packaged binary files. Installation and usage are extremely simple, requiring only a few commands to complete port forwarding operations. Let's look at the official demo command; a single line is enough:
# Assuming your relay server IP is 5.6.7.8, you can access 5.6.7.8:9999 to reach 1.2.3.4:9999
brook relay -f :9999 -t 1.2.3.4:9999
Since the official command is already simple enough, why run it on Docker? Isn't that like taking off your pants to pee? Xiaoz has summarized several benefits of running it in Docker:
- Managing multiple port forwards with Brook Relay can be inconvenient.
- It is difficult to monitor memory, CPU, and traffic usage for each port forward, whereas Docker natively supports monitoring for each container.
- Combined with Portainer, it enables web interface management (introduced later).
Running Brook Relay in Docker
Now that we understand the advantages of running Brook in Docker, let's start deploying the container. Xiaoz has already created a Docker image for Brook Relay. If you have Docker installed, you can use the following command directly:
docker run -itd \
	--restart=always \
	-e DIP="192.168.1.222" \
	-e DPORT="22" \
	-p 2293:9999 \
	helloz/brook-relay
Explanation of the command above:
--restart=always: Automatically restart the container if it crashes.DIP="192.168.1.222": Target IP address.-e DPORT="22": Target port.-p 2293:9999: 2293 is the port on your relay server (you can define this), while9999is the internal container port. Do not modify the internal port; keep it at the default.
Assuming your relay server IP is 192.168.1.111, connecting to 192.168.1.111:2293 is equivalent to forwarding to 192.168.1.222:22. Those familiar with port forwarding will find this easy to understand.
If you need to run multiple port forwards, simply copy the command above and modify the relay port, target IP, and target port accordingly.
Installing Portainer
Portainer is a visual container management tool that allows you to manage Docker directly via a web interface. Installing Portainer is optional. To achieve web management for port forwarding, you can install Portainer by continuing to read below.
On the relay server, copy and run the following command to install Portainer:
# Create a volume
docker volume create portainer_data
# Run Portainer
docker run -d -p 8000:8000 -p 9000:9000 --name=portainer --restart=always -v /var/run/docker.sock:/var/run/docker.sock -v portainer_data:/data portainer/portainer-ce
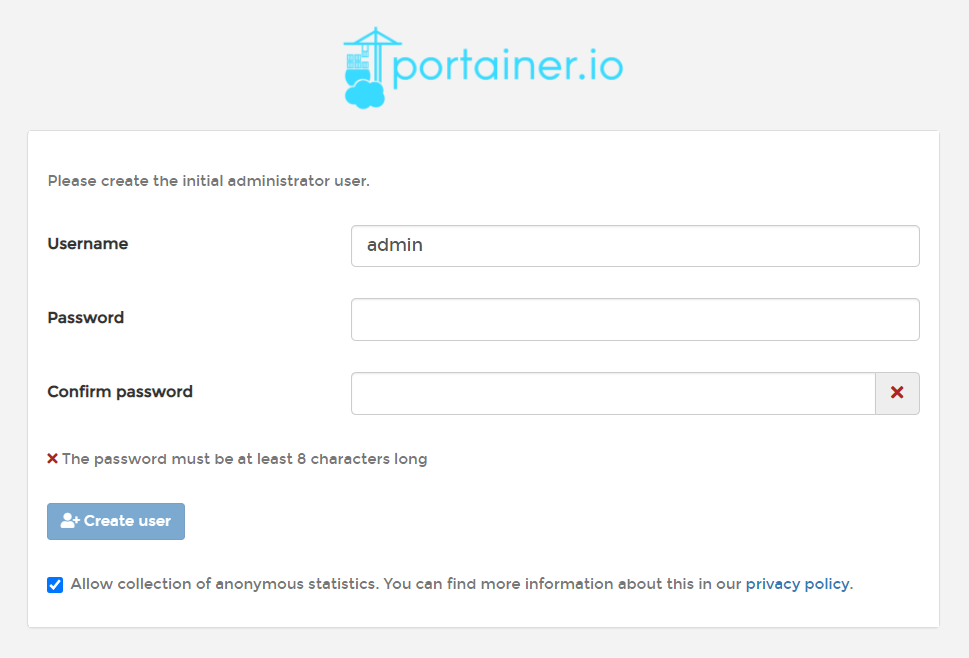
Then, visit IP:9000 to open the Portainer interface and follow the prompts to set up an administrator account and password.
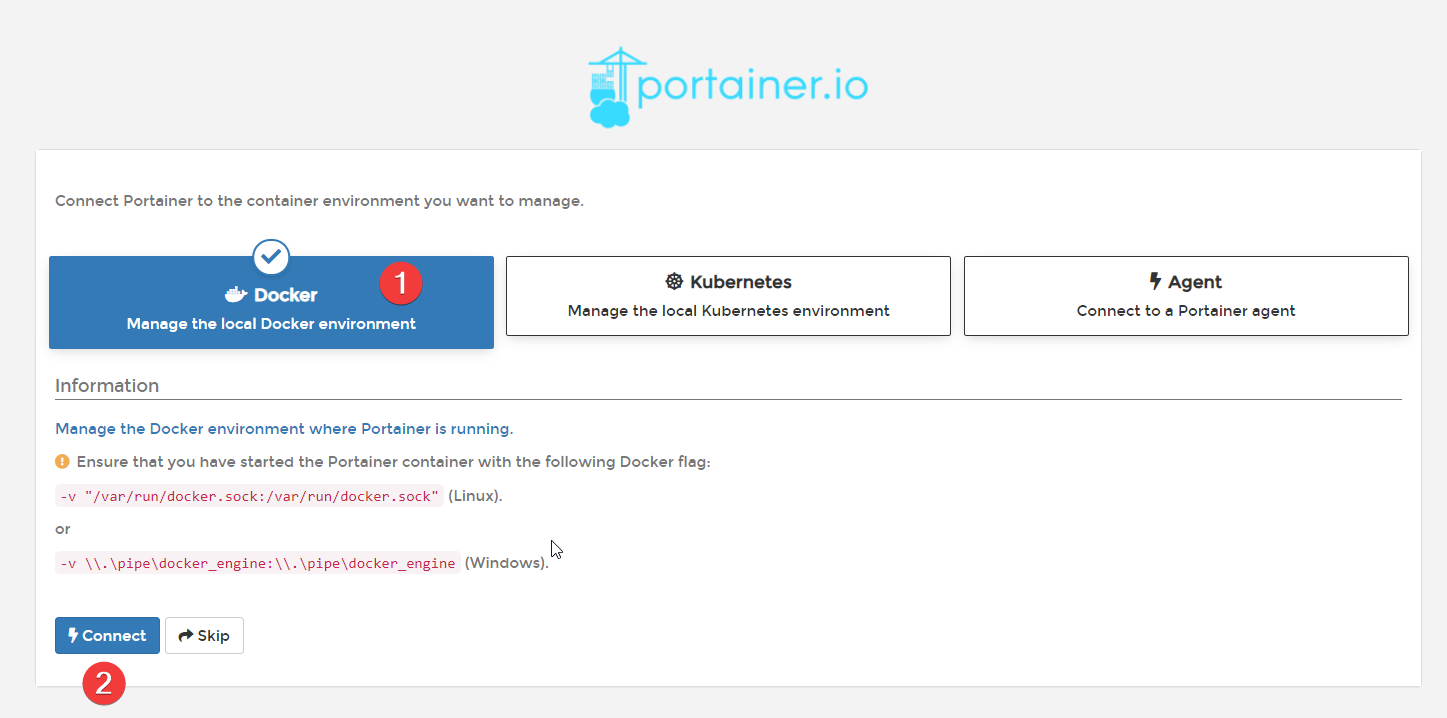
Select Docker and connect.
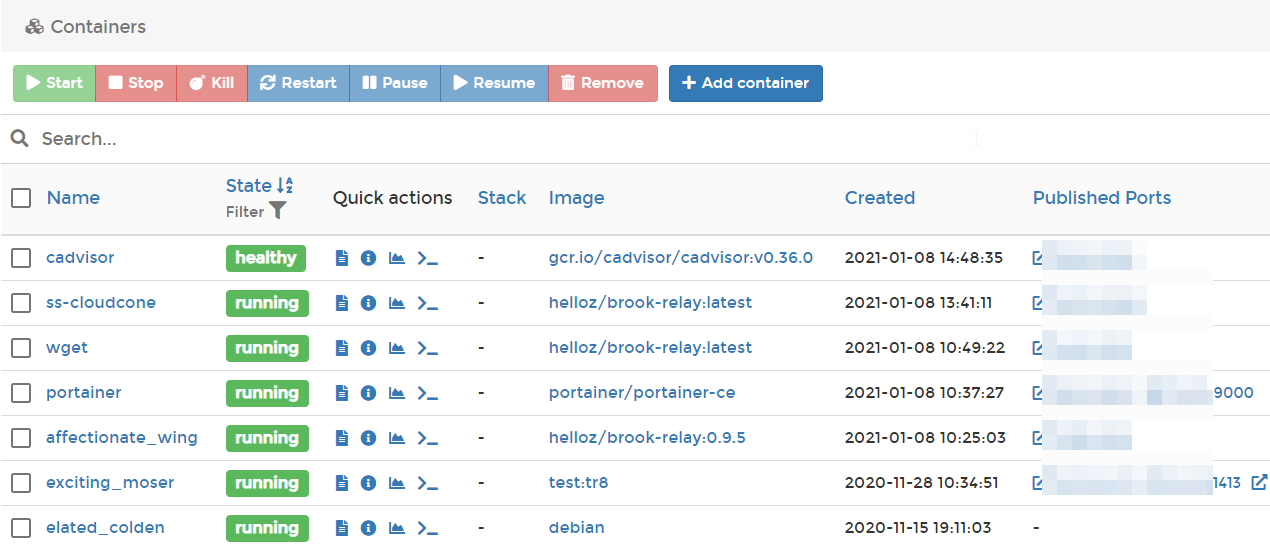
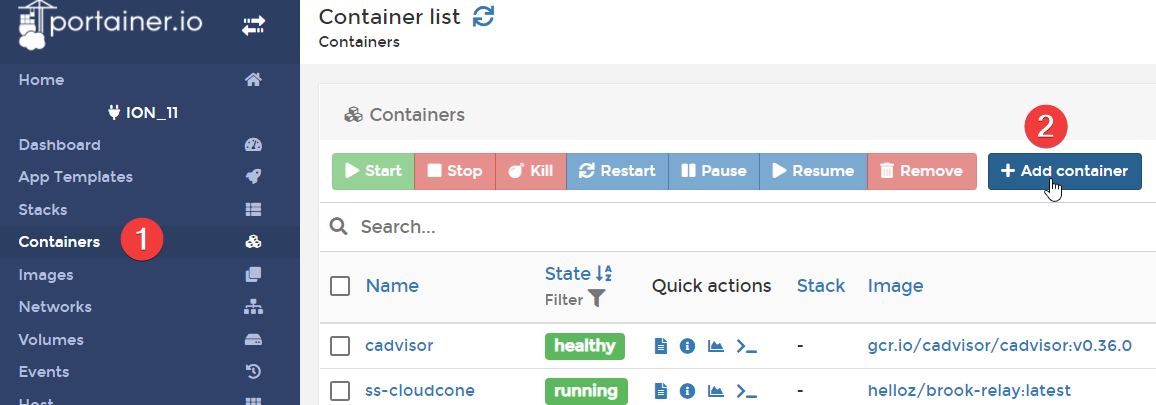
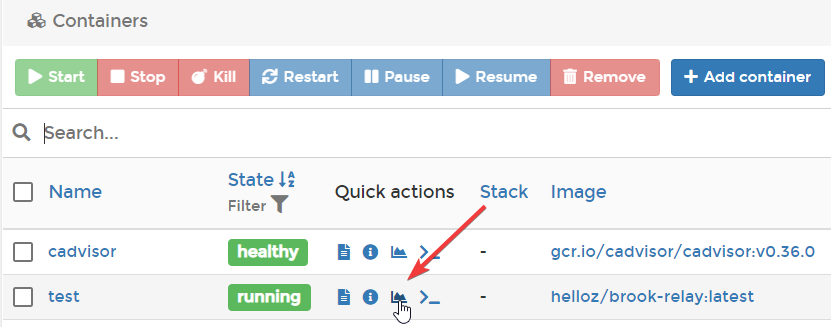
Go to the backend and find the Containers option. You will see all containers, including the Brook Relay port forwarding container created via Docker command.
Next, let's use Portainer to demonstrate how to deploy a Brook Relay port forwarding container. On the left side of Portainer, find Containers and click Add Container.
Fill in the details as shown in the screenshot below:
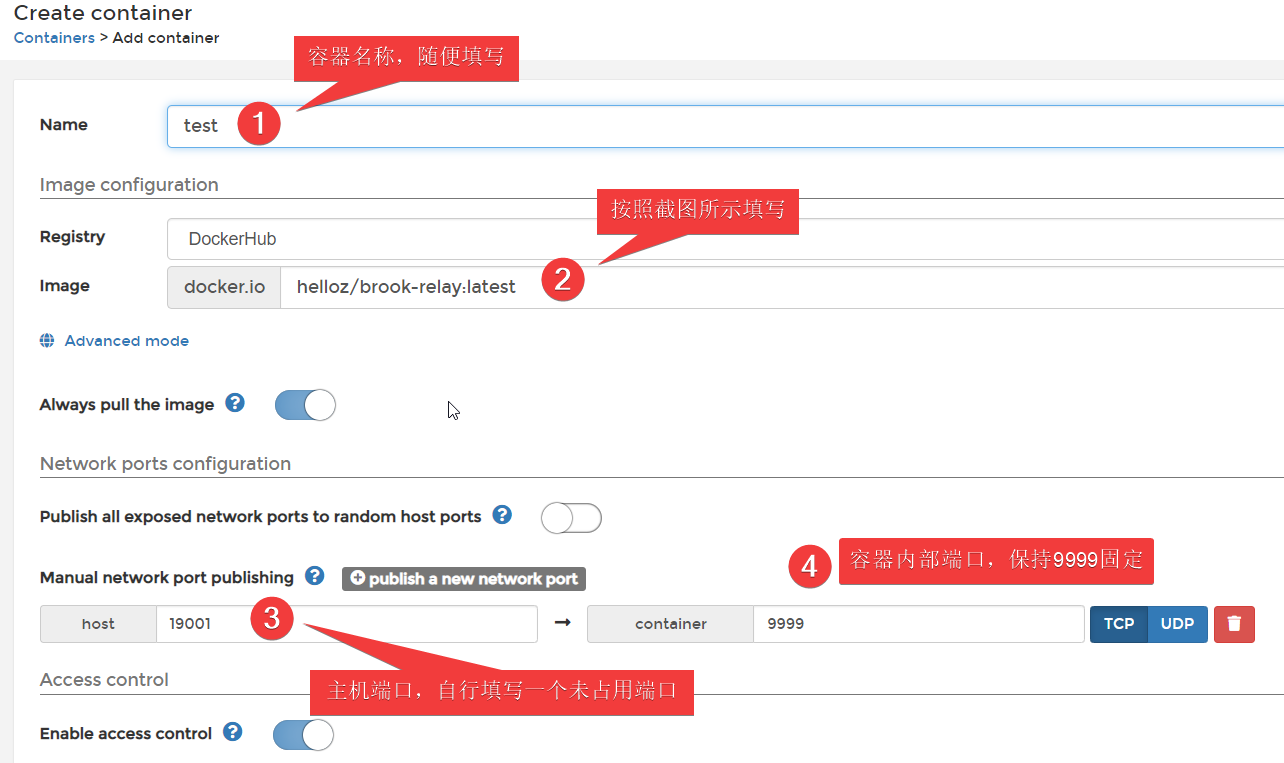
- Name: Container name (can be anything).
- Image: Enter the image name packaged by Xiaoz:
helloz/brook-relay:latest. - Host Port: Define as needed.
- Container Port: Keep
9999fixed.
That's not all. Scroll down further to fill in the target IP and target port. In the Advanced container settings section, click ENV and add two lines as shown in the screenshot below.
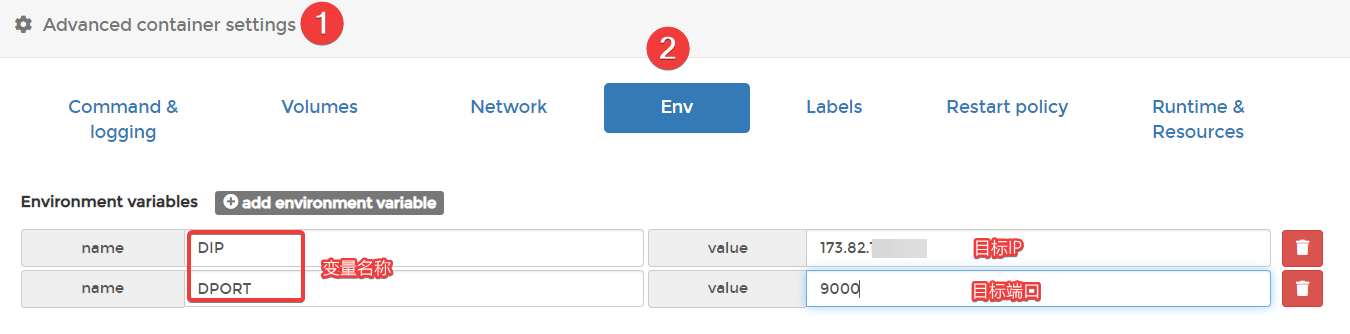
- DIP: Target IP.
- DPORT: Target port.
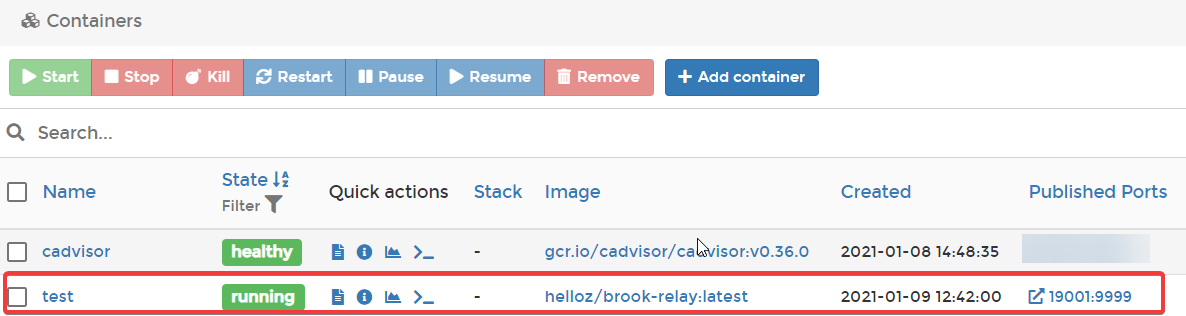
After completing the settings above, click the Deploy the container button on the interface to deploy. Once successful, you will see the newly created container on the interface.
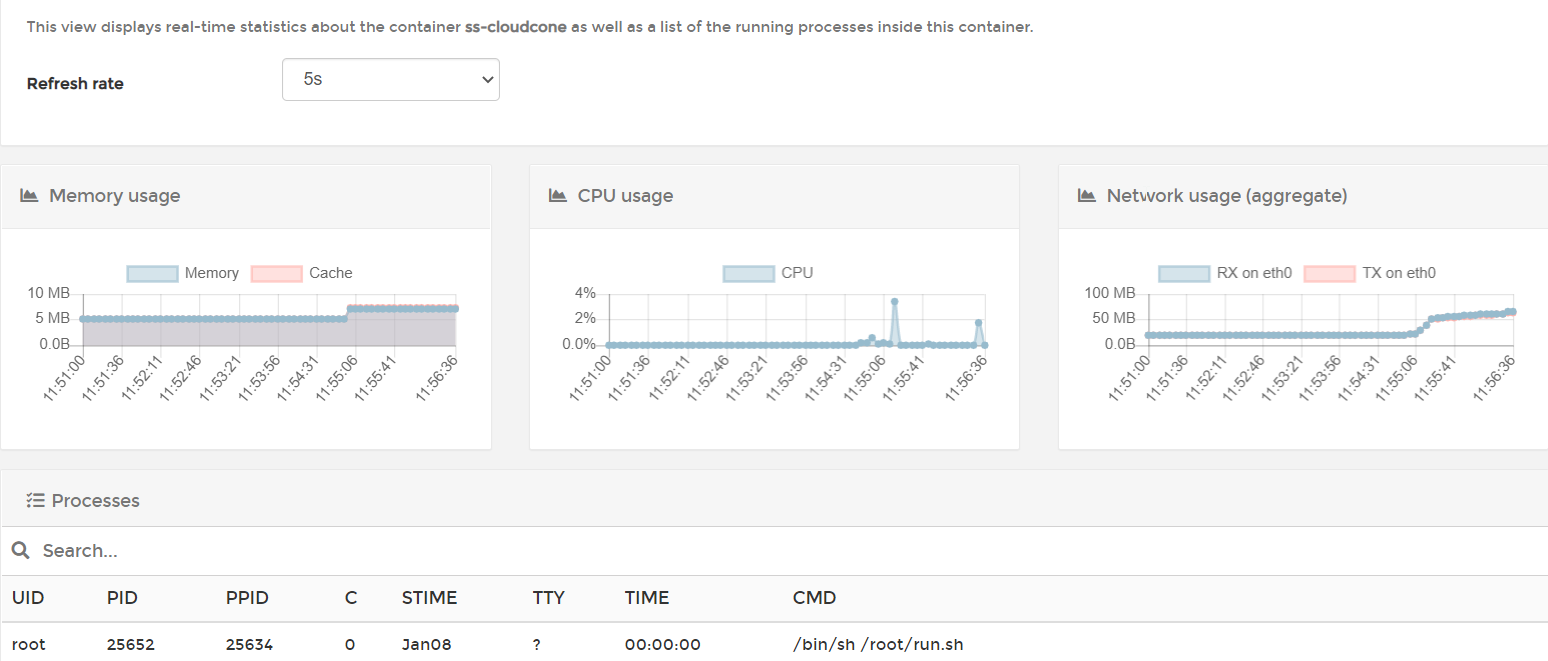
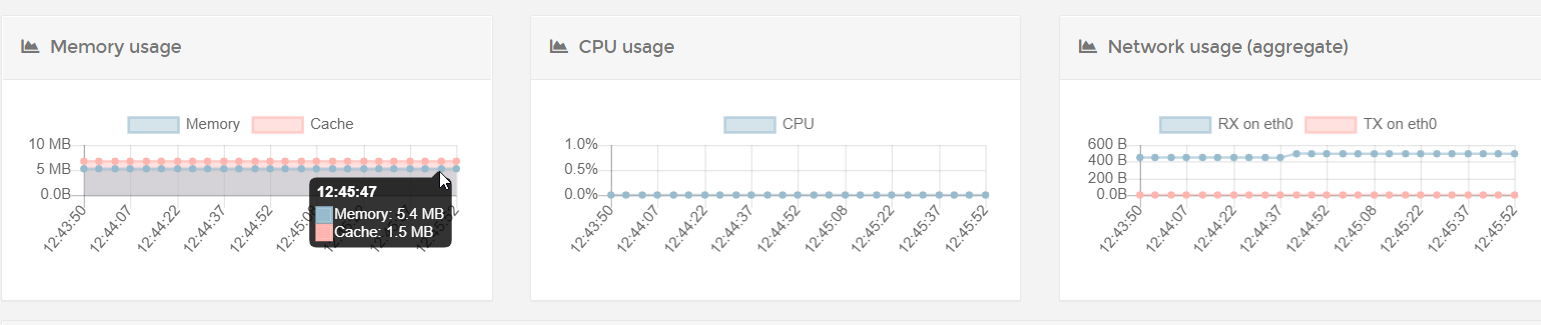
Click the Stats button to monitor the container status, such as CPU, memory, and traffic usage.
You can see that Brook Relay uses about 5MB of memory when idle, which is very low.
Summary
Using this approach, you can package any port forwarding program, such as rinetd, nginx, or socat, into a Docker image and combine it with Portainer to achieve web management and status monitoring.
Open-source port forwarding panels on the market often struggle to provide CPU, memory, and traffic monitoring, whereas Docker supports this natively. Finally, thanks to the following open-source projects: