How to Install AMH 4.2 Virtual Host Panel on DigitalOcean
After creating a DigitalOcean cloud server, you need to configure the server environment. While you can manually build a LAMP or LNMP environment, this is too difficult for beginners and prone to errors. Instead, you can install the open-source Chinese virtual host panel AMH 4.2, which integrates an LNMP environment. Note that version 5.0 is now paid, while AMH 4.2 remains free. This article focuses on installing AMH 4.2 on DigitalOcean. The example uses CentOS, but the method is similar for other operating systems.
1. Install wget via SSH
Log in to the server using an SSH tool and install the download tool using yum install wget. Press 'y' when prompted to allow the installation. This process takes only a few seconds.\n
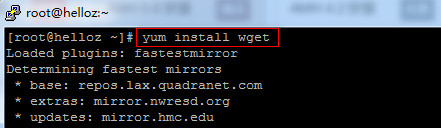 Figure 1-1: Installing wget
2. Execute the AMH Installation Script
Run the following command to download and execute the AMH installation script:
wget http://amh.sh/file/AMH/4.2/amh.sh && chmod 775 amh.sh && ./amh.sh 2>&1 | tee amh.log
Follow the prompts and enter 1 to start the installation.
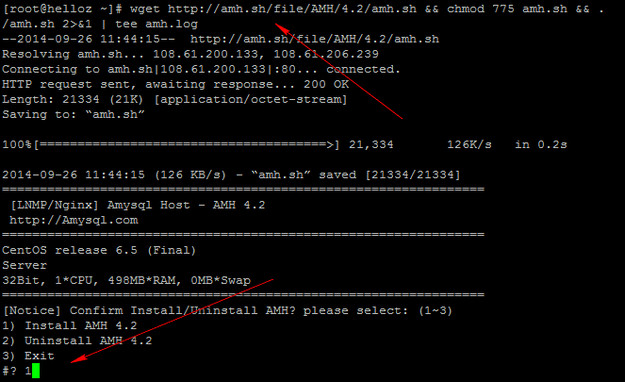 Figure 2-1: Executing the installation script
3. Manually Enter IP Address
AMH cannot automatically detect the DigitalOcean IP address, so you must enter it manually.
 Figure 3-1: Entering the IP address
4. Set Passwords
Next, input the MySQL password and the AMH panel password to proceed with the installation.
 Figure 4-1: Entering passwords
5. Access the Panel
Wait about 10 minutes for the installation to complete. Once finished, you can access the panel by visiting:
http://your_ip_address:8888
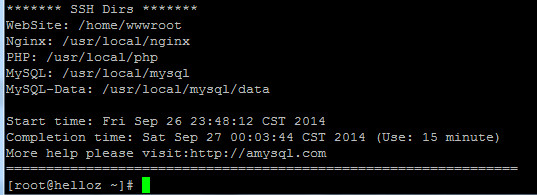 Figure 5-1: Installation complete
Register here and use the latest promo code SSDMAY10 to receive $10. This allows you to use the service for $5 over three months. Don't miss this opportunity if you enjoy experimenting.