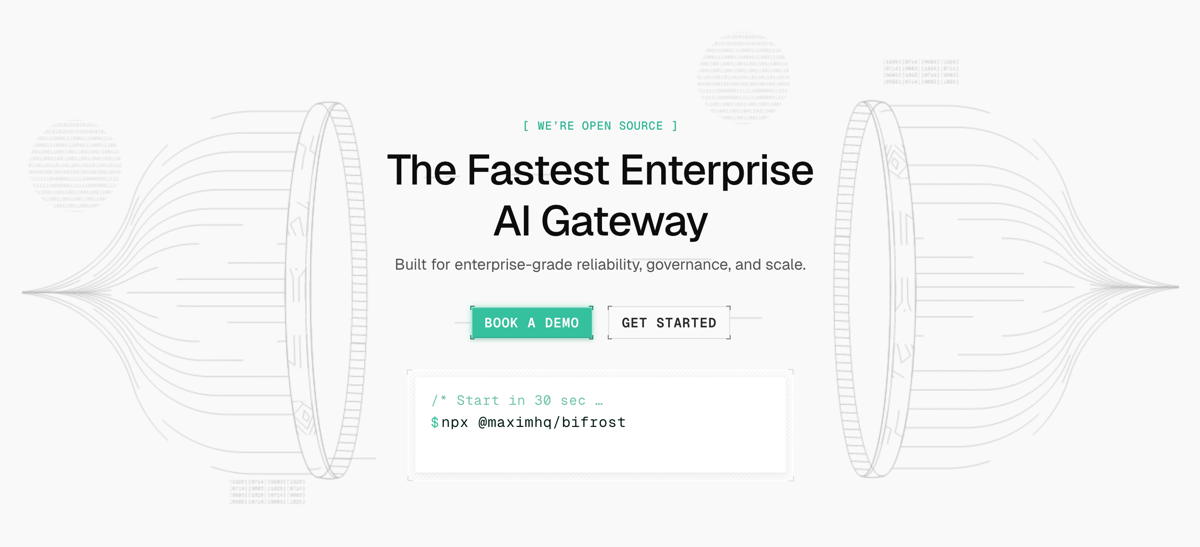
Building a High-Availability LLM Gateway: Bifrost Deployment and Setup Guide
When building AI applications, the biggest headache is often integrating with various APIs from different providers while worrying about outages and latency. Bifrost was created to solve this problem—a super lightweight open-source gateway written in Go. It unifies models like OpenAI, Claude, and Gemini into a single standard interface, offering high speed along with built-in automatic failover and load balancing.
Bifrost GitHub Open Source Address: https://github.com/maximhq/bifrost
Bifrost Features
- Extreme Performance: Developed in Go with microsecond-level latency, throughput far exceeds Python-based gateways (such as LiteLLM).
- Unified Interface: Fully compatible with the OpenAI API standard; one integration allows calling global mainstream models (OpenAI, Anthropic, Google, AWS, etc.) and local models.
- High Availability Architecture: Built-in automatic failover and intelligent load balancing ensure single-point failures are undetectable, guaranteeing uninterrupted service.
- Intelligent Caching: Supports semantic caching, significantly reducing costs for repeated requests and improving response speeds.
- Lightweight Deployment: No complex dependencies; official Docker images are provided, making it ideal for containerized environments and resource-constrained scenarios.
- Strong Observability: Built-in detailed request logs and monitoring metrics facilitate tracking of latency, error rates, and token consumption.
- Flexible Routing: Supports traffic distribution strategies based on model names, user tags, or custom rules.
Bifrost vs. New API
Currently, the most common gateway for mainstream large models in China might be New API. As an emerging high-performance solution, Bifrost shares some functional overlap with New API but also has significant differences. The following comparison analysis highlights that neither is inherently better; users can choose based on their specific scenarios.
| Feature | Bifrost | New API (One-API) |
|---|---|---|
| Performance | ⬆️ Extremely High | High |
| Deployment Difficulty | ⬆️ Simple | Medium |
| Applicable Scenarios | Enterprise/Internal/Individual Developers: Pursuing extreme stability, low latency, and multi-model disaster recovery | Merchants/Webmasters: Wanting to build a website to "sell API keys" |
| Models & Ecosystem | Rich, better support for foreign large models, less support for domestic models. | ⬆️ Very Rich, good support for both domestic and foreign large models. |
| Special Engineering Features | ⬆️ Semantic Caching, Adaptive Load Balancing, Automatic Failover, MCP (Model Context Protocol) support. | ⬆️ Model Redirection, More Granular Billing |
| Web Interface | Simple, but only supports English. | ⬆️ Beautiful, supports multiple languages. |
Deploying Bifrost with Docker Compose
Bifrost deployment is very simple; it can be completed in 30 seconds using Docker Compose. Create a compose.yaml file and fill in the following content:
services:
  bifrost:
    image: maximhq/bifrost
    container_name: bifrost
    ports:
      - "8080:8080"
    user: "0:0"
    volumes:
      - ./data:/app/data
    restart: unless-stopped
Then run docker compose up -d. After success, visit http://IP:8080.
Note: Here
user: "0:0"uses therootuser to run. If you do not want to use therootuser, you can pass the user ID and group manually, while ensuring that./datain the current directory has write permissions for the corresponding user, otherwise it will not run.
Initialization
By default, Bifrost runs without protection, which is obviously not secure for production environments. However, you can set up account and password access in [Settings - Security - Password protect the dashboard].
Adding Channels
Next, add large model channels. In the console, go to [Models - Model Providers - Add New Provider] to add. Built-in support includes 20+ common channels like Anthropic, OpenAI, and Gemini, and you can also customize any OpenAI-compatible channel.
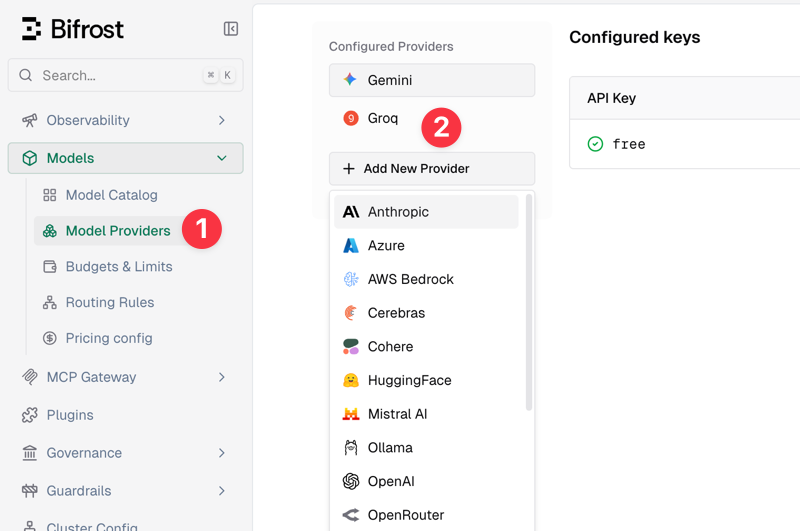
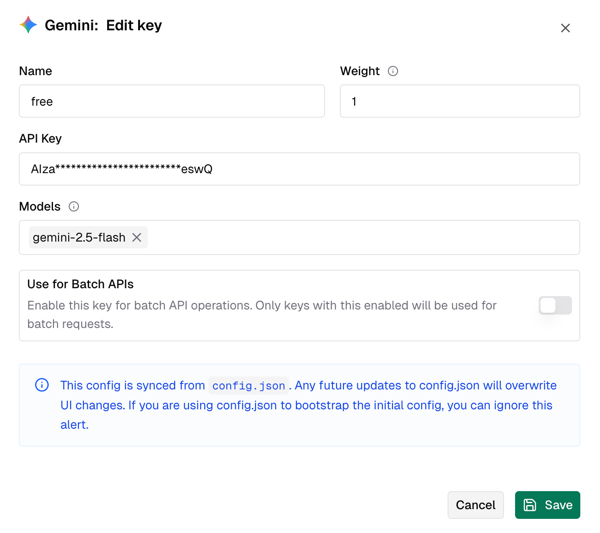
Taking Gemini as an example, you just need to give it a name, fill in the key, select available large models (e.g., gemini-2.5-flash), and save, as shown below.
Bifrost supports adding multiple upstream channels; simply select different types of channels to add.
Setting Virtual Keys
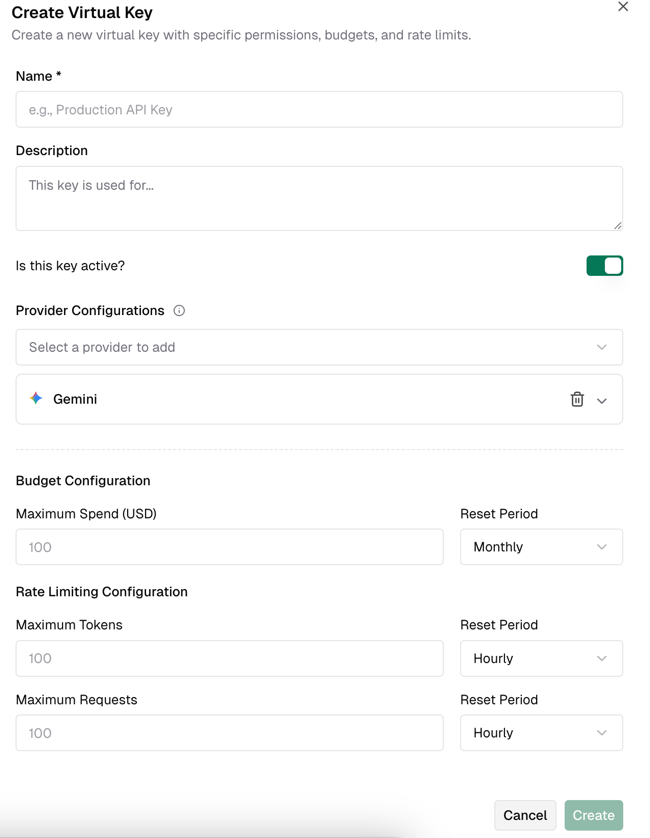
Virtual keys allow for more convenient and secure calls to the Bifrost gateway, so this step is mandatory. You need to create a virtual key first in the console [Governance - Virtual Keys].
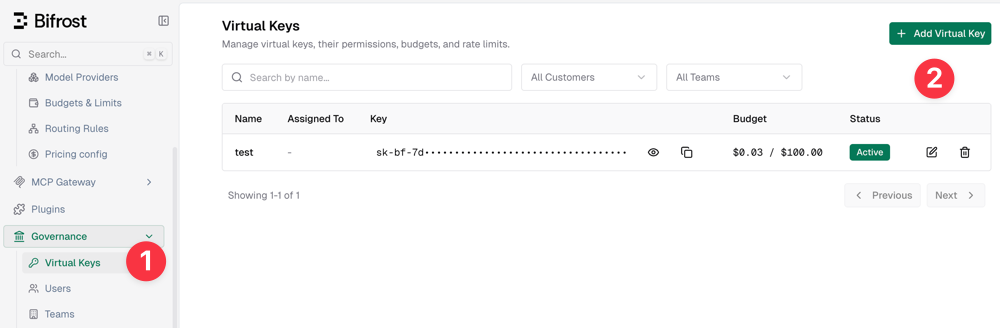
When creating a virtual key, you can set limits on quotas and token lengths.
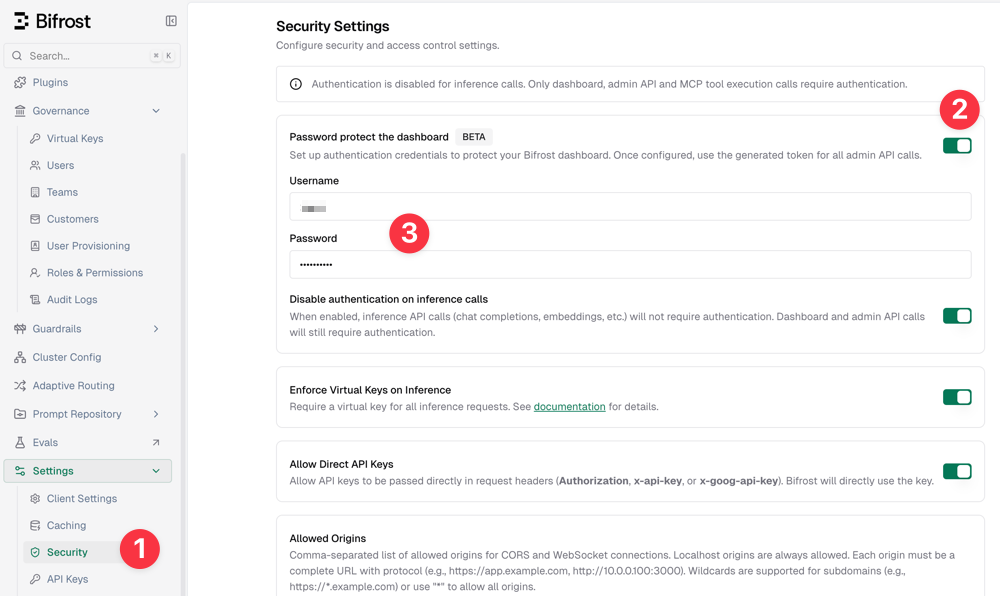
I initially thought that creating a virtual key would allow direct calls, but I got a 401 error and spent several hours troubleshooting. The reason was that after creating a virtual key, it is not supported by default to call directly (a bit counter-intuitive); you need to enable it separately in the security settings.
The specific steps are: In the console [Settings - Security], check the following three options:
- Disable authentication on inference calls
- Enforce Virtual Keys on Inference
- Allow Direct API Keys
As shown below:
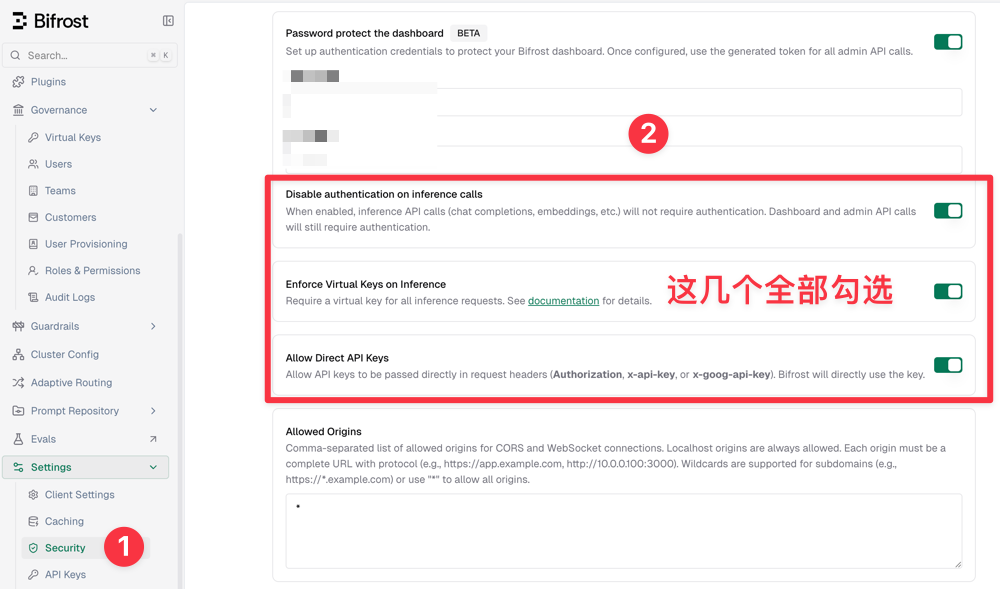
Then save, and you can now use the virtual key for calls.
Calling the API
The Bifrost gateway is fully compatible with the OpenAI format. The curl command call method is as follows:
curl -X POST http://IP:8080/v1/chat/completions \
  -H "Content-Type: application/json" \
--header 'Authorization: Bearer Virtual Keys' \
  -d '{
    "model": "gemini/gemini-2.5-flash",
    "messages": [
      {"role": "user", "content": "Hello!"}
    ]
  }'
- Change
Virtual Keysto the virtual key you just created. - In the
modelfield, you need to add the channel prefix. For example, if I added the Gemini channel and the correspondinggemini-2.5-flashmodel, the complete model ID is:gemini/gemini-2.5-flash.
Nginx Reverse Proxy
In production environments, IP access is generally not used. It is recommended to configure domain names and SSL access via Nginx reverse proxy. You can refer to the following Nginx reverse proxy configuration:
# Main location for API calls and WebSocket
    location / {
        proxy_pass http://IP:8080;

        client_max_body_size 64m;

        # Set timeout to 120s
        proxy_connect_timeout 120s;
        proxy_send_timeout 300s;
        proxy_read_timeout 300s;

        # Standard headers
        proxy_set_header Host $host;
        proxy_set_header X-Real-IP $remote_addr;
        proxy_set_header X-Forwarded-For $proxy_add_x_forwarded_for;
        proxy_set_header X-Forwarded-Proto $scheme;

        # WebSocket and connection settings for streaming
        proxy_http_version 1.1;
        proxy_set_header Upgrade $http_upgrade;
        proxy_set_header Connection "upgrade";
        proxy_set_header Accept-Encoding gzip;
        proxy_cache_bypass $http_upgrade;

        # Disable buffering for WebSocket
        proxy_buffering off;
    }
Routing Rules
Bifrost also supports creating complex routing rules to achieve load balancing and failover for backend AI large models, thereby ensuring stability and high availability. Due to space limitations, we cannot elaborate in detail here; a future article will explain Bifrost routing rule configuration separately.
Conclusion
Bifrost, with its extreme performance and lightweight deployment, has become a powerful tool for building high-availability AI backends. Although it is not as rich as New API in terms of Chinese ecosystem and billing features, it has obvious advantages in self-use scenarios pursuing low latency and automatic disaster recovery. I hope this article helps you quickly build your own gateway, making model calls more stable and faster. I will delve into routing rule configuration in the future, so stay tuned.
Bifrost GitHub Open Source Address: https://github.com/maximhq/bifrost