How to Enable WordPress Multisite Mode in Subdirectory
WordPress has supported multisite mode since version 3.0. This feature allows you to run multiple independent WordPress sites using a single WordPress installation. User accounts, posts, and attachments across different sites remain completely separate. This setup is ideal for users managing multiple language-specific sub-sites or creating demonstration sites with different themes.
Note: This tutorial is based on Apache server operations. Theoretically, the steps apply to other servers as well, except for the specific rewrite rules.
Enabling Multisite
- Edit the
wp-config.phpfile in the root directory of your WordPress site and add the following code:
define('WP_ALLOW_MULTISITE', true);
Deactivate all plugins by going to Dashboard → Plugins → Installed Plugins.
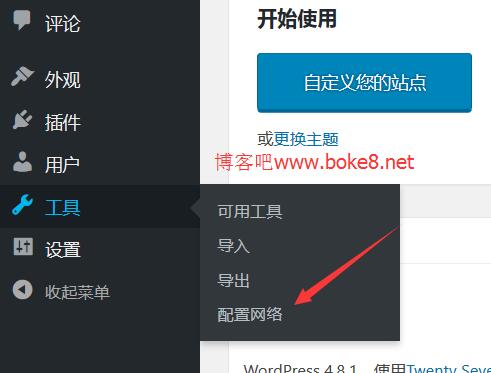
Access the Network Setup page by clicking Tools → Network Setup in the WordPress admin sidebar.
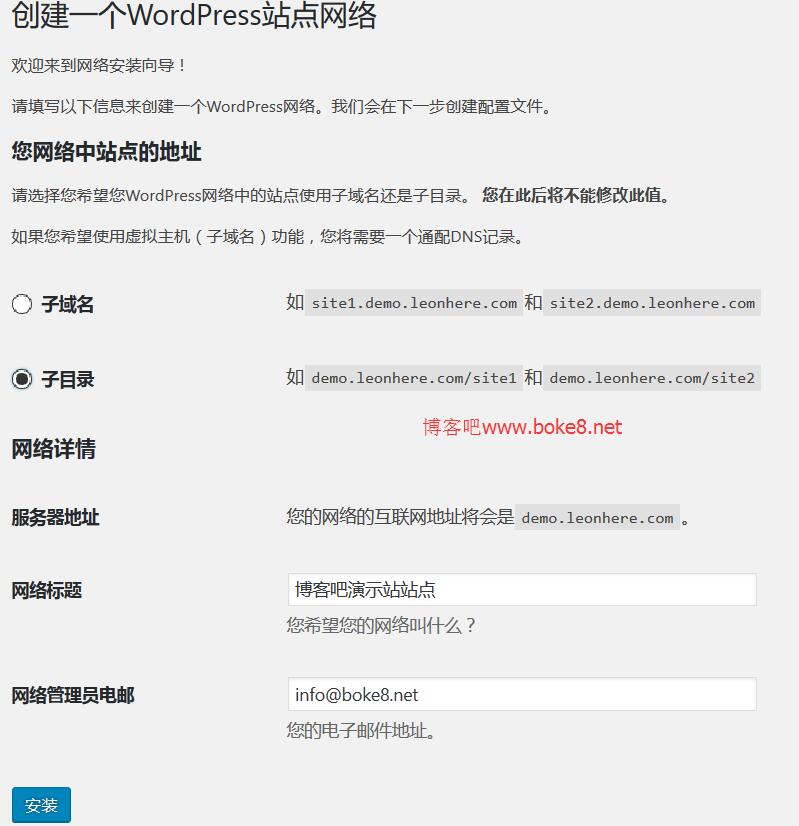
- On the Create a WordPress Network page, choose either Subdomain or Subdirectory based on your needs. Note that subdomain installation requires domain wildcard DNS configuration, while subdirectory installation follows this tutorial directly. Enter the Network Title and Network Admin Email (defaults are the main site's title and email).
- Click the Install button. On the Enabling Network page, WordPress will provide two blocks of code that you need to add to your files. Important: If this is not a fresh WordPress installation, back up your
wp-config.phpand.htaccessfiles before proceeding. If errors occur, you can restore the backups.
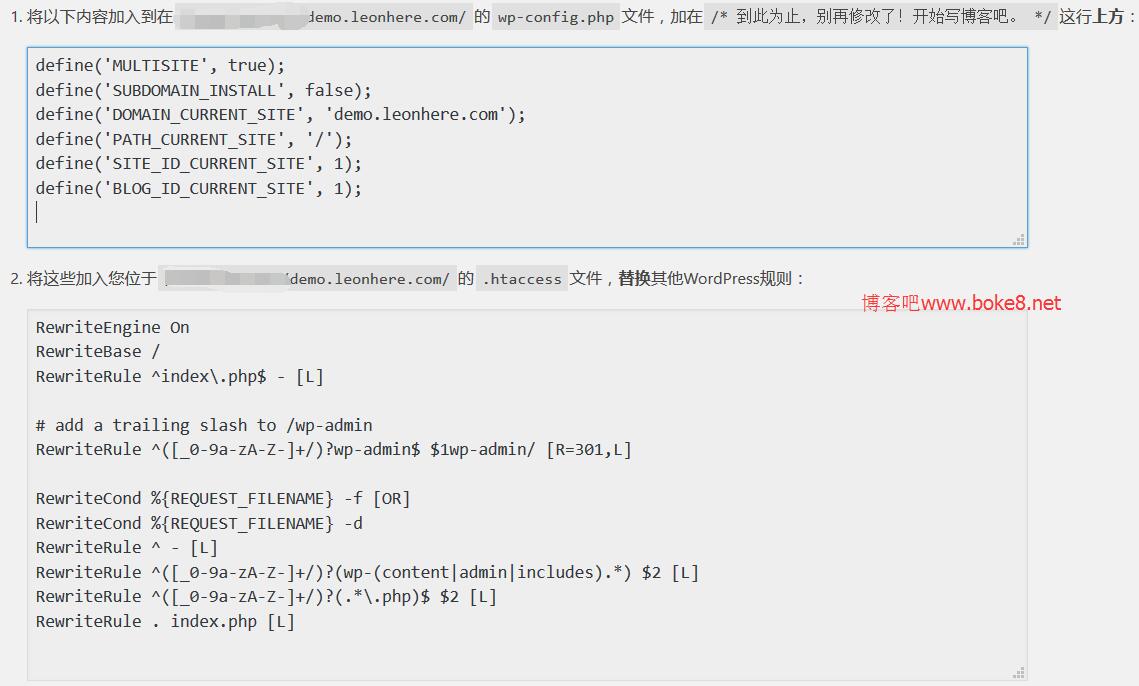
Add the following code to your wp-config.php file:
define('MULTISITE', true);
define('SUBDOMAIN_INSTALL', false);
define('DOMAIN_CURRENT_SITE', 'demo.leonhere.com');
define('PATH_CURRENT_SITE', '/');
define('SITE_ID_CURRENT_SITE', 1);
define('BLOG_ID_CURRENT_SITE', 1);
Note: The code above is for demonstration. Please copy the exact values provided on your specific WordPress interface.
Replace the content of your .htaccess file (for Apache servers) with the following rewrite rules:
RewriteEngine On
RewriteBase /
RewriteRule ^index\.php$ - [L]

# add a trailing slash to /wp-admin
RewriteRule ^([_0-9a-zA-Z-]+/)?wp-admin$ $1wp-admin/ [R=301,L]

RewriteCond %{REQUEST_FILENAME} -f [OR]
RewriteCond %{REQUEST_FILENAME} -d
RewriteRule ^ - [L]
RewriteRule ^([_0-9a-zA-Z-]+/)?(wp-(content|admin|includes).*) $2 [L]
RewriteRule ^([_0-9a-zA-Z-]+/)?(.*\.php)$ $2 [L]
RewriteRule . index.php [L]
Note: These are the rewrite rules. Please copy the code provided on your own WordPress interface.
- After completing these steps, log out and log back into your WordPress site. You will notice changes in the top-left corner and the dashboard tabs of the admin panel.
You can now reactivate the plugins you deactivated earlier.
Creating a Subdirectory Site
- Go to My Sites → Network Admin in the admin sidebar to access the network management interface.
- Click Sites → Add New to open the site creation page.
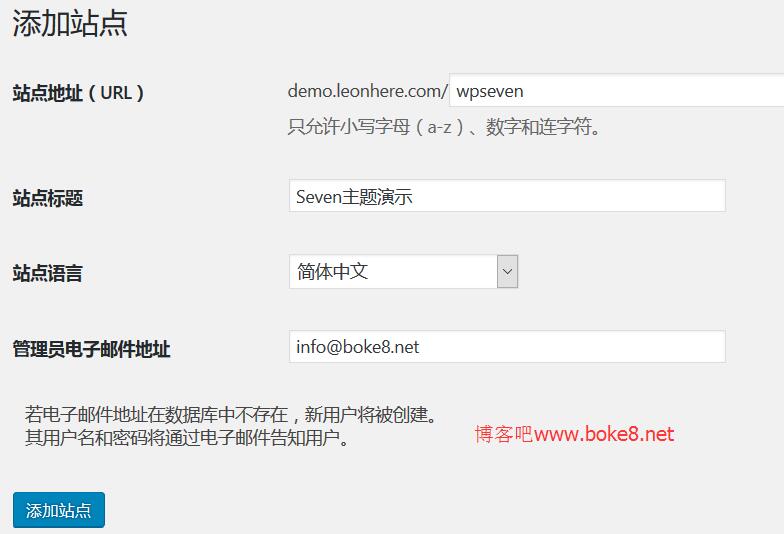
Fill in the following details:
- Site Address (URL): The access address for the subdirectory site.
- Site Title: The title of the subdirectory site.
- Site Language: Select based on your requirements.
- Admin Email Address: Enter the administrator's email.
Click Add Site. When the message "Site added. Visit Dashboard or Edit Site" appears, the subdirectory site has been successfully created. You can click Visit Dashboard to access the new site's admin homepage.