How to Downgrade Vultr from $5 to $2.5 Plan: A Step-by-Step Guide
In a previous article, we introduced Vultr's new $2.5 plan, which includes a $20 credit for new users. Many users, like myself, previously used the $5 plan (1 CPU, 768MB RAM) and wanted to downgrade to the $2.5 plan (1 CPU, 512MB RAM). However, the Vultr dashboard only supports upgrading, not downgrading. Here is how to handle this situation.
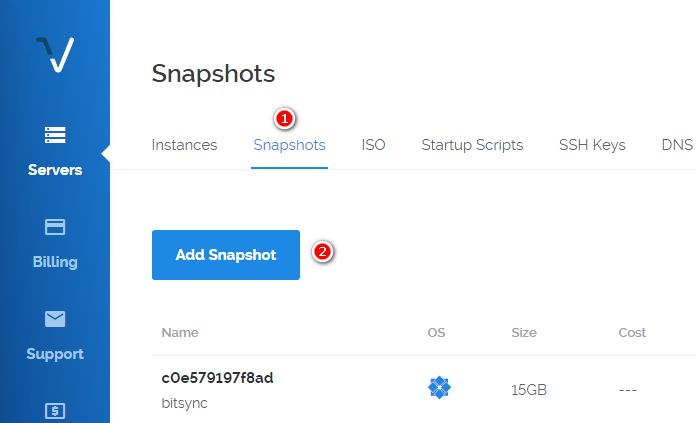
Create a Snapshot
The purpose of creating a snapshot is to back up your current data completely to prevent any loss. In the Vultr dashboard, go to Snapshots > Add Snapshots and create a snapshot for the server you need to operate. This process may take a few minutes to several tens of minutes, as shown in the screenshot below.
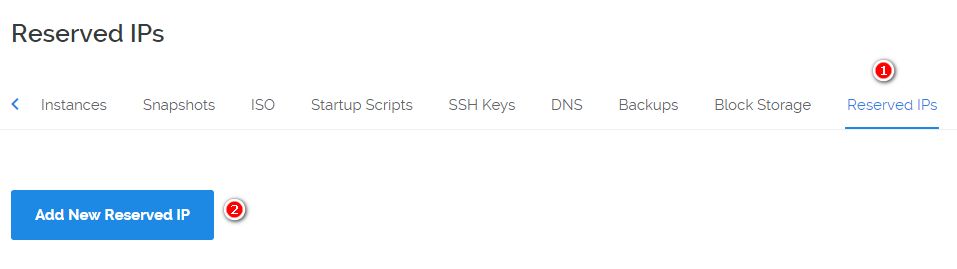
Reserve the Current IP Address
For example, if Vultr assigned your server an IP like 192.168.1.123 and you intend to keep using it, you can reserve this IP. The cost is $3/month, billed hourly. In the Vultr dashboard, go to Reserved IPs > Add New Reserved IP. If you only want to lower the configuration and have no specific requirements for the IP, you can skip this step.
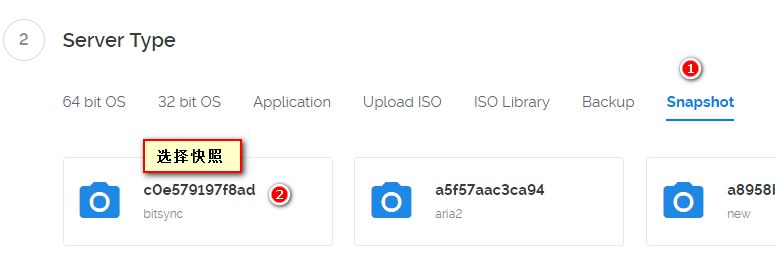
Create a New Instance
Ensure that the previous two steps are completed, especially the first one. Then, delete the current $5 server. After deletion, create a new instance in the same data center. Select the $2.5 plan and choose the snapshot you just created under Server Type (if you have multiple snapshots, ensure you select the correct one).
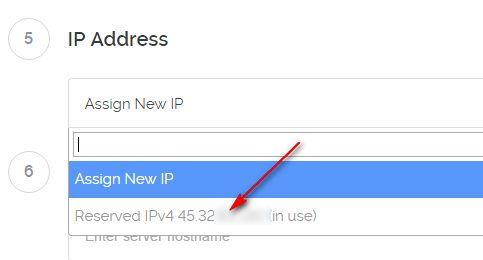
For the IP Address, select the reserved IP. If you have no requirements for the IP, you can ignore this option.
Follow-up Work
Wait for the system installation to complete, which may take a few minutes to several tens of minutes. This way, your IP remains unchanged, your data is safe, and the configuration is reduced. Note that a reserved IP cannot be deleted within 24 hours, so remember to delete it after 24 hours to avoid unnecessary charges.
Summary
Additionally, for existing users on the $5 plan (768MB RAM), you can directly upgrade to the 1GB plan via the dashboard. This upgrade keeps the price the same while increasing the configuration. Remember to create a snapshot before operating to avoid data loss.
- Create a snapshot in the dashboard.
- Reserve the current IP address.
- Delete the $5 server.
- Create a new $2.5 server, select the snapshot you just created for the OS, and choose the reserved IP.
- Done! Your data is safe, and your IP remains unchanged.