Accelerate Your Overseas Projects with Bunny CDN: No Filing Required & Beginner Guide
When it comes to overseas CDN, CloudFlare is a must-mention. CloudFlare not only offers a free plan with loose restrictions, unlimited traffic, and protection, making it the top choice for most webmasters. So since CloudFlare is so generous, why choose other overseas CDNs? This brings up several issues with CloudFlare's free plan that bother bloggers:
- Mandatory DNS integration; free version does not support CNAME integration.
- Does not support custom origin ports (though possible via workarounds, it is very cumbersome).
- Free version does not support custom origin HOST.
To solve the above problems, the blogger switched some domains to Bunny CDN. Bunny CDN is not only cheap but also solves CloudFlare's lack of CNAME support and custom origin issues, offering great flexibility and control. If you have overseas projects, I recommend trying Bunny CDN.
About Bunny CDN
Bunny CDN launched in 2015, known for low prices, no filing requirements, and flexible configuration. It does not force DNS takeover, supports pay-as-you-go, has rich global nodes, and is developer-friendly. Accelerate overseas projects without complex settings; it is an ideal choice for independent developers seeking high cost-performance to replace traditional giants.
Bunny CDN Exclusive Registration Link: https://bunny.net?ref=9e3c8xtlk9 (If it doesn't open, please use proxy tools)
Bunny CDN Features
- No filing required
- Supports CNAME integration
- Supports custom origin ports
- Supports custom origin HOST
- Transparent and low pricing: Traffic fees are far lower than giants like AWS CloudFront
- Supports automatic SSL certificate deployment
- Provides WAF protection
Disadvantages: Although Bunny CDN provides Asia-Pacific nodes, access speed from within China is average, so it is not recommended for users targeting China.
About Pricing
Bunny CDN does not offer a free plan. The minimum monthly consumption is $1, and amounts under $1 are charged as $1. Detailed pricing is as follows.
Standard Network
- EU/US nodes:
$0.01/GB, approximately70 RMB/TB - APAC nodes:
$0.03/GB, approximately210 RMB/TB
Traffic Network
The Traffic Network does not distinguish node regions, defaulting to coverage of EU/US, APAC, etc. It is designed for scenarios like storage and video with high bandwidth. The number of nodes is fewer than the Standard Network, but the price is lower. For 500 TB or less, the fee is $0.005/GB, approximately 35 RMB/TB.
Overall, Bunny CDN's traffic fees are far lower than giants like AWS CloudFront and Akamai, and it is highly cost-effective.
Register Bunny CDN
Bunny CDN Exclusive Registration Link: https://bunny.net?ref=9e3c8xtlk9 (If it doesn't open, please try using proxy tools). Bunny CDN provides a 14-day free trial after registration.
Note: Please enter your real name in Pinyin during registration to avoid risk control affecting subsequent top-ups and usage!!!
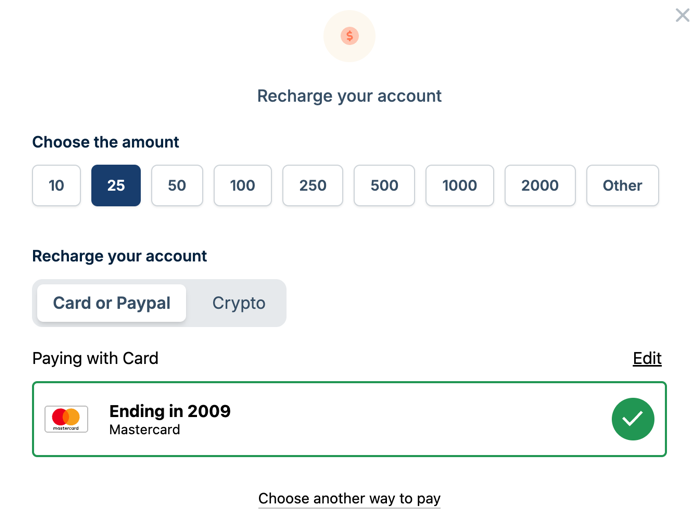
After the trial ends, we can top up on the billing page. The minimum top-up amount is $10.
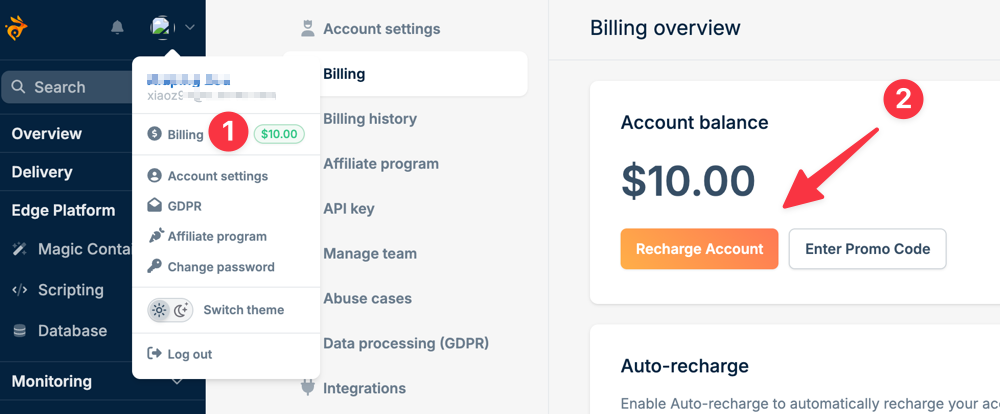
Supports credit cards, PayPal, cryptocurrency, etc.
Using Bunny CDN
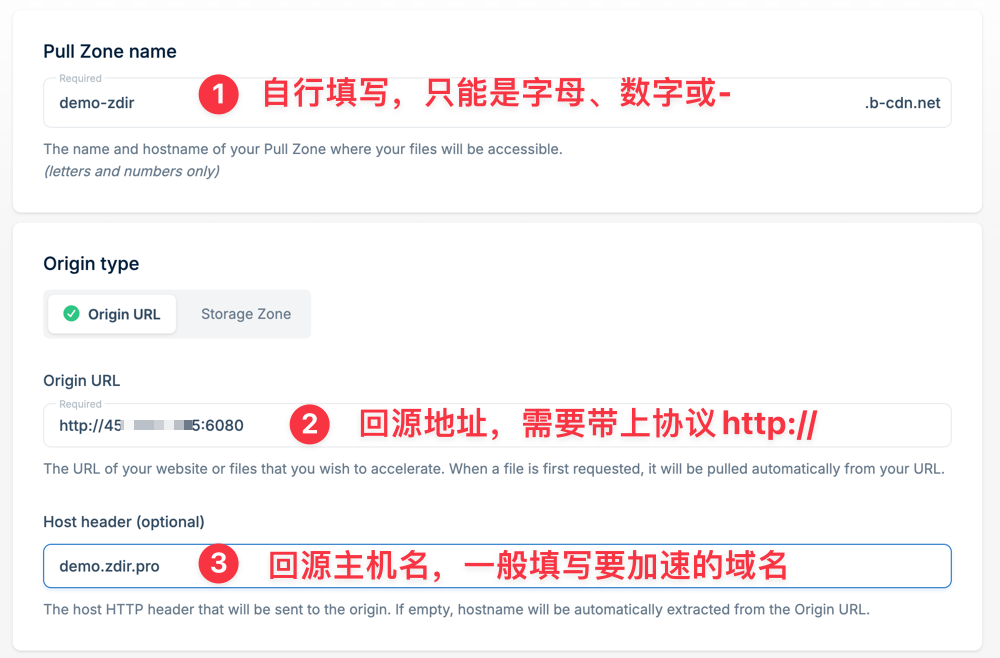
In [Backend Control Panel - Delivery - CDN - Add Pull Zone]
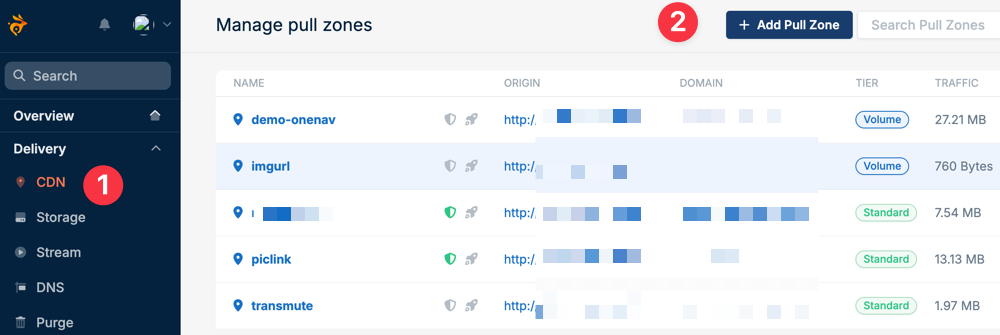
Then enter according to page requirements: Pull Zone name. Pull Zone name can only be letters, numbers, or
-, and must be globally unique and non-repeating.Origin type, which is the origin address, usually
IP + Port. Note to addhttp://orhttpsbefore it.Host header setting is the domain you need to accelerate.
Reference screenshot as follows:
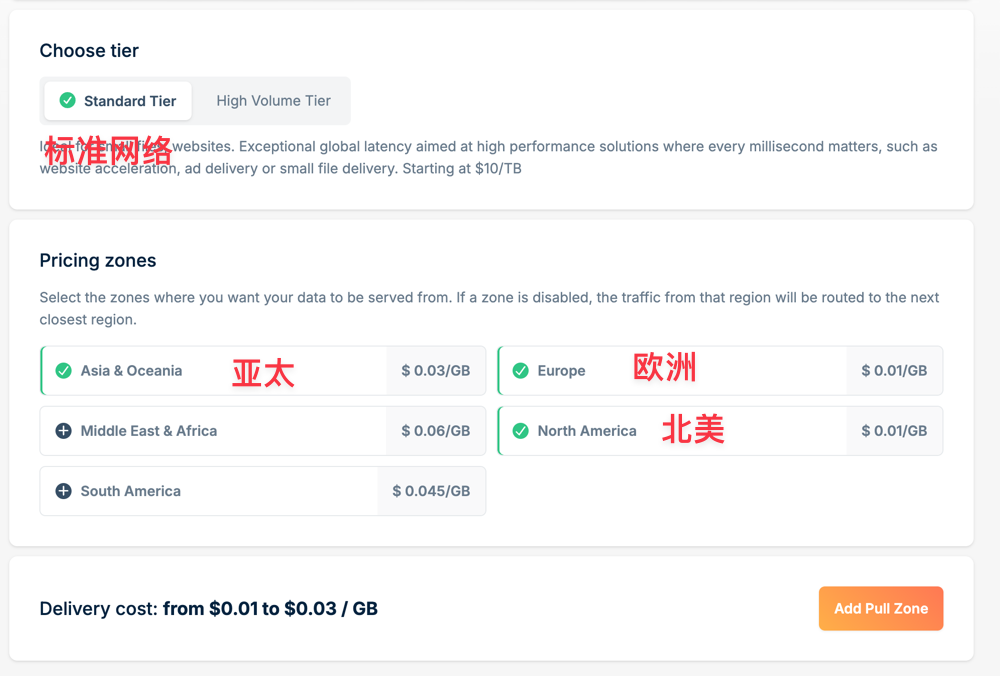
Continue to select the network plan. Standard Network allows selecting node regions; prices vary by region. Choose the appropriate region based on your visitor location; generally, there is no need to select all.
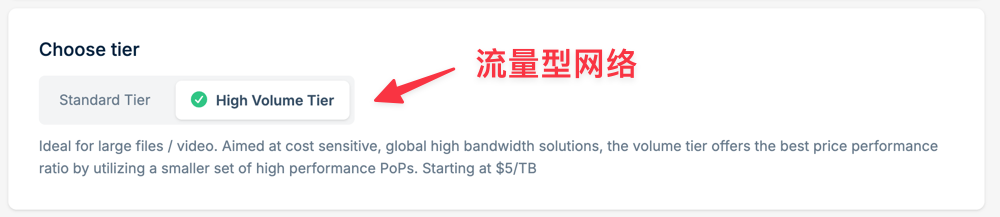
You can also choose [Traffic Network], which is cheaper, but has fewer nodes than the Standard Network and cannot set node regions individually.
Finally, click [Add Pull Zone] to add.
Just completing the addition is not enough for production; you still need to set various rules for optimization to meet production environment requirements.
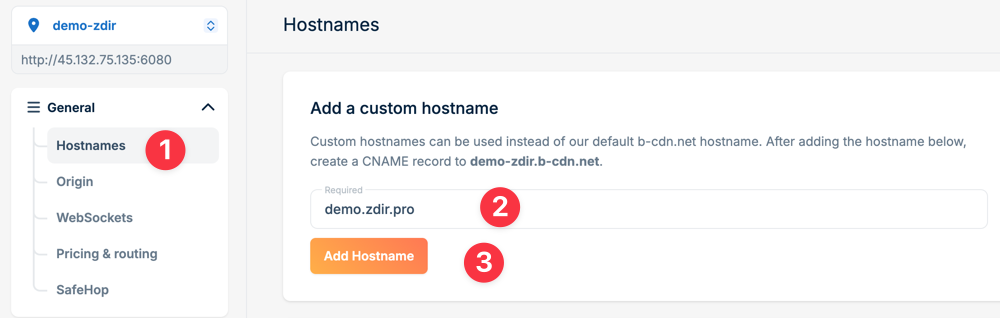
Add Custom Domain
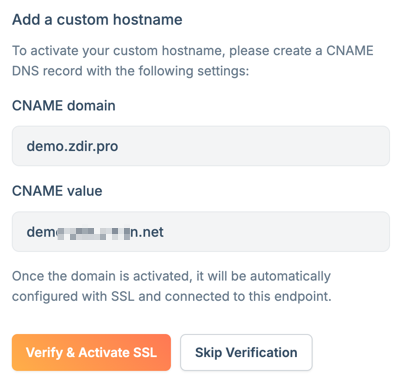
In [General - Hostname - Add a custom hostname], enter the domain you need to accelerate.
Add DNS Resolution
Follow the prompt to use CNAME to resolve your domain to the system-assigned alias address. After resolution is complete, click the button to activate and verify SSL, which will automatically issue an SSL certificate for you.
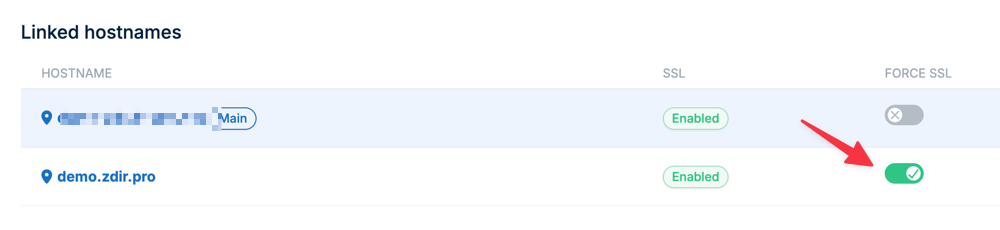
Also suggest turning on Force SSL to improve security.
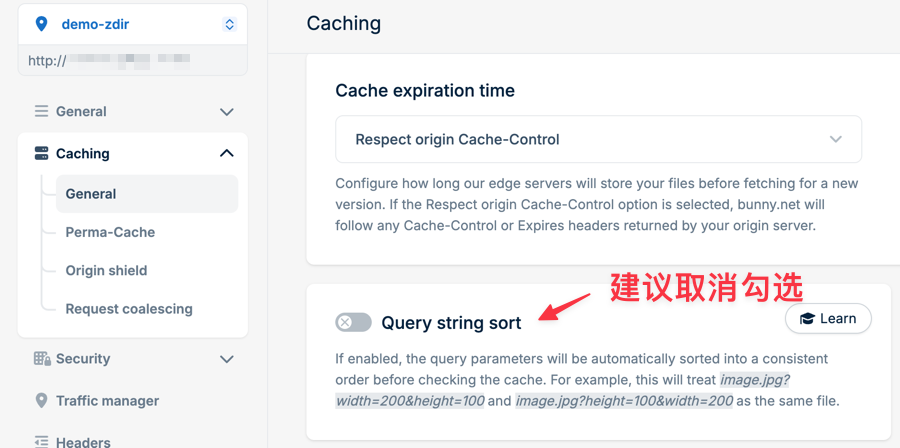
Default Cache Settings
In [Caching - General], it is recommended to uncheck the default Query string sort, otherwise URL parameters will be ignored.
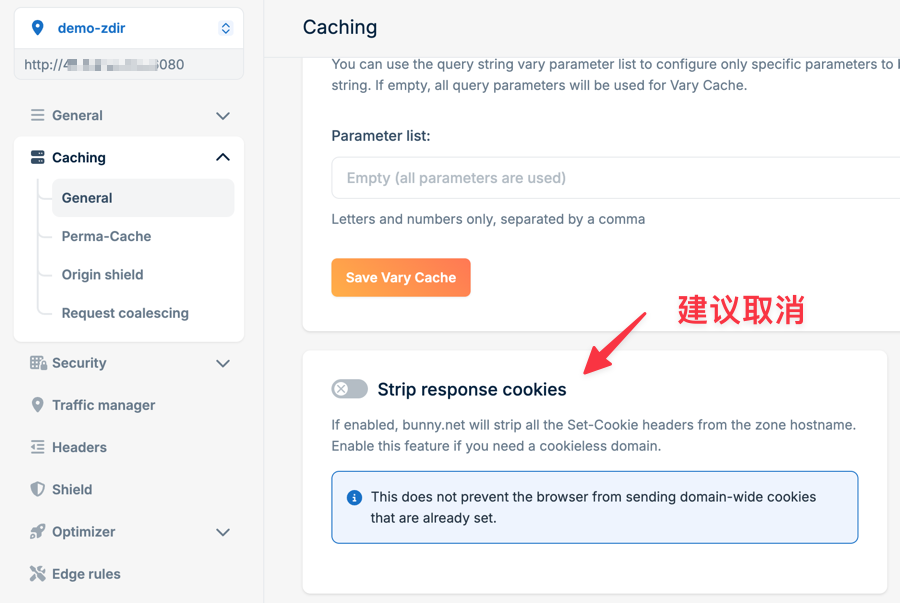
Continue scrolling down to find Strip response cookies, it is also recommended to uncheck, otherwise your website cannot set and generate Cookies, which may cause login or other status anomalies.
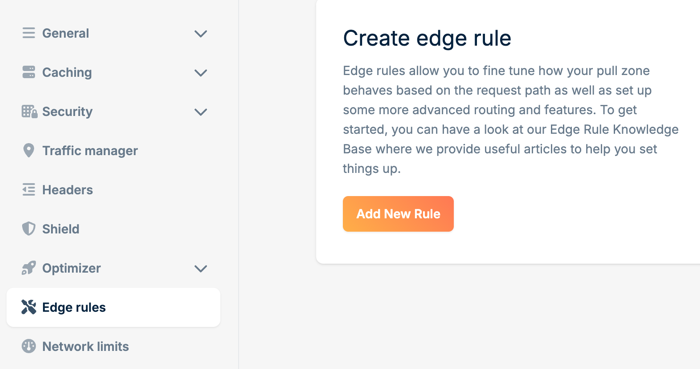
Custom Page Rules
If you need to set cache for some paths and no cache for some suffixes, add rules in Edge rules. Detailed description is not provided here, you can research it yourself.
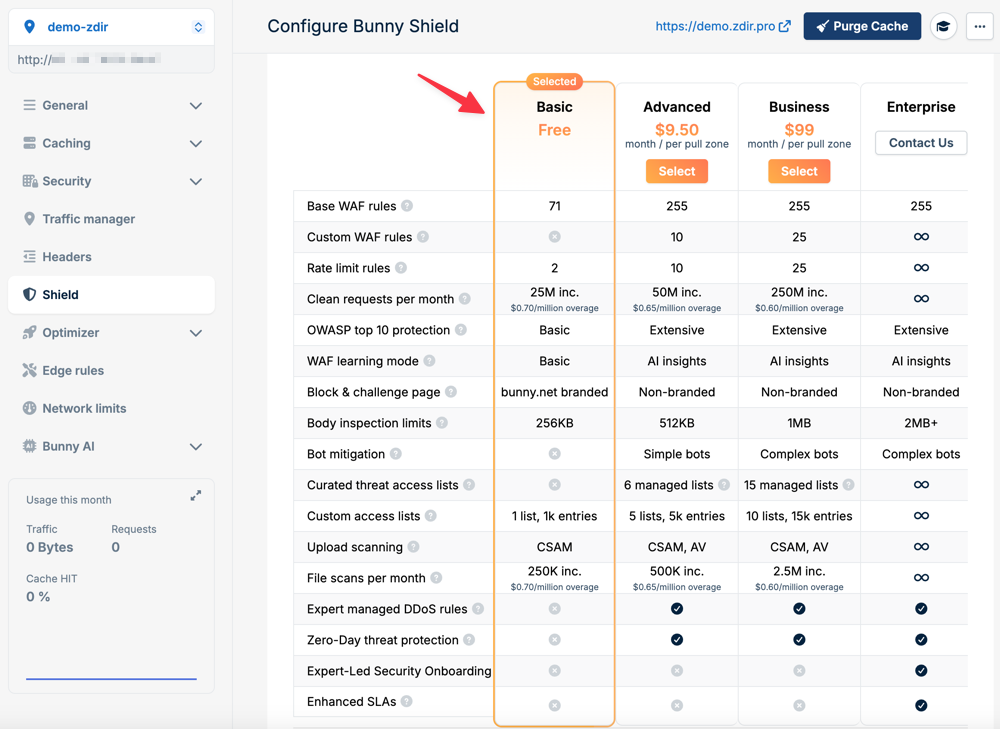
Enable WAF Protection
In [Shield], you can enable WAF protection. WAF protection provides a certain free quota; extra charges apply after exceeding it. You can choose whether to enable it based on your own situation.
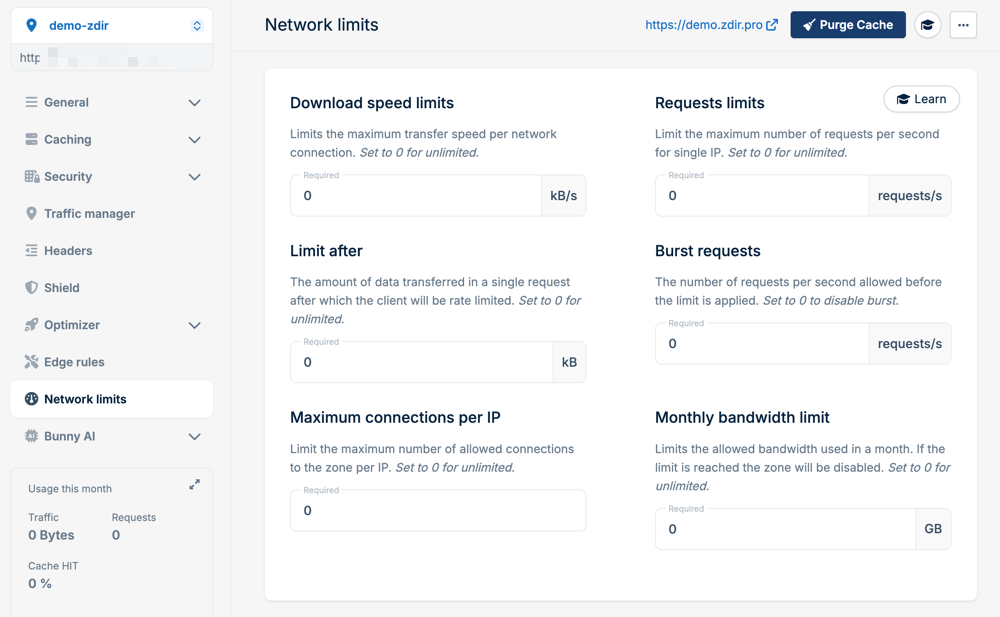
Network Limits
In [Network limits], you can limit connections, speed, and traffic. In a production environment, set reasonably according to your website's own traffic volume.
Conclusion
There is no absolute good or bad in CDN, only suitability. If you dislike CloudFlare's mandatory DNS binding, or need custom origin information, Bunny CDN is definitely a freer and more transparent choice. Although it is not free, the pay-as-you-go starting at $1 per month brings complete control and clear billing. Overseas projects seek peace of mind and control, don't you think?
Bunny CDN Exclusive Registration Link: https://bunny.net?ref=9e3c8xtlk9 (If it doesn't open, please use proxy tools)