New User Exclusive: Step-by-Step Guide to Claiming $200 AWS Service Credit
Amazon Web Services is recognized as a comprehensive, reliable, and scalable cloud service platform in the industry. Now, new users can receive up to $200 in service credits to freely experience its core services. Friends who haven't registered for Amazon Web Services must not miss this opportunity.

This $200 consists of two parts:
- $100 on Registration: Receive $100 in credits immediately upon completing registration.
- $100 on Tasks: Receive an additional $100 in credits by completing simple exploration tasks.
These credits can directly offset fees for popular products such as EC2 Cloud Servers, S3 Object Storage, and RDS Databases. Below, xiaoz will guide you step-by-step on how to claim them.
The following will be covered:
- Register for an Amazon Web Services account
- Verify and activate the account to receive the $100 credit
- Complete 5 reward tasks to receive the $100 credit
Register for an Amazon Web Services Account
Before registering, you need to prepare:
- A commonly used email address
- A commonly used mobile phone number
- A debit card or VISA/MasterCard credit card
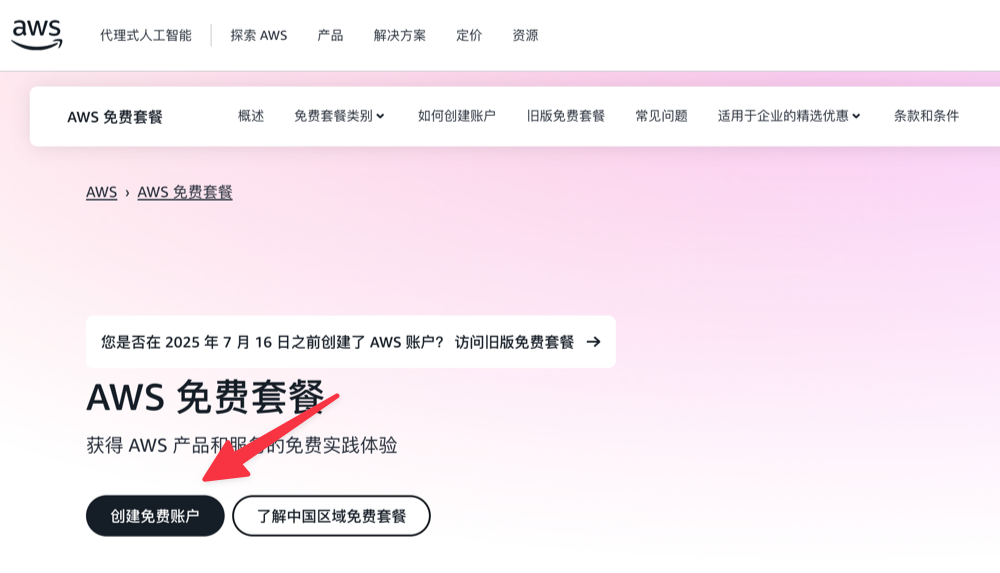
First, open the Amazon Web Services registration page and click Create Free Account.
Click the top right corner to switch Language to Chinese to facilitate the subsequent registration process.

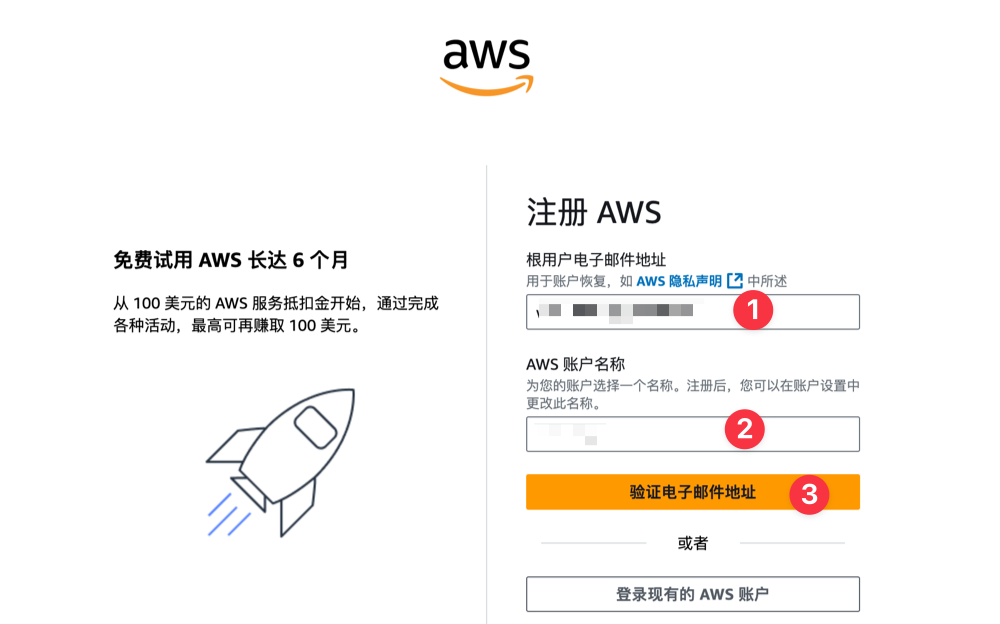
Then enter your commonly used email and set a username, then click the Verify Email Address button.
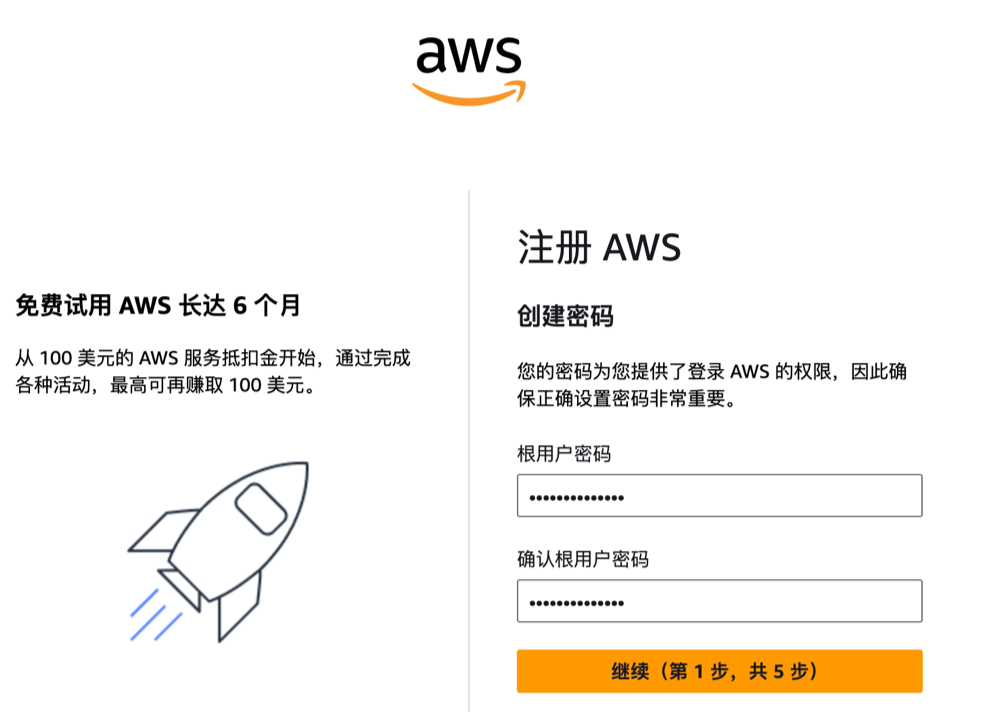
After entering the email verification code to complete verification, set an account password.
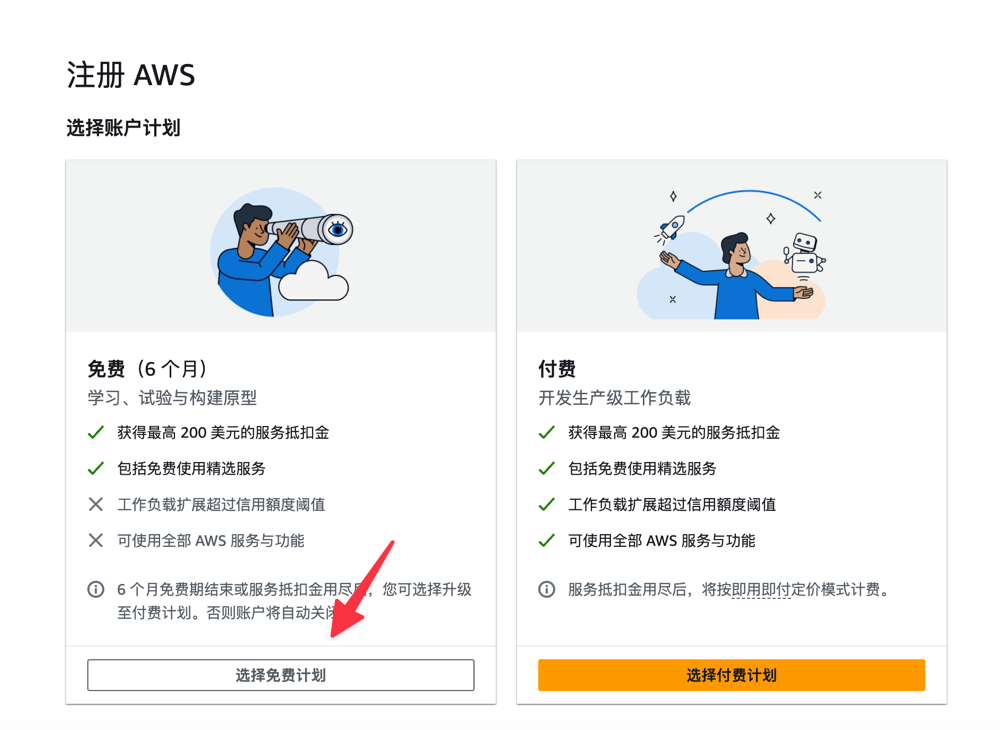
Then select the Account Plan. It is recommended to choose the Free Plan first, and consider upgrading to a paid plan later based on usage.
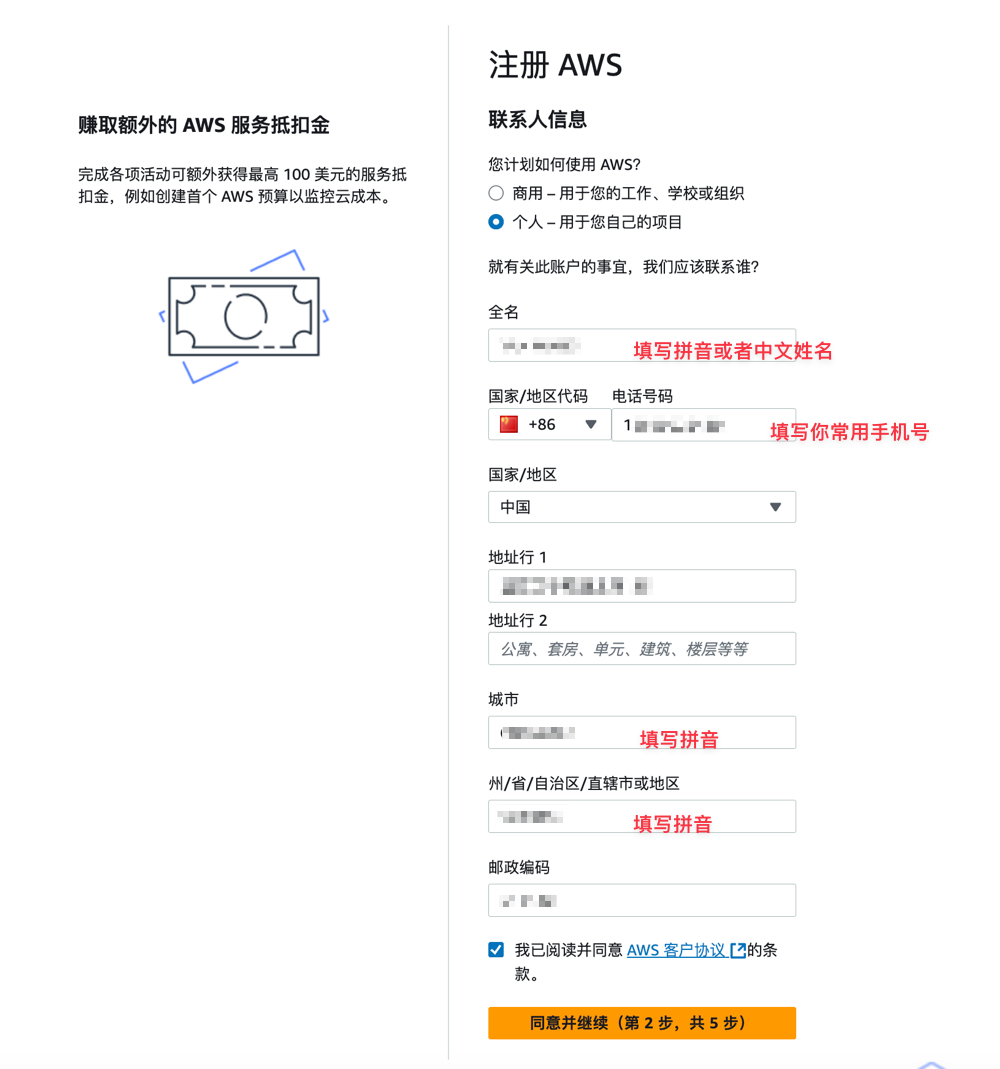
Next, fill in the contact information. This step is important; please fill in the information truthfully, do not fill it randomly, otherwise it may trigger risk control.
Bind UnionPay Card / Credit Card
Next, you need to bind a domestic UnionPay card or VISA/MasterCard credit card for verification. If you have a VISA/MasterCard, it is recommended to prioritize selecting Other Credit or Debit Card (this verification process is simpler). If you do not have a VISA/MasterCard credit card, then select China UnionPay Credit Card, as this verification step is slightly more cumbersome.
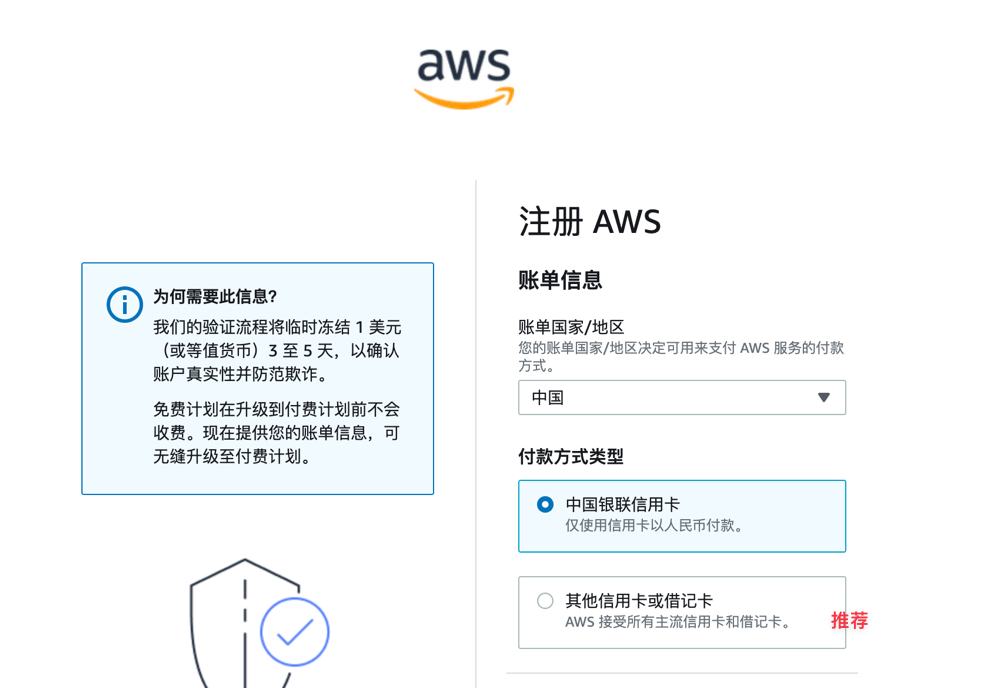
After the credit card binding is successful, a small fee will be deducted for verification and will be automatically refunded later.
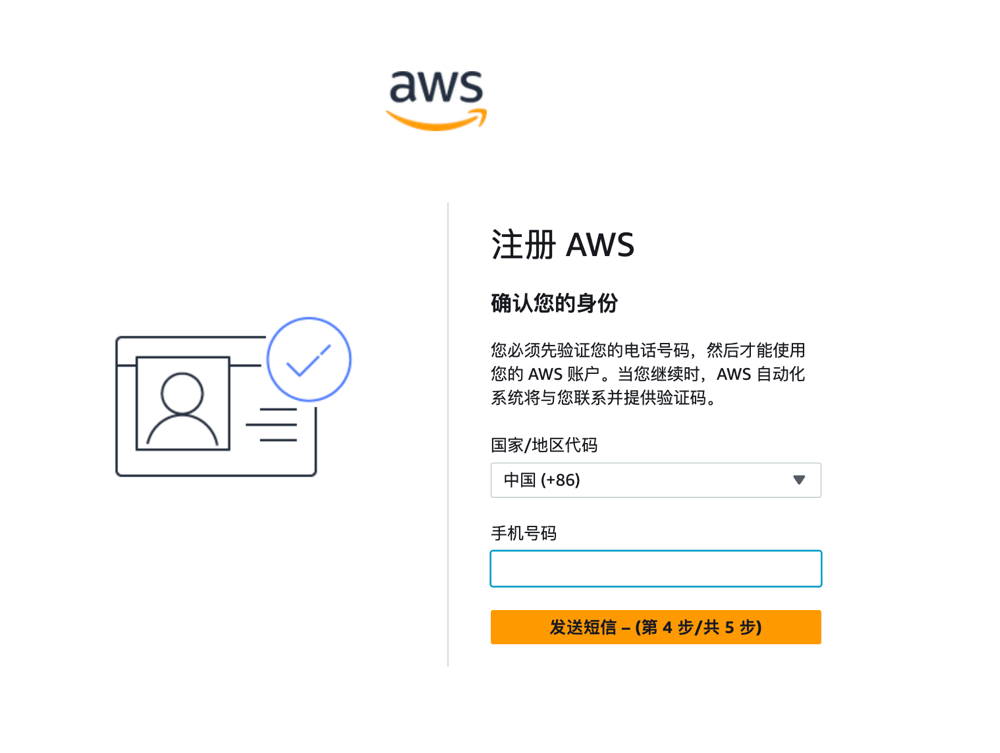
Next, you will be required to bind a mobile phone number for verification. For country, it is recommended to select China (+86).
If everything goes smoothly, it will prompt that the account activation was successful, and you will receive a success email.

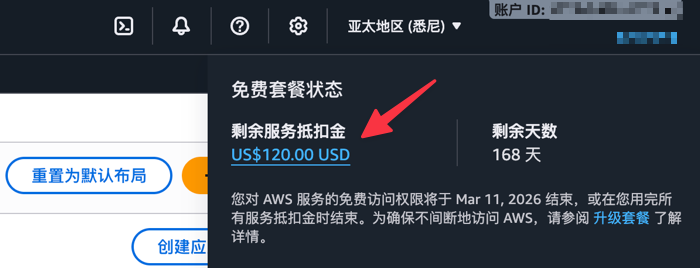
Log in to the Amazon Web Services backend. Click on the ID in the top right corner to see the gifted $100 credit and the expiration time (valid for six months).

Complete Reward Tasks
In addition to the $100 credit coupon gifted upon registration, Amazon Web Services has also assigned 5 simple tasks to help us familiarize ourselves with the products. The tasks are:
- Task 1: Learn how to start and terminate an Amazon EC2 instance.
- Task 2: Learn the basic configuration options for launching an Amazon RDS database.
- Task 3: Learn to build a simple web application that includes a Lambda function with a function URL.
- Task 4: Learn how to submit prompts in the Amazon Bedrock text interaction environment to generate responses.
- Task 5: Learn to set budgets and receive alerts when actual costs exceed the budget amount.
Completing each task earns a $20 credit coupon. These tasks are relatively simple, almost equivalent to free money.

Next, xiaoz will demonstrate Task 1: Learn how to start and terminate an Amazon EC2 instance.
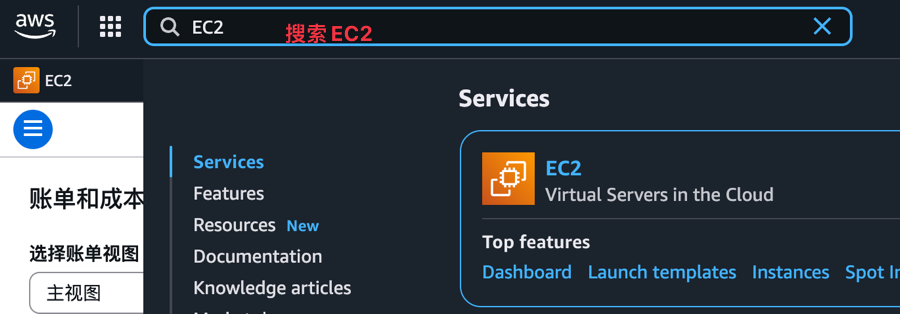
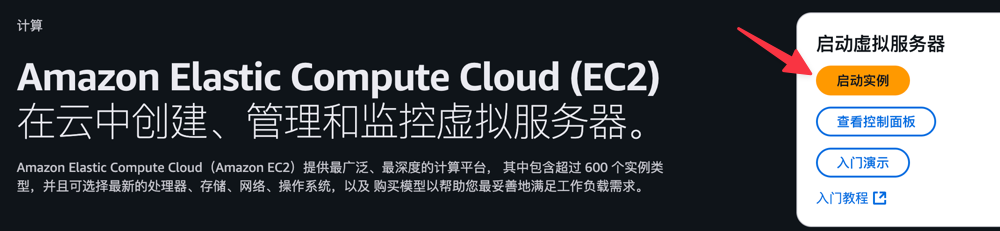
In the Amazon Web Services backend search box, search for EC2 to enter.
Then click Launch Instance.
In the Quick Start section, select an operating system you are familiar with. The author chose Debian, keep others as default.
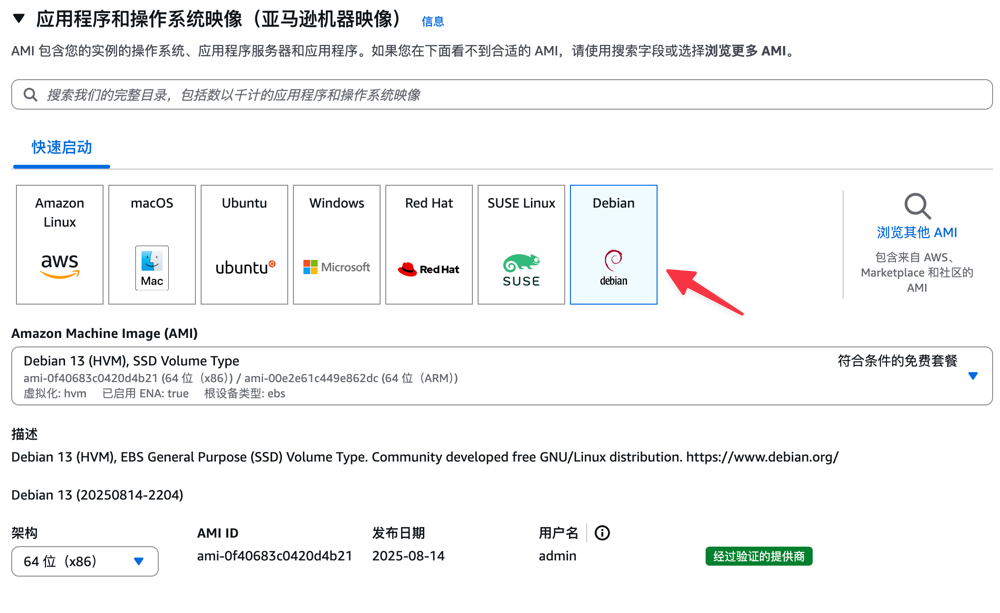
Note that for the first creation, we need to create a new key pair for subsequent server login. The key pair name can be filled in randomly, select type RSA and create.

Keep other information as default, then launch.

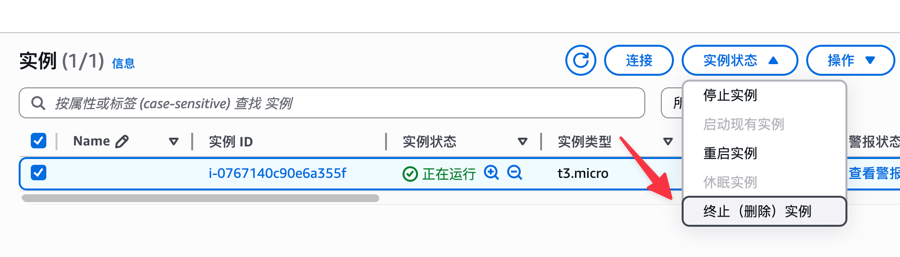
In the instance, find the server we just launched, then select Terminate Instance. This completes the first task "Learn how to start and terminate an Amazon EC2 instance".
After completing the task, generally wait a few hours, and the system will automatically send the credit coupon.
On the console homepage, you can see the current task progress and completion status.
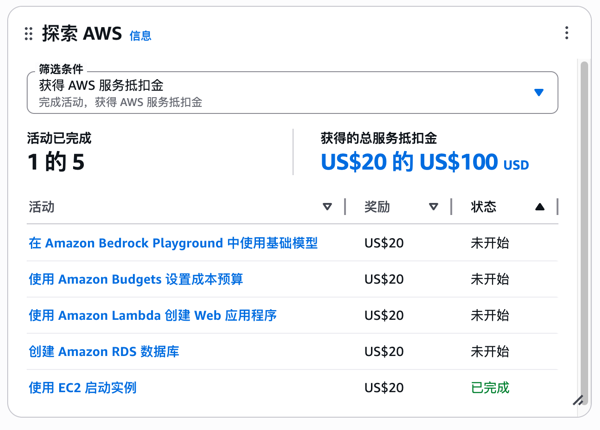
Completing 1 task earns a $20 credit coupon. There are 5 tasks in total. After completing all of them, you can receive a $100 credit coupon. Adding the 100$ credit coupon gifted to new users upon registration, the total is 200$.
Conclusion
The above is the complete process for claiming the Amazon Web Services $200 gift credit. Both registration and tasks are very simple. This generous credit coupon allows you to explore the powerful features of core services like EC2 and S3 at zero cost and without pressure. Finally, wish you fun!
Amazon Web Services Free Registration Link: https://dwz.ovh/grgu
Warm Tip: If you decide to stop using the service, remember to close and delete the service in the console to avoid generating fees!