How to Create a MySQL Database in Amazon Web Services
Amazon RDS is an easy-to-use cloud database service that automatically handles database provisioning, backups, patching, and other operational tasks. It supports multiple database engines and deployment methods, allowing you to create a database within minutes. It also provides high-performance options (such as Multi-AZ, read optimization) and cost control solutions, helping users manage databases easily.

This article will introduce how to create a MySQL database in Amazon Web Services. The content is divided into the following steps:
- Register an Amazon Web Services Account
- Create a MySQL Database
- Powerful Database Management Features
Register an Amazon Web Services Account
Before using Amazon RDS, we need to register an Amazon Web Services account first. After registration, you can experience many free cloud products provided by Amazon Web Services. However, before starting, you need to prepare:
- A common email address
- A common phone number
- UnionPay/VISA/MasterCard credit card
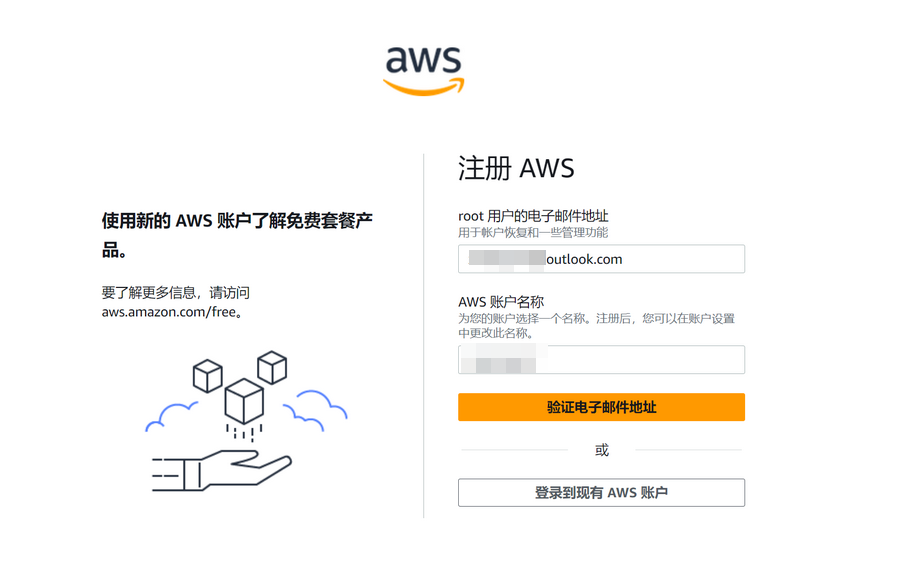
Click the link: Amazon Web Services to go to registration. When registering, note to select "Amazon Web Services International Region". The international region does not require enterprise verification.

Fill in your email and account name.
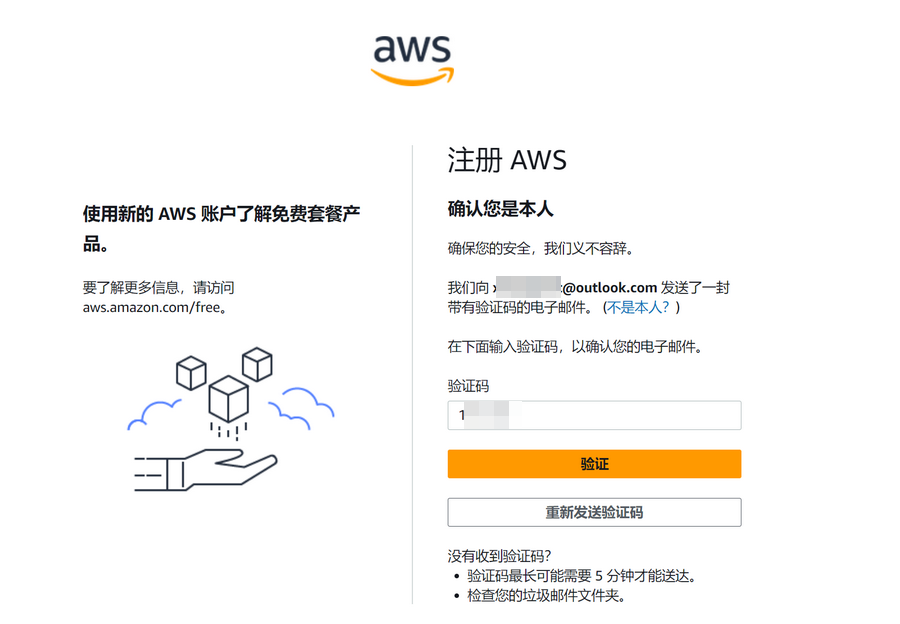
Enter the verification code sent by Amazon Web Services to your email for verification.
Continue to set the account password.

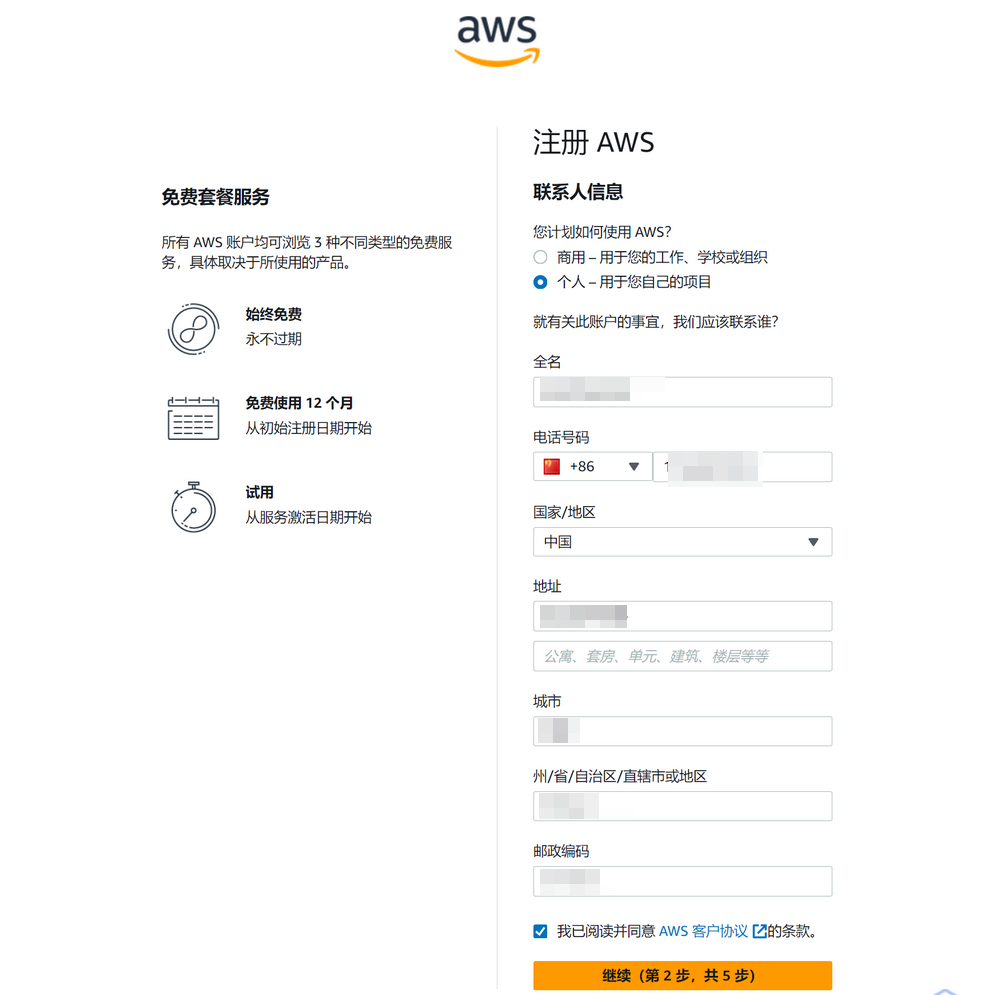
Next, fill in contact information. Note:
- Select Individual or Business User based on your actual situation. The blogger selected Individual.
- Full name/phone/address information must be filled in truthfully. Do not make it up, otherwise it may trigger risk control.
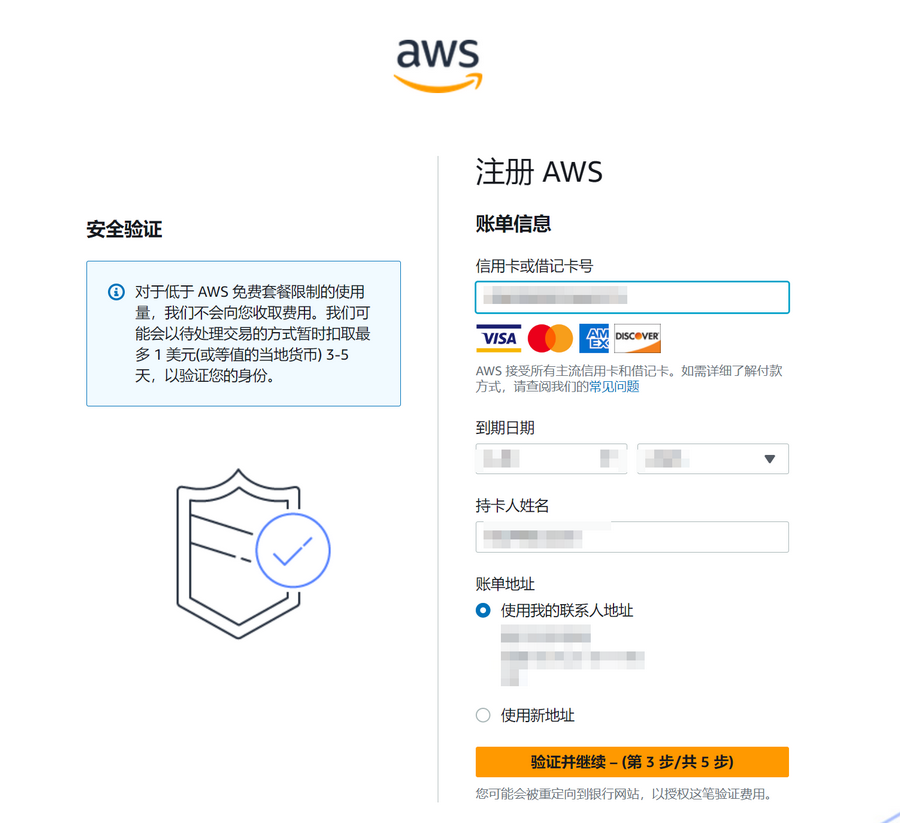
Next, you need to verify using a credit card. UnionPay/VISA/MasterCard/AE credit cards are supported. Fill in the credit card/name/address information based on your actual situation. A maximum of $1 will be temporarily deducted during verification and refunded after verification passes.
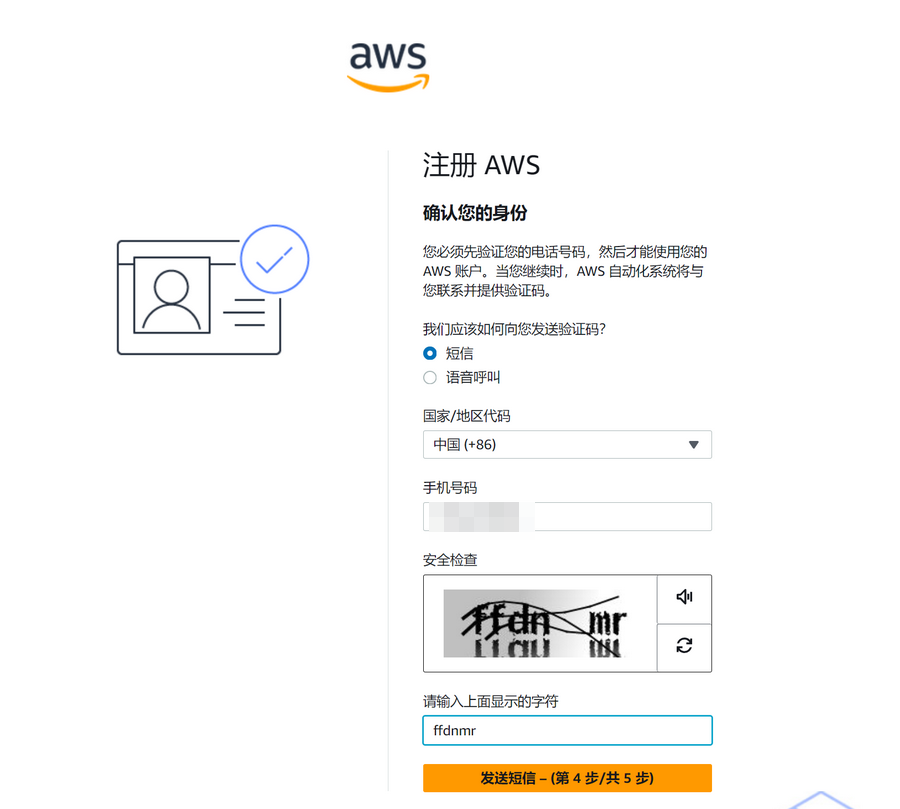
Continue to verify the mobile phone number.
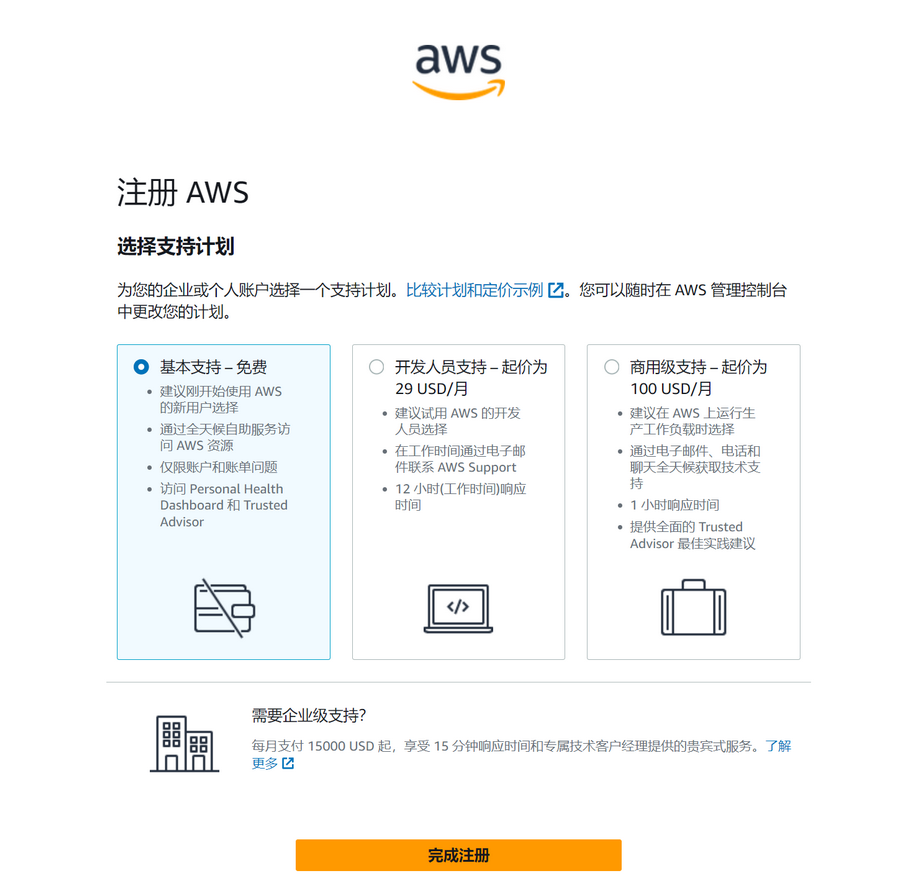
The last step is to select "Support Plan". The blogger selected "Basic Support - Free".
After registration, wait for the account verification to pass and start experiencing the free tier provided by Amazon Web Services.
Create a MySQL Database
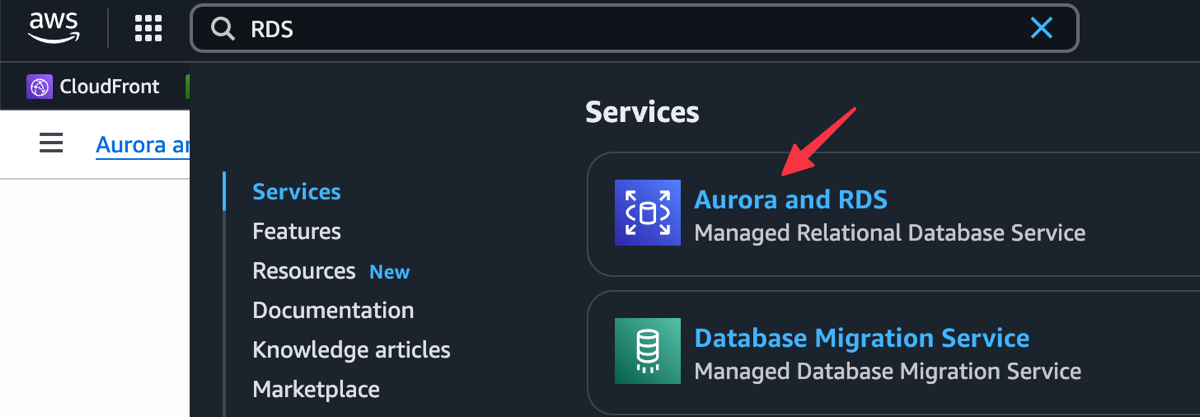
Enter RDS in the console search box to find Aurora and RDS and enter.
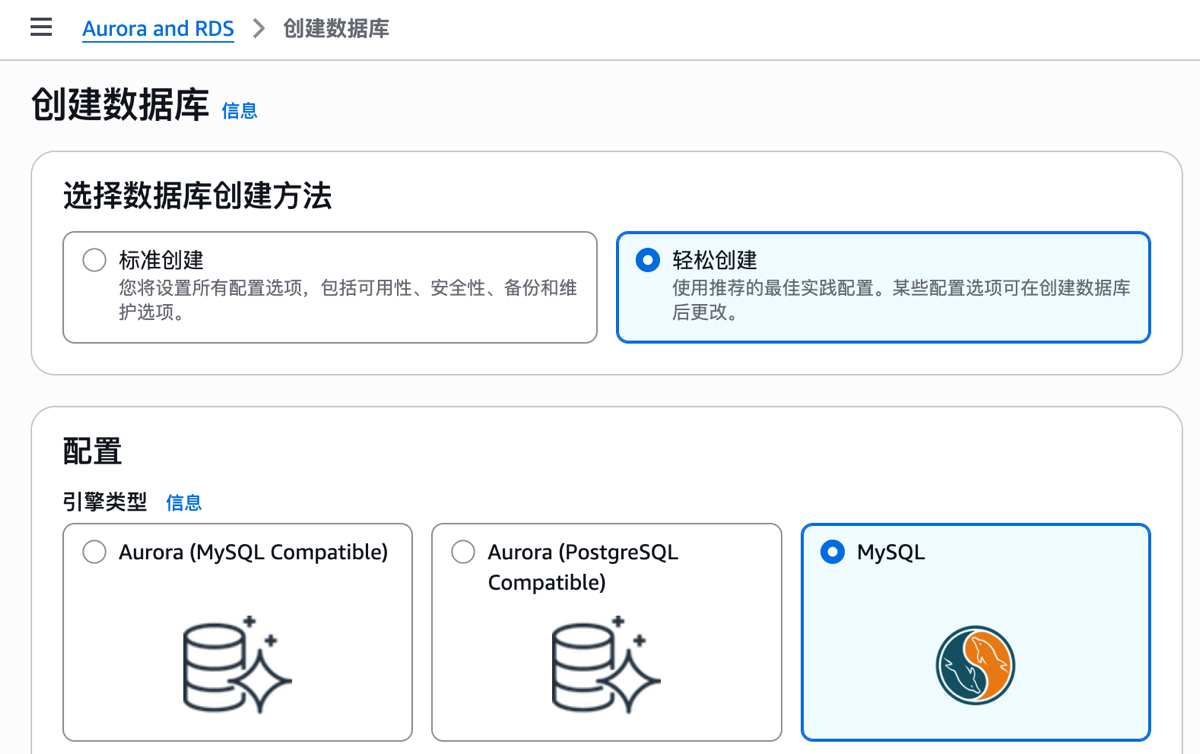
Then select according to the requirements below:
- Database Creation Method: Easy Create
- Engine Type: MySQL
Continue filling in according to the prompts:
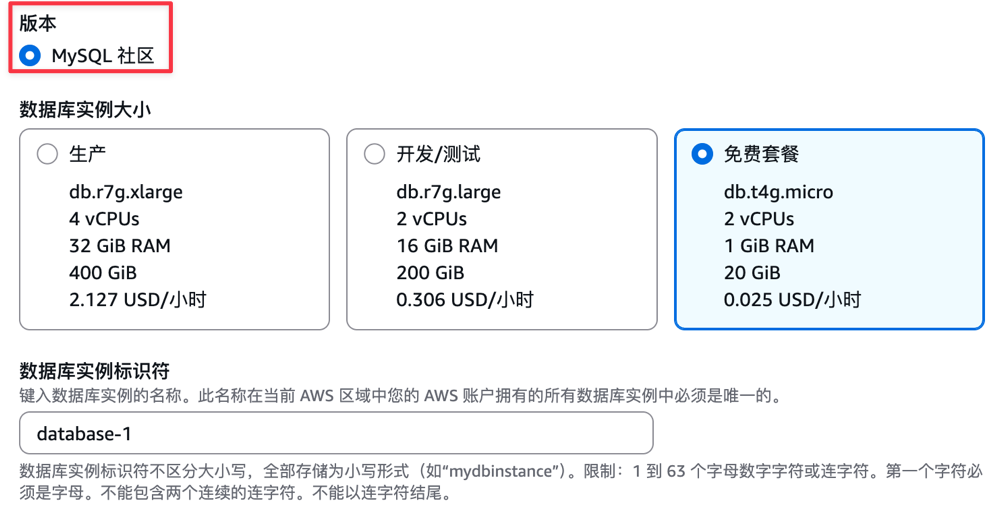
- Version: MySQL Community
- Database Instance Size: Select based on your own situation
- Database Instance Identifier: Keep default, or fill in yourself
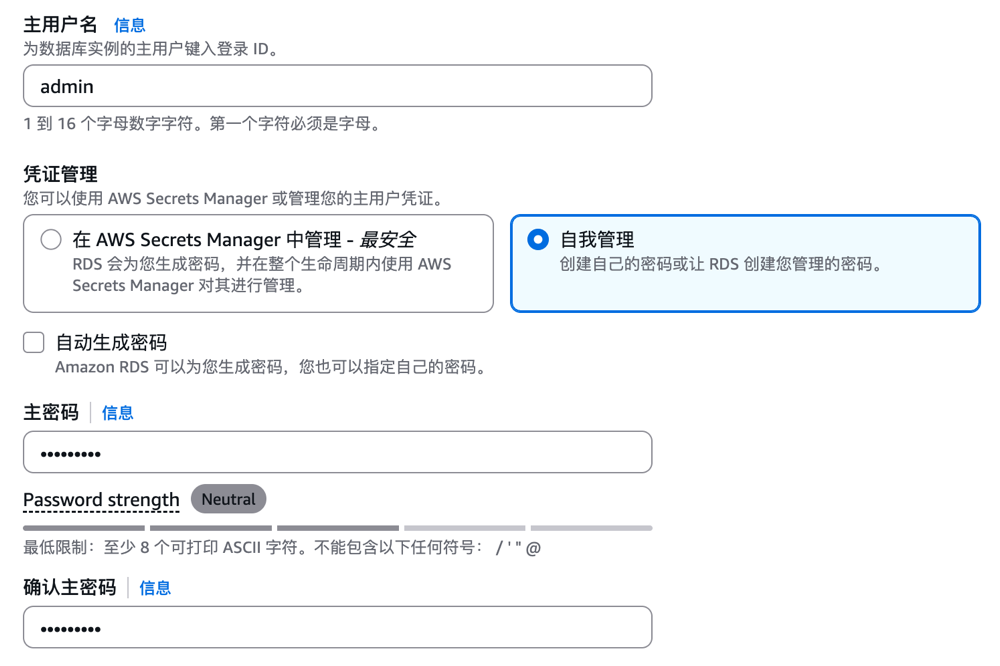
Next is setting the username and password.
- Master Username: Keep default or set yourself
- Credential Management: Self-managed
- Master Password: Set yourself
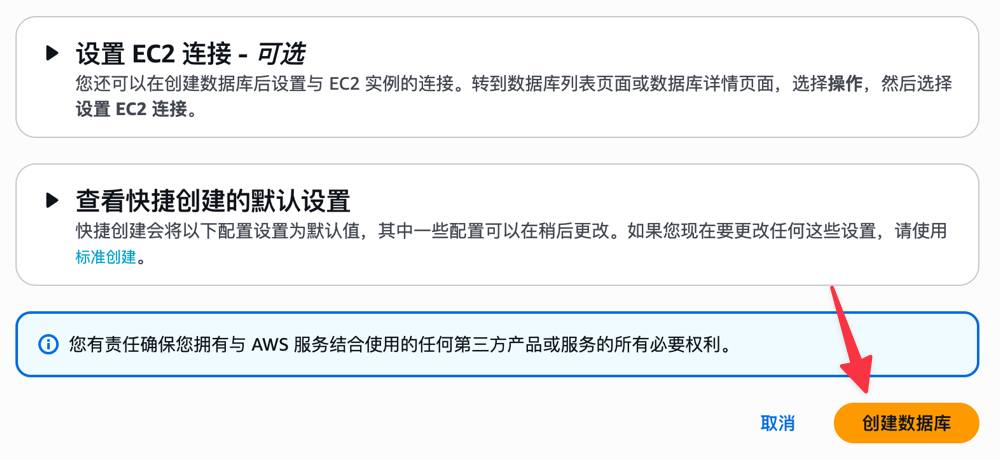
Finally, click the Create Database button to complete the creation.
Powerful Database Management Features
After the MySQL database is created, switch to Database - Click Database - Find Connection and Security, and you can see the database connection information, as shown in the figure below.

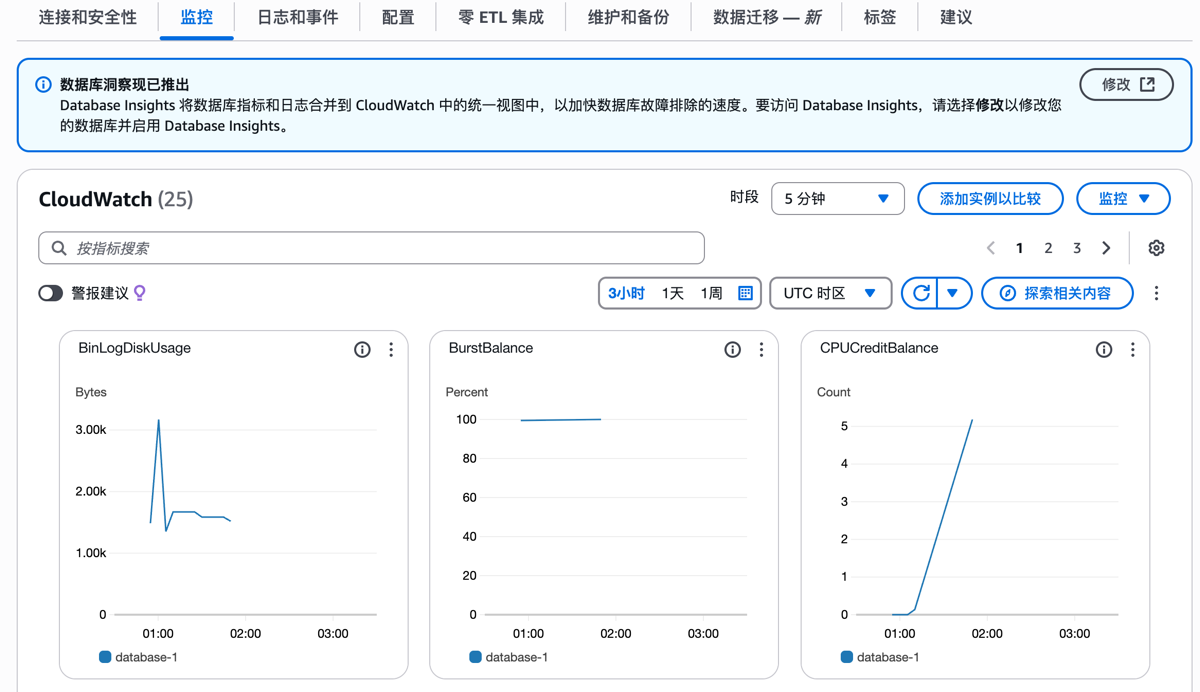
In the Monitoring option bar, you can intuitively see multiple indicators such as database CPU usage and connection count, making it convenient for us to monitor the database status at any time.
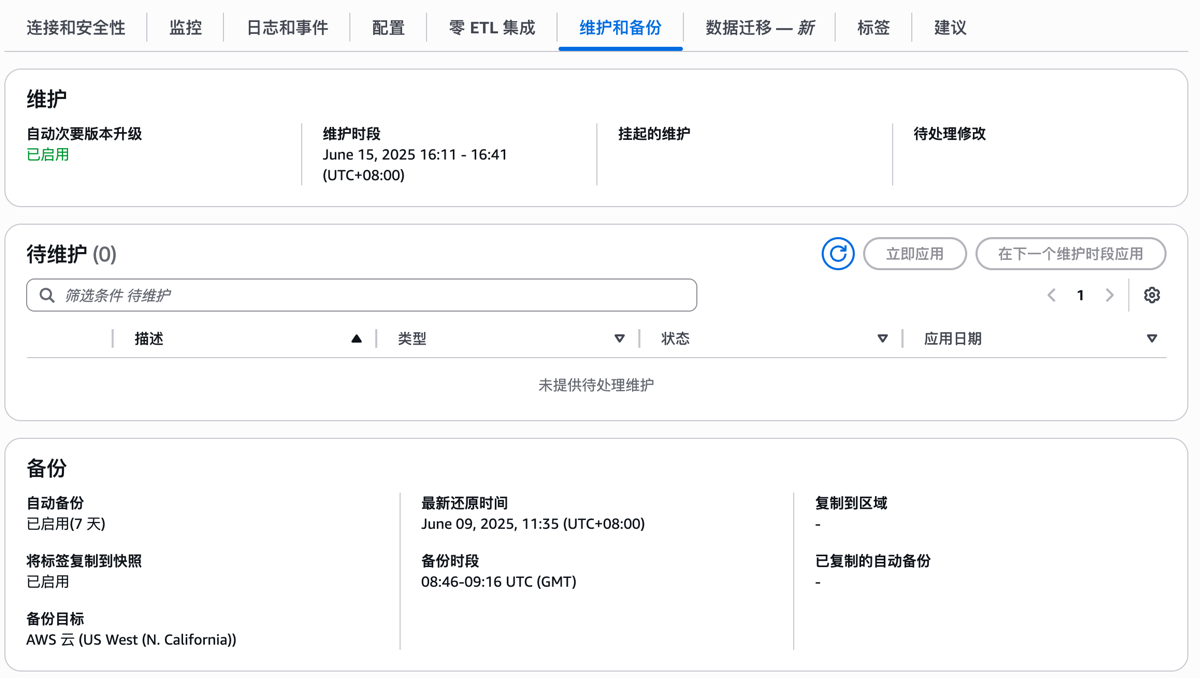
In the Maintenance and Backup option, the database enables automatic backup by default (you can also modify the backup cycle yourself), thereby ensuring data security.
In addition to automatic backup, you can take snapshots and restore snapshots at any time, greatly improving security and convenience. These features are not available in native MySQL.

Amazon RDS also provides reserved instances and proxy functions. Friends who are interested can try them after creating a database. From the functions above, it can be seen that Amazon RDS is more powerful than native self-built MySQL, and maintenance is also easier.
Conclusion
Through the introduction in this article, you have learned how to use Amazon RDS to quickly create a MySQL database in Amazon Web Services. RDS simplifies database management, improving efficiency while ensuring stability and security. Combined with its flexible configuration and powerful functions, it can effectively support your business development.
On June 19-20, 2025, the Amazon Web Services China Summit will be held in Shanghai, focusing on innovative technologies such as Generative AI and Big Data. Participate in hands-on experiments and expert lectures, sign up immediately, get cutting-edge cloud computing knowledge, and help your technology upgrade and business transformation!
Tip: If you decide to stop using a service, remember to close and delete the service in the console to avoid charges!